

AGENTX FEATURES
How to create a customized AI Agent Chatbot on Wordpress in a few simple steps

Ready to create an AI agent on AgentX and publish to a Wordpress website? This blog provide you a step by step guide from the beginning to the end.
Goals:
Creating an AI agent by training an AI model with your knowledge.
Publishing the AI agent to a Wordpress website, serving its audience
If you already have an account and have an agent ready, scroll down and start from Step 6.
Step 1: 📢 Log In
Sign up with AgentX and log in to your account. AgentX has a free plan which does not ask for your credit card 💳!
Step 2: 📢 Open the “Build” Page
After log in, you will see the "Agent Space" page. Feel free to browse the page later. For our purpose, hover to the top left and click the second icon from top to bring up the “Build” page.
Step 3: 📢 Click the Purple + Button and Enter General Info of Your AI Chat Agent
🔸 Configure the agent avatar, name, creator name, creativity level, agent bio, greeting message, and response instruction. Hover to any exclamation mark for hints or explanations.
🔸 Pick the AI model powering your AI chat agent. Popular models include ChatGPT 3.5 and 4, Google Gemini, Claude 3 Haiku, Sonnet, and Opus.

Step 4: 📢 Train Your AI Agent with Knowledge At Your Choice
To impart domain knowledge to your AI chat agent, AgentX provides 4 ways.
➡️ Onboarding Info
🔸 Your agent will always remember onboarding info when answering each question. For example, the onboarding info may include the key information of your company.
🔸 You may also specify some simple logic for your agent. For example, you can enter: [First Title] step 1 [First Content] After greeting, ask user for zip code in the US and when receiving an answer proceed to step 2; [Second Title] step 2 [Second Content] provide the name of the city corresponding to the zip code.
🔸 After entering texts, remember to click “Add Info” to complete the addition.
➡️ Document Knowledge
🔸 Upload files like WORD, PDF, Image, or Txt to train your AI chat agent. After choosing each file, remember to click “Upload Document” to complete the upload.
➡️ Website Knowledge
🔸 Train your AI chat agent with knowledge from web pages. Remember to click “Add links”.
🔸 Single Webpage: Input a specific webpage’s content
🔸 Sitemap: Use a website's sitemap to capture URLs of the website
🔸 Find Sublinks: Enter a website address and set the depth to explore and learn from recurring links on the site. You may choose a “depth” up to value 3 For example, setting “depth” to a value of 2 means capturing the primary web page of the root link and secondary web pages linked to the primary page.
🔸 Website knowledge refresh option is available to capture updates to the webpages.
➡️ FAQ Knowledge
🔸 You may enter frequently asked questions and answers and click “Add Questions” for each pair. This is a preferred option for great accuracy,
Step 5: 📢 Create Your AI Chat Agent
Skip the Action tab for now and click “Create agent” and your AI chat agent will be born in a few moments.
After a successful build, you will see an interface like below, showing a test chat window on the right. Try chatting with your agent. You can share your agent or chat conversations by clicking the top right icons.

Congratulations 🎉🥳, you have built your AI Agent Chatbot! Now it comes to the easy part.
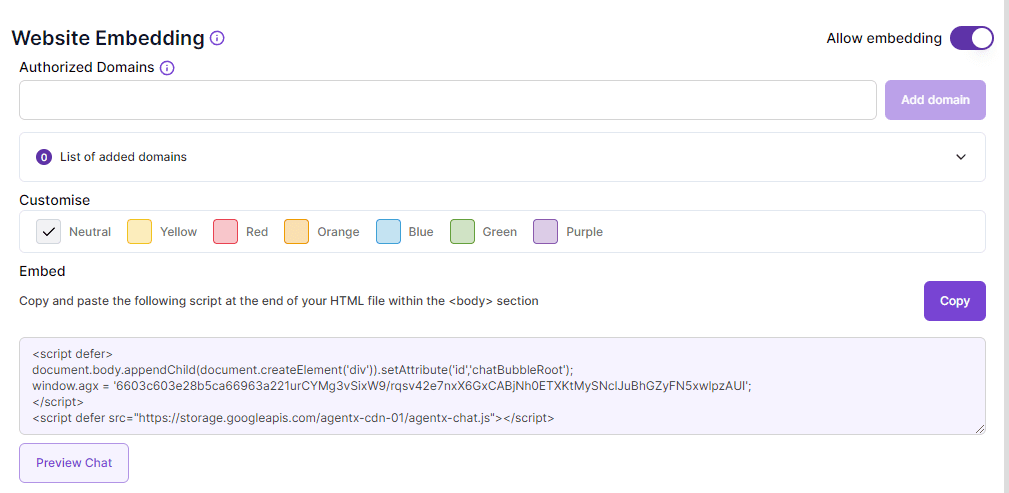
Step 6: Deploy- Copy JavaScript Code Provided by AgentX
Under the “Deploy” page, toggle “Enable” for “Website Embedding”. Find short piece of code, as shown below, under the “Embed” and click “Copy”.
Now you are done with AgentX, and please navigate to your Wordpress account to complete the rest.
Step 7: Remove Pre-installed Chatbots (if any)
Make sure there is no pre-installed chatbot on your website. Obviously, you don’t want to have chatbots stacking on each other.
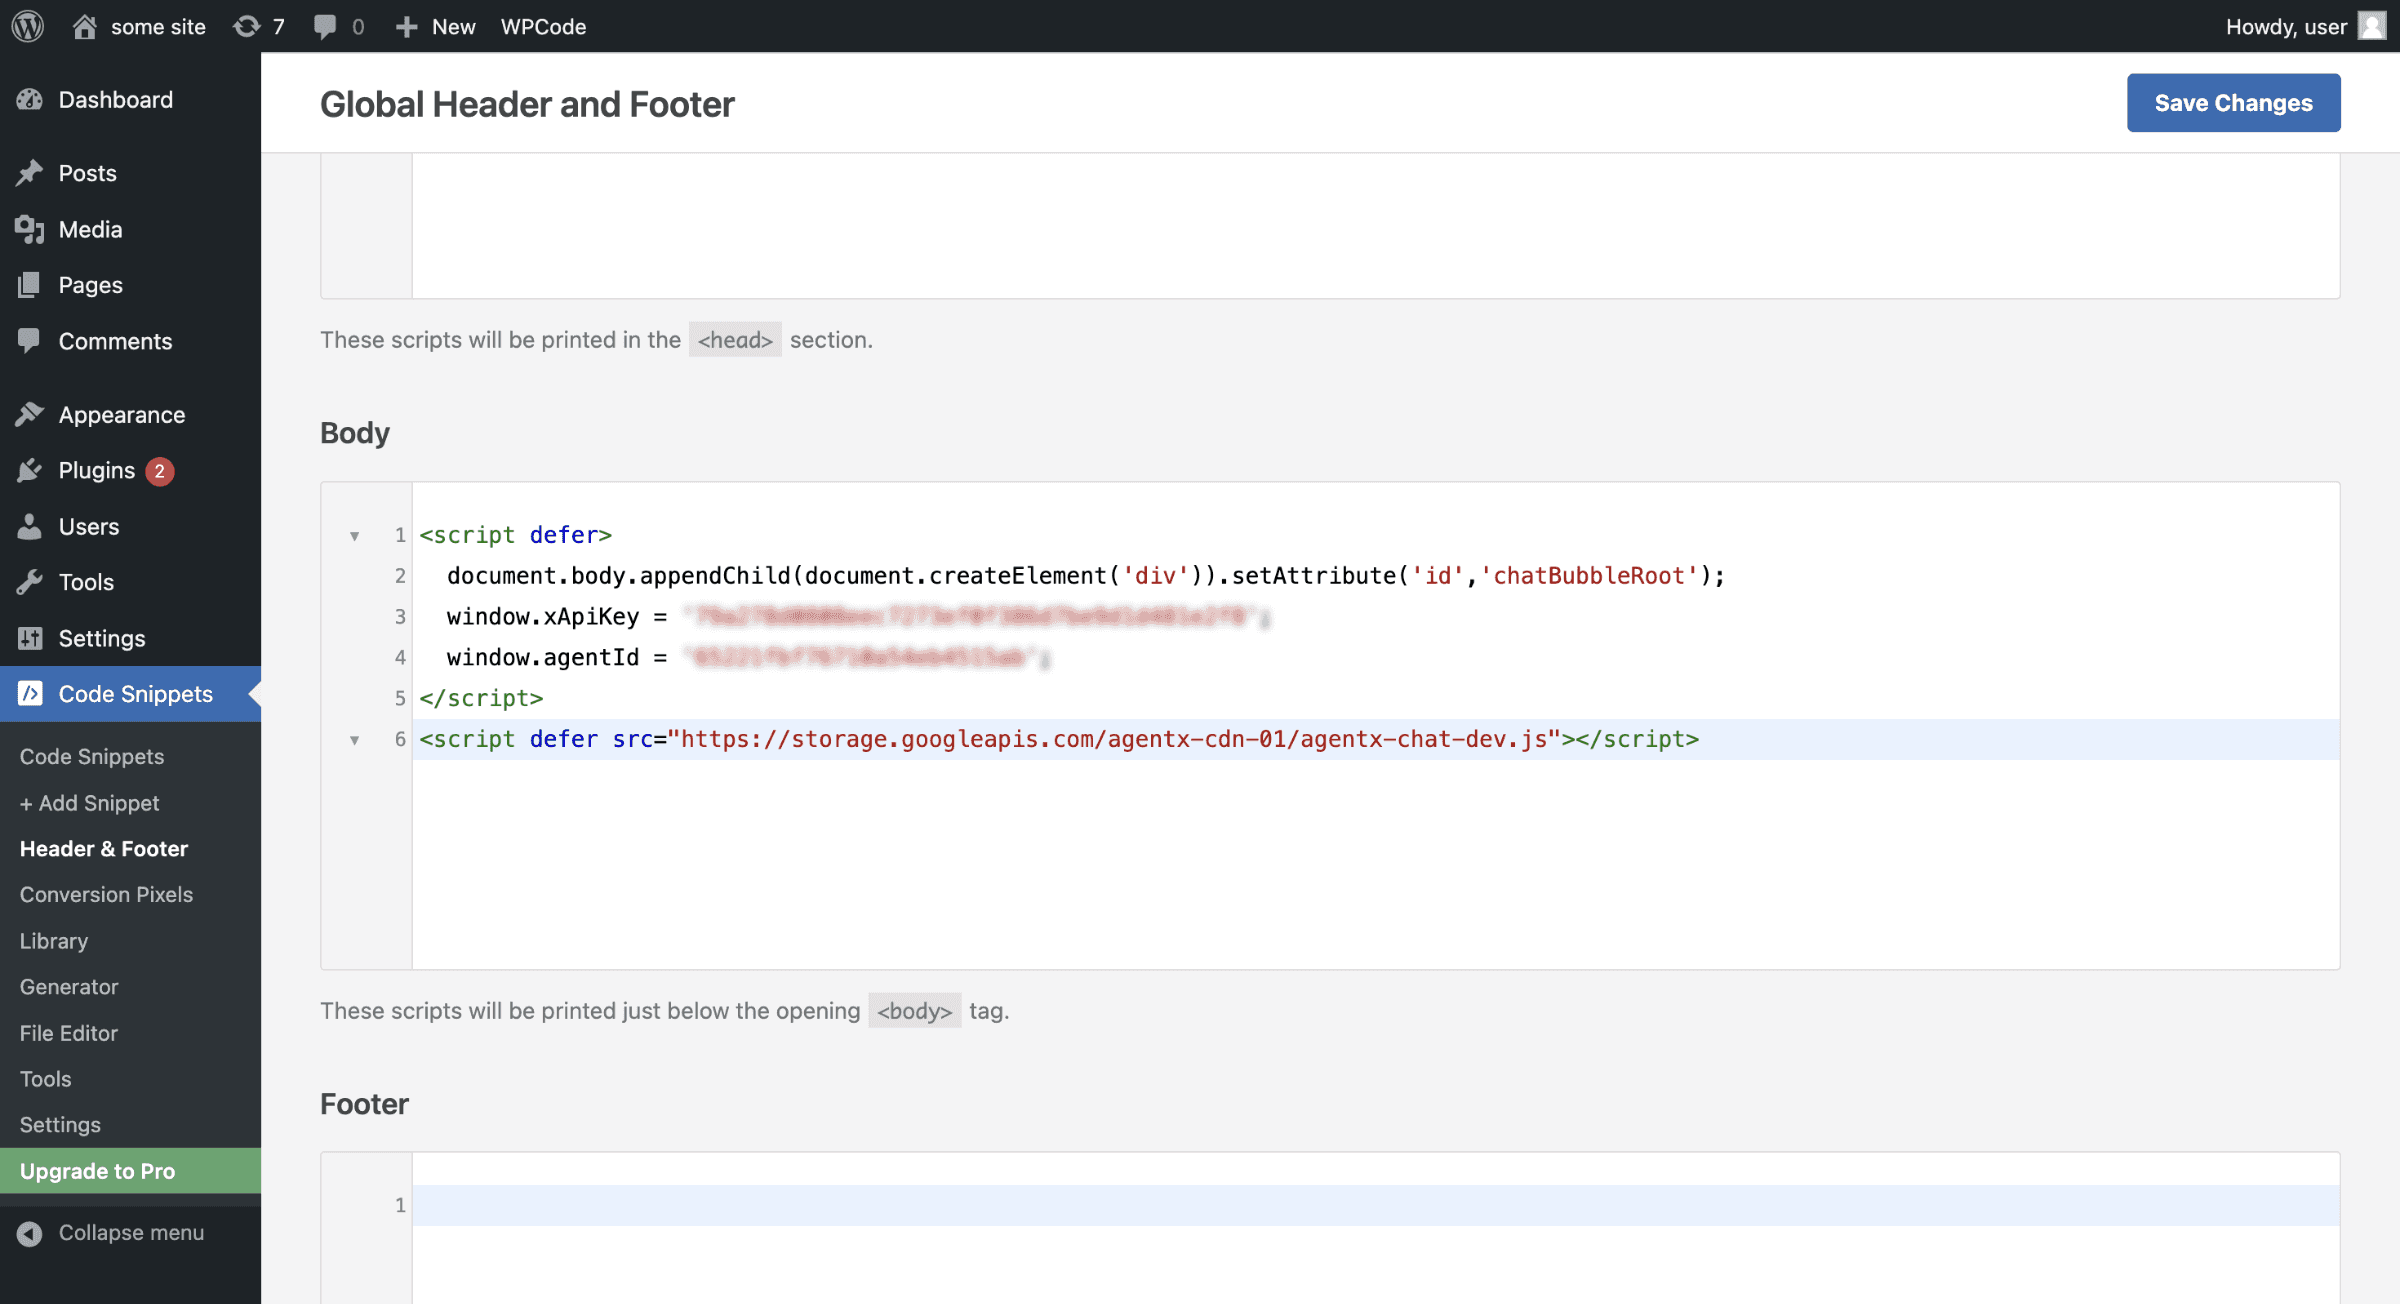
Step 8: Install Plugin
Install a plugin that allows you to inject code Snippets, such as WPCode
Step 9: Paste the Copied JavaScript code
Under “Code Snippets” or a similar module of the plugin, paste the copied JavaScript code to <Body> as shown below.
Now, Visit Your Website to Watch Your AI Agent Chatbot in Action
Creating an AI chat agent on AgentX is a straightforward process, beginning with logging into AgentX, navigating to the "Build" page, inputting agent details, and training the agent. Integrating this agent into a Wordpress webpage is just as simple: select the desired page, access its settings, and paste the JavaScript code into the specified area. This integration can significantly enhance user engagement and customer service on your website, providing benefits like 24/7 support, personalization, and valuable insights.
To experience these advantages and improve your website's interactivity, consider starting with AgentX. Ready to transform your website with AI? Create your account on AgentX and begin your journey toward a more dynamic online presence.
Running into any issues? Contact us to onboard your business!
Share Blog
Related blogs
