
How to create and deploy an AI Agent to your Webflow
Create an AI agent powered chatbot on AgentX and publish to your Webflow site. Only a few steps and no code needed.
This tutorial provides you a step-by-step guide on creating an AI agent powered chatbot and deploy to your Webflow site. After that, your Webflow site will be have a human-like AI agent represent you to interact with your website guests and collect info as needed.
How to Deploy AI Agent to Webflow
Goals:
Creating an AI agent trained with your knowledge.
Publishing the AI agent to a Webflow website as a chatbot.
Prerequisite:
Step-by-step Guide:
Step 1: Log In
Sign up with AgentX and log in to your account. AgentX has a free plan which does not ask for your credit card 💳!
Step 2: Create a new agent
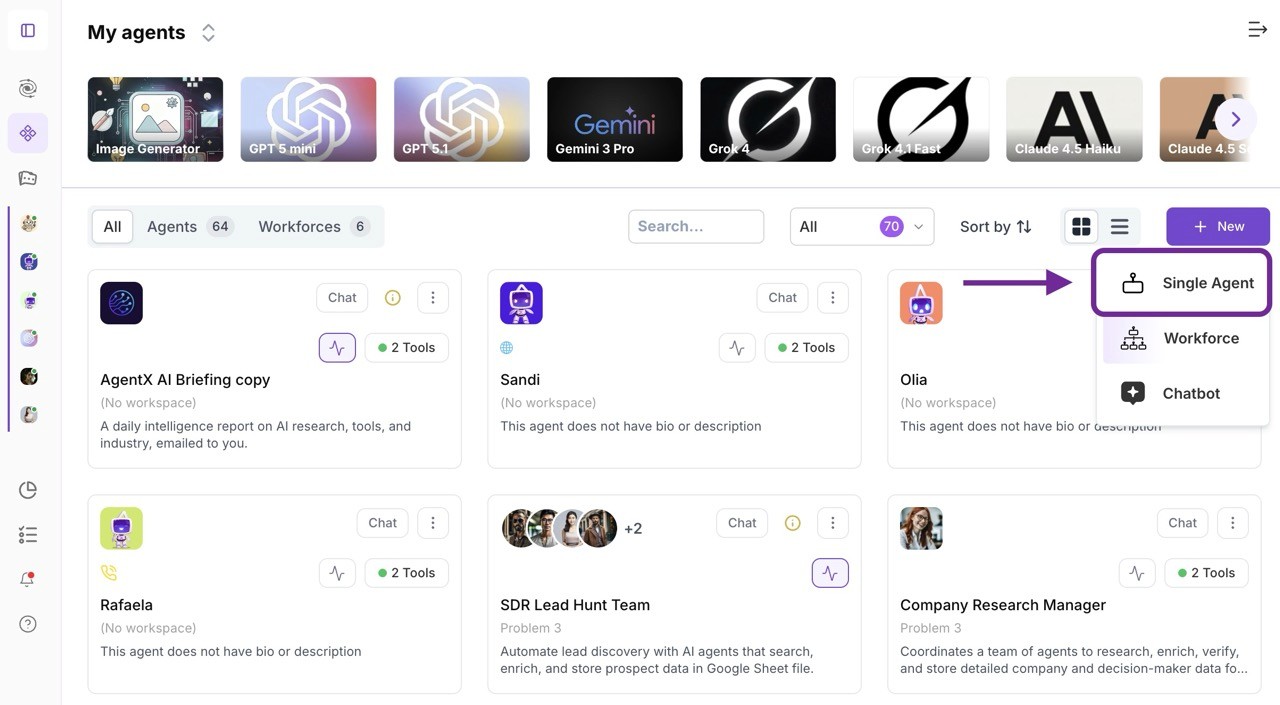
After log in, navigate to "Workspaces" tab and then click "+ New" and select "Single Agent".
Step 3: AI agent basic setup
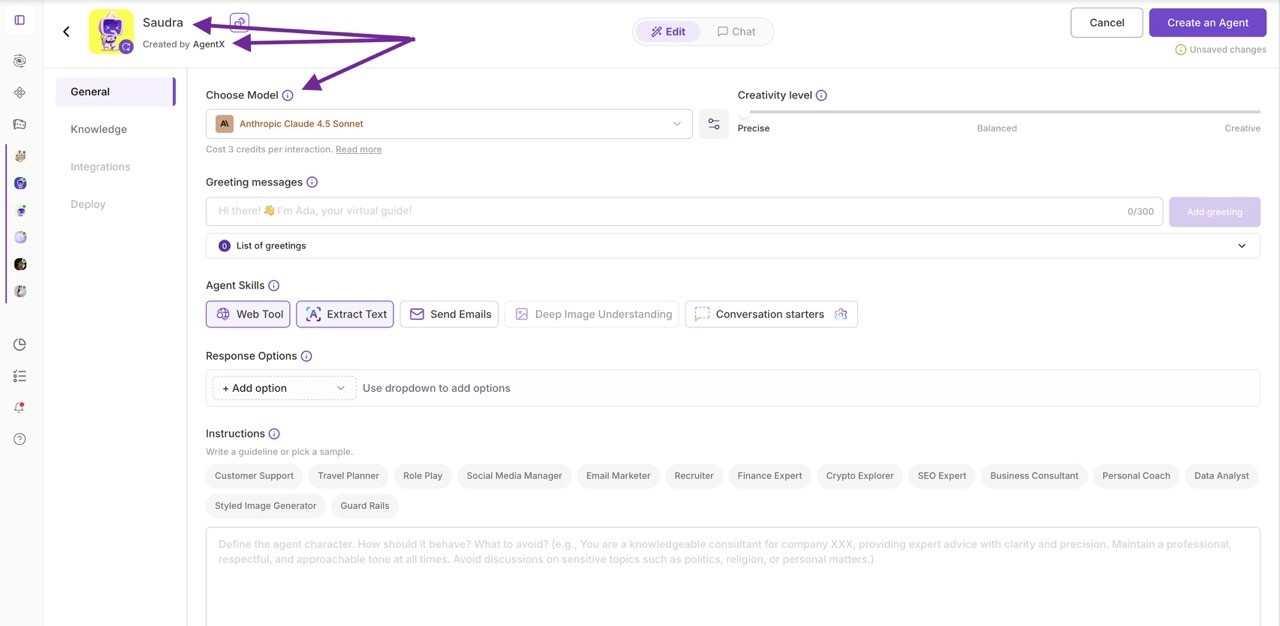
Give your AI agent a name, like "My Agent" (I am sure you can do better than this).
You can also change the creator's name if you like.
Then choose a LLM(Large Language Model) engine. Ranging from GPT, Claude, Gemini, Llama, Deepseek, Nova, etc. Each model consumes different credits amount while using.
Step 4: Train Your AI Chat Agent with Knowledge
To impart domain knowledge to your AI chat agent, AgentX provides 4 ways.
1. Onboarding Info
Your agent will always remember onboarding info when answering each question. For example, the key information of your company. (e.g. When was the company founded? Answer: In 2024 .
2. Document Knowledge
Upload files like WORD, PDF, Image, or Txt to train your AI agent. After choosing each file, remember to click “Upload Document” to complete the upload.
Your agent will learn from the document content as the part of its knowledge.
You can also upload Excel with curated data. If choose to use Excel as knowledge source, we recommend use the follow format, for example:
Product name | Color | size | link |
|---|---|---|---|
Shoes A | white | 8 | https://www.some-link.com/shoes-a |
Shoes B | black | 10 | https://www.some-link.com/shoes-b |
T-shirt | green | XL | https://www.some-link.com/t-shirt |
This way, the agent is able to fully learn and digest your knowledge.
You can also choose documents from your Google drive. It works exactly same as uploading them, but better, it is able to automatically update the knowledge, whenever there will be updates on the documents.
3. Website Knowledge
If you don't have documents handy, don't worry, you can use your website content as knowledge source as well.
Single Webpage: add a single webpage to the list
Sitemap: Use a website's sitemap to capture URLs of the website
Find Sublinks: Enter a website address and set the depth to explore and learn from recurring links on the site. You may choose a “depth” up to value 3 For example, setting “depth” to a value of 2 means capturing the primary web page of the root link and secondary web pages linked to the primary page.
*Website knowledge refresh option is available to automatically capture updates to the webpages.
4. FAQ Knowledge
You may enter frequently asked questions and answers and click “Add Questions” for each pair. This is a preferred option for great accuracy.
Whenever you find the agent is not responding to the question in the way you desired, you can always add the FAQ and next time it will "behave" well.
You may also mark any FAQ items as Conversation Starter, so they will show up as buttons in the Chatbot for user to quickly click and break the ice.
Step 5: Create Your AI Chat Agent
The action and tool tabs allow you to define how your agent can utilize some features such as view web, search engine, generate documents, use MCP servers etc. We will be tackling those in the different tutorials.
You can now click "Create" to create your agent.
congratulations 🎉🥳, you have built your AI Agent Chatbot!
Now it comes to the easy part.
Step 6: Deploy with JavaScript Snippet
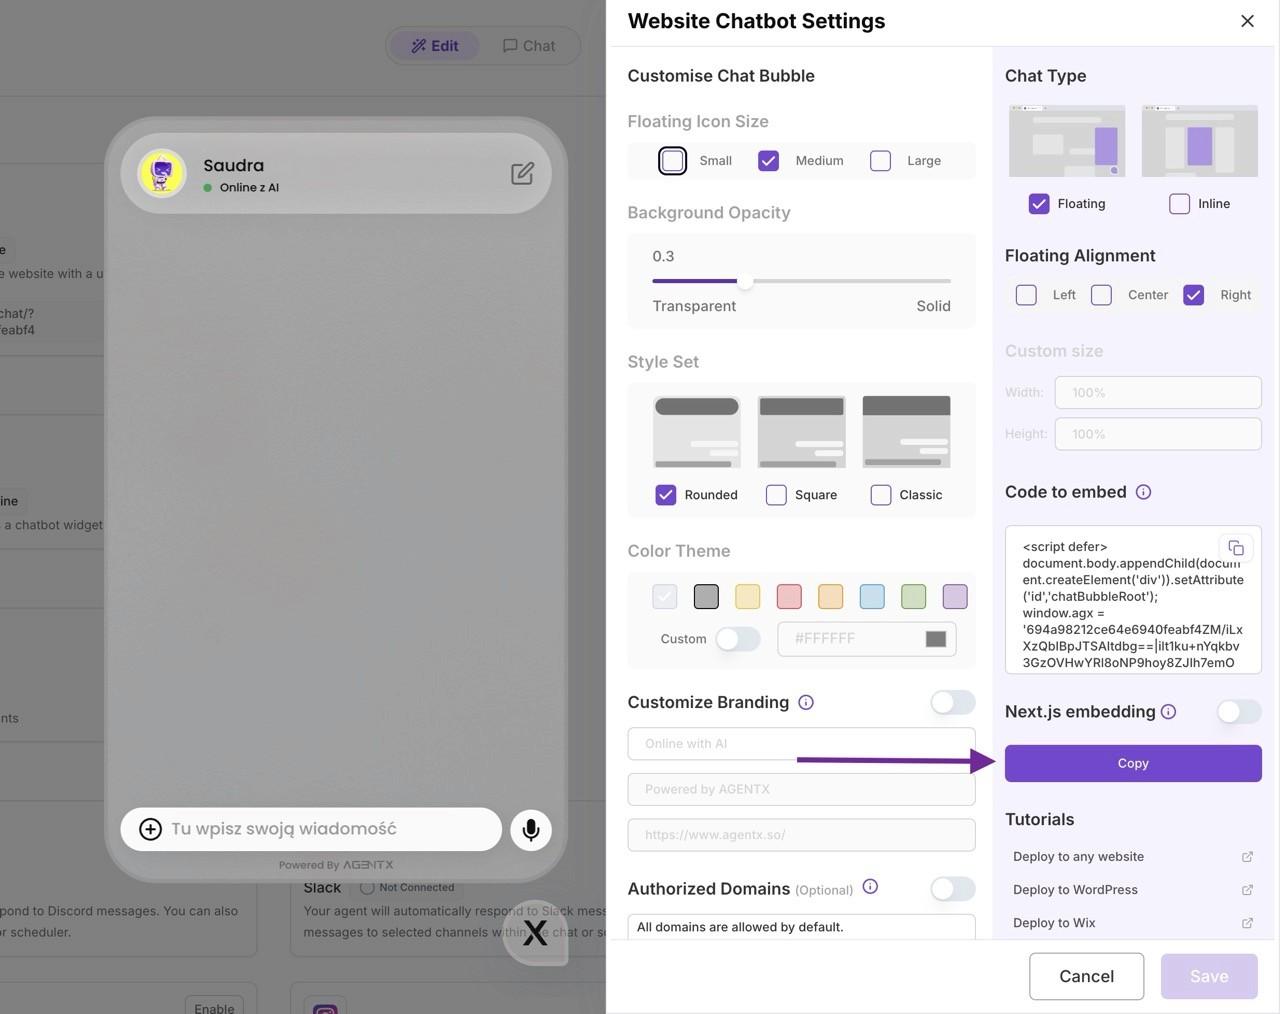
Go to "Deploy" tab, and enable "Chatbot" - "Website embedding". Then click "Enable".
You can customize your chatbot style as you like.
Then click copy to copy your agent's code snippet.
Now it is time to move to your Webflow dashboard.
Step 7: Remove Pre-installed Chatbots (if any)
Make sure there is no pre-installed chatbot on your website. Obviously, you don’t want to have chatbots stacking on each other.
Step 8: Copy and past the code snippet
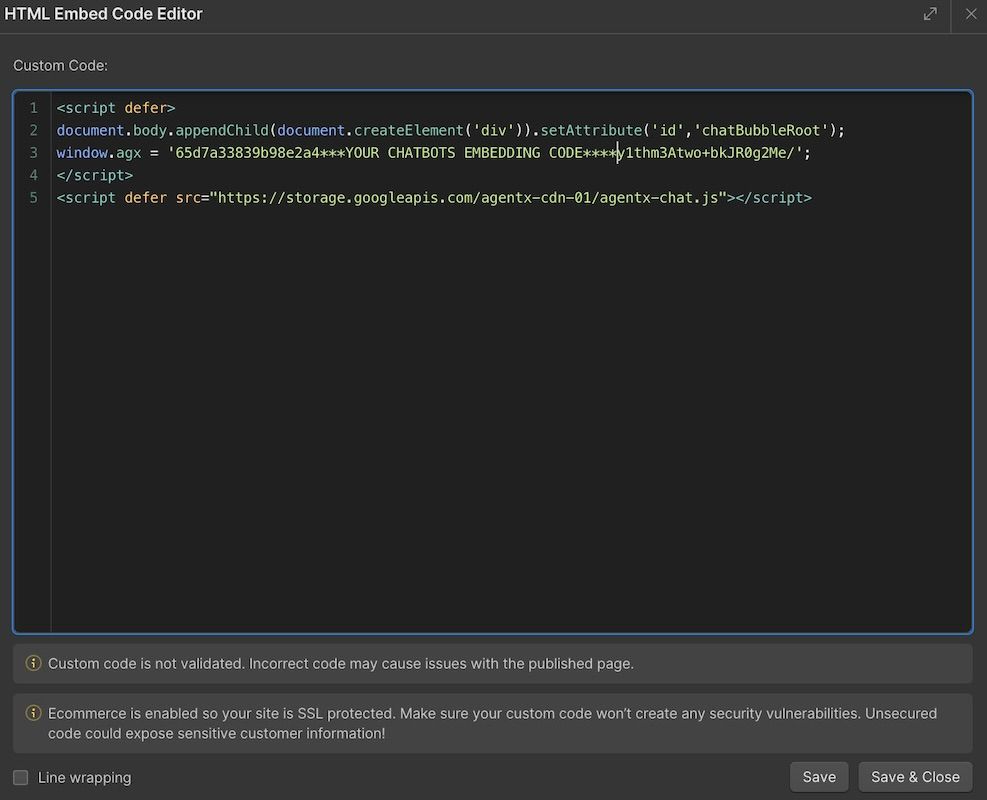
From your Webflow account, select the “Embed” element under Add → Advanced, place the element anywhere on your webpage, and paste the copied JavaScript code into the HTML Embed Code Editor of the element.
Or you can copy and past the code snippet to a certain page's body section if you only want the chatbot to show up for certain page.
Now, Visit Your Website to Watch Your AI Agent Chatbot in Action
Creating an AI chat agent on AgentX is straightforward, the whole process does not require any coding. Integrating your AI agent into a Webflow webpage is just as simple. This integration can significantly enhance user engagement and customer service on your website, providing benefits like 24/7 support, personalization, and valuable insights.
To experience these advantages and improve your website's interactivity, consider starting with AgentX. Ready to transform your website with AI? Create your account on AgentX and begin your journey toward a more dynamic online presence.
Running into any issues? Contact us to onboard your business!
