
How to Deploy an AI Agent to Square/Squarespace
Quickly integrate an AI chatbot into your Square or Squarespace website by creating an AgentX agent, copying the embed code, and pasting it into your page’s Advanced code settings for seamless, automated customer support.
Boost engagement on your Square or Squarespace website by adding an AgentX AI chatbot! Follow these simple steps to deploy an AI agent and automate customer support in minutes.
Deployment to AI Agent to Squarespace
Step 1: Create Your AI Agent with AgentX 🤖
Before you add a chatbot to WordPress, you need to build your AI agent:
Visit AgentX’s Beginner’s Guide.
Follow the steps to set up your AI agent, customize responses, and configure basic settings.
Already have an agent? Skip to Step 2!
Step 2: Configure Deployment & Copy the Embed Code 📝
On AgentX, go to the Deploy section:
Enable Website Embedding: Toggle “Enable” for Website Embedding.
Customize the Chat Widget:
Style: Choose between Floating or Inline chat.
Floating Position: Left, center, or right on your page.
Floating Icon Size: Adjust to fit your site design.
Style Set: Pick Rounded, Square, or Classic look.
Color Theme: Match your website’s color palette.
Rebranding (Pro feature): Upgrade to Pro for white-label & custom branding options. See pricing
Authorized Domains: For extra security, add your website (e.g., https://yourdomain.com) to restrict the agent to specific domains (optional, but recommended).
Chat File Upload: By default, uploaded files are analyzed by the agent. Enable “File Upload as Attachment” if you want users to send files (like print-ready images or documents) as direct attachments, not processed by the AI.
Most important:
Find the unique JavaScript embed code under “Embed,” and click Copy.
Note: If you use Next.js and have issues, select “Next.js Embedding.”
Step 3: Remove Pre-Installed Chatbots (if any)
Make sure your Square/Squarespace site does not have any existing chatbots to prevent conflicts.
Step 4: Paste the Code in Square/Squarespace
Log in to your Square or Squarespace account.
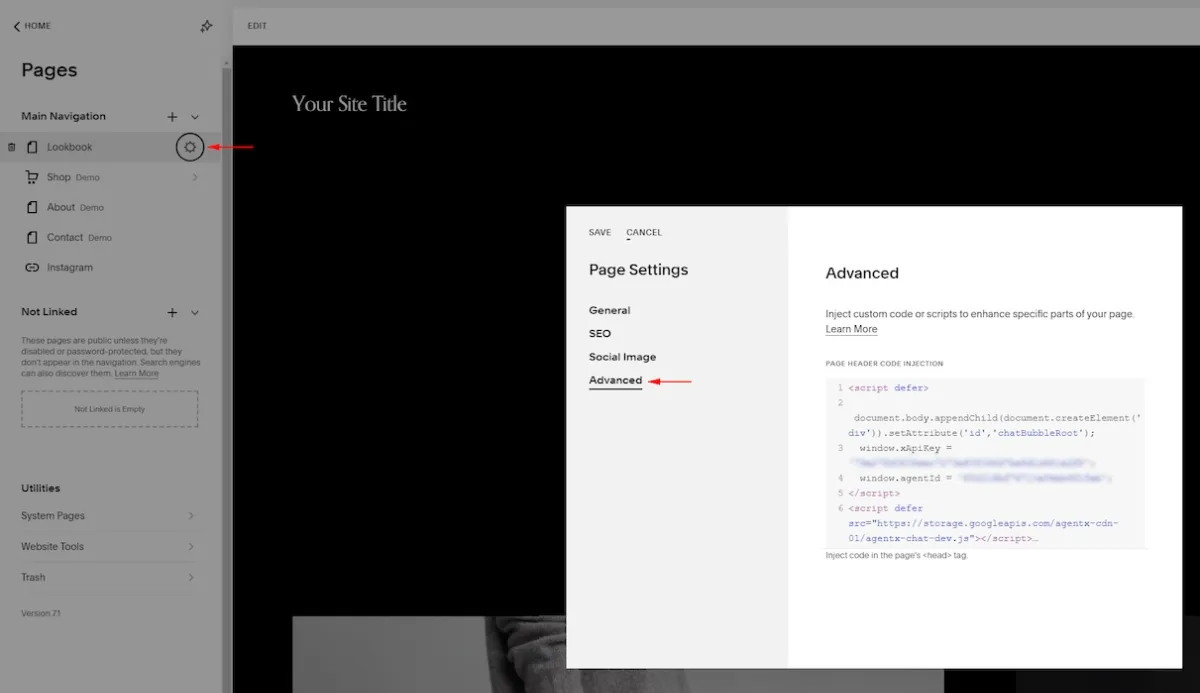
Enter the page settings (⚙️) for the page you want to add the chatbot.
Select “Advanced”, then paste your JavaScript code in the custom code box.
Save and publish.
Done!
Visit your site to see your new AgentX AI chatbot live and ready to assist your
Ready to transform your website? Create your AgentX account now and start building a smarter, more dynamic WordPress site today!
Running into any issues? Contact us to onboard your business!
More
Check out more tutorials to find how to deploy to website builders, such as:
