
How to Deploy an AI Agent to Wix
Learn how to quickly deploy an AI chatbot on your Wix website with this simple, step-by-step guide. Boost engagement and automate support by integrating your custom AgentX AI agent - no coding required!
Looking to add an AI chatbot to your Wix website? Deploying an AgentX AI agent on Wix can instantly boost your site’s engagement, automate support, and provide a modern, interactive experience for your visitors. Here’s exactly how to do it:
Deploying AI Agent to Wix
Step 1: Create Your AI Agent with AgentX 🤖
Before you add a chatbot to WordPress, you need to build your AI agent:
Visit AgentX’s Beginner’s Guide.
Follow the steps to set up your AI agent, customize responses, and configure basic settings.
Already have an agent? Skip to Step 2!
Step 2: Configure Deployment & Copy the Embed Code 📝
On AgentX, go to the Deploy section:
Enable Website Embedding: Toggle “Enable” for Website Embedding.
Customize the Chat Widget:
Style: Choose between Floating or Inline chat.
Floating Position: Left, center, or right on your page.
Floating Icon Size: Adjust to fit your site design.
Style Set: Pick Rounded, Square, or Classic look.
Color Theme: Match your website’s color palette.
Rebranding (Pro feature): Upgrade to Pro for white-label & custom branding options. See pricing
Authorized Domains: For extra security, add your website (e.g., https://yourdomain.com) to restrict the agent to specific domains (optional, but recommended).
Chat File Upload: By default, uploaded files are analyzed by the agent. Enable “File Upload as Attachment” if you want users to send files (like print-ready images or documents) as direct attachments, not processed by the AI.
Most important:
Find the unique JavaScript embed code under “Embed,” and click Copy.
Note: If you use Next.js and have issues, select “Next.js Embedding.”
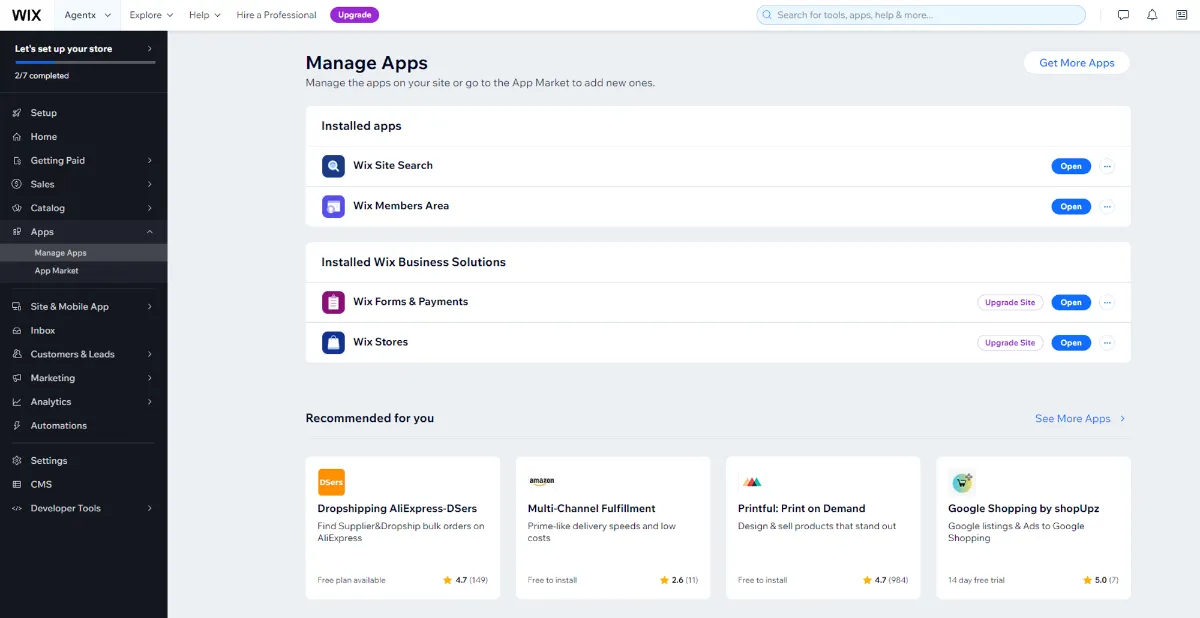
Step 3: Remove Pre-Installed Chatbots
In your Wix Dashboard, go to Apps → Manage Apps.
Remove any existing chatbot apps to avoid multiple chatbots overlapping.
Step 4: Navigate to “Custom Code” in Wix
From the Wix Dashboard, click Settings on the left.
Scroll down to </> Custom Code and click it.
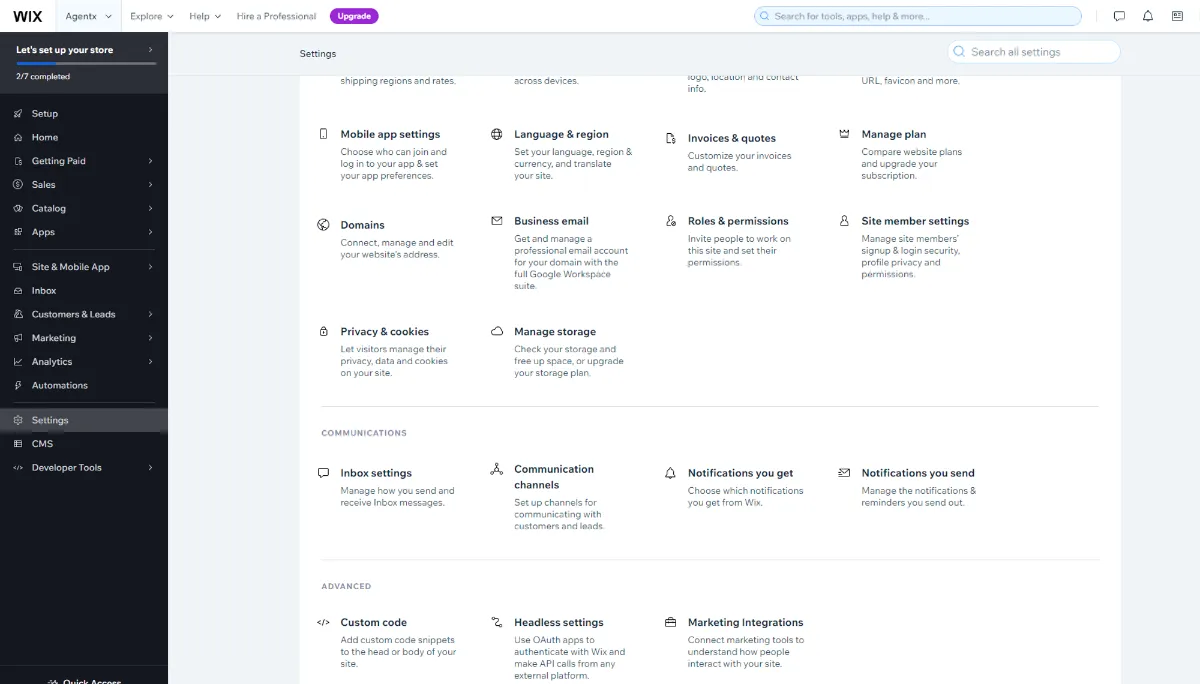
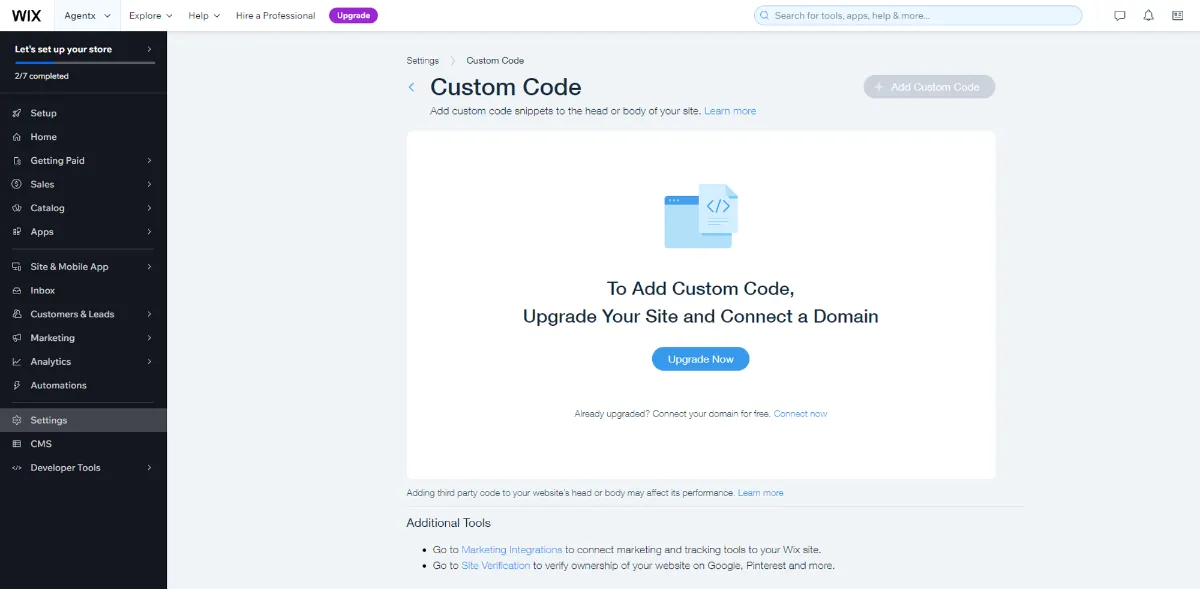
Note: You must have a paid Wix plan and a connected domain to access the Custom Code feature.
Step 5: Insert the AgentX Code in the Body
In the Custom Code section, click the middle “Add Code” block for Body - Start.
This is the correct location for your AgentX chatbot script.
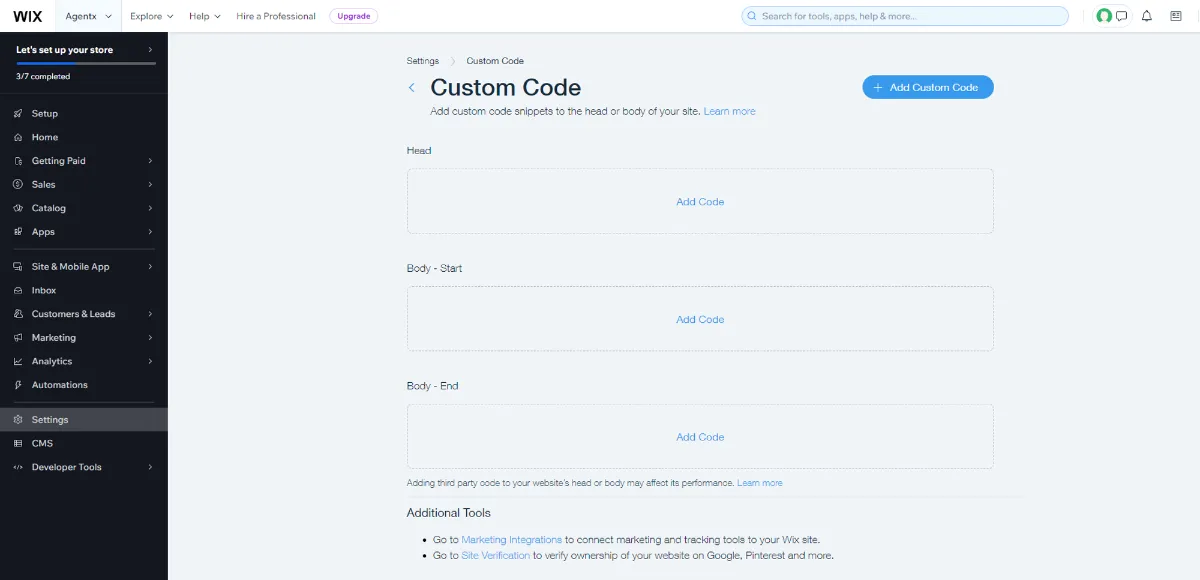
Step 6: Paste and Apply the Code
Paste your copied JavaScript code into the first textbox.
Click Apply.
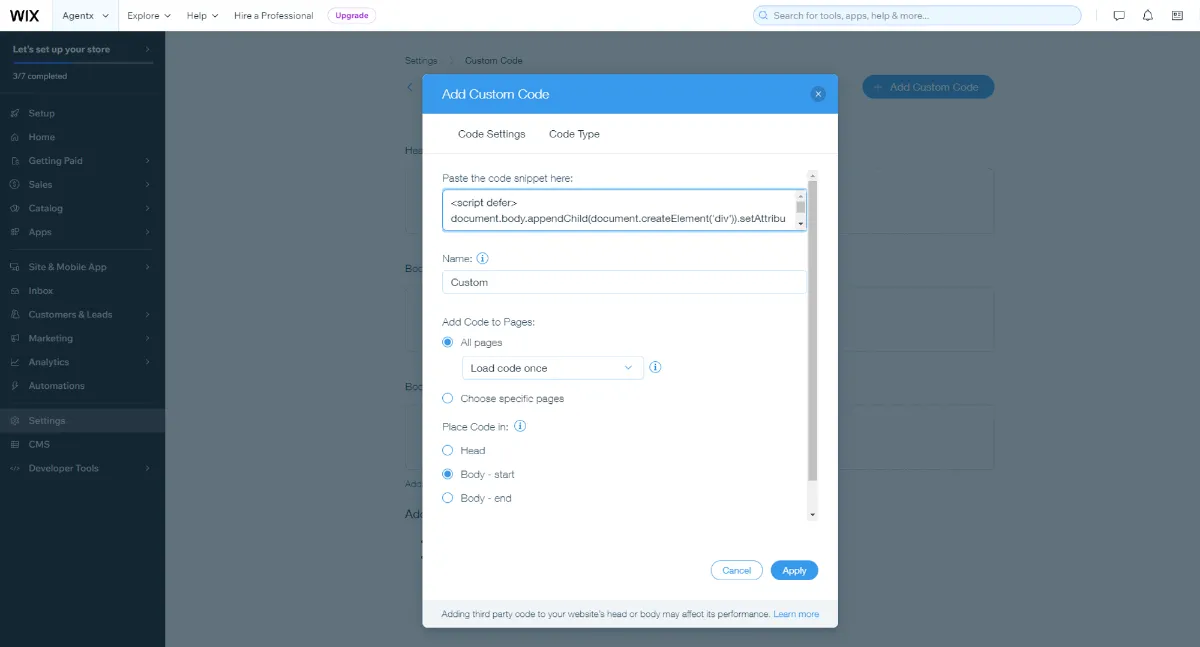
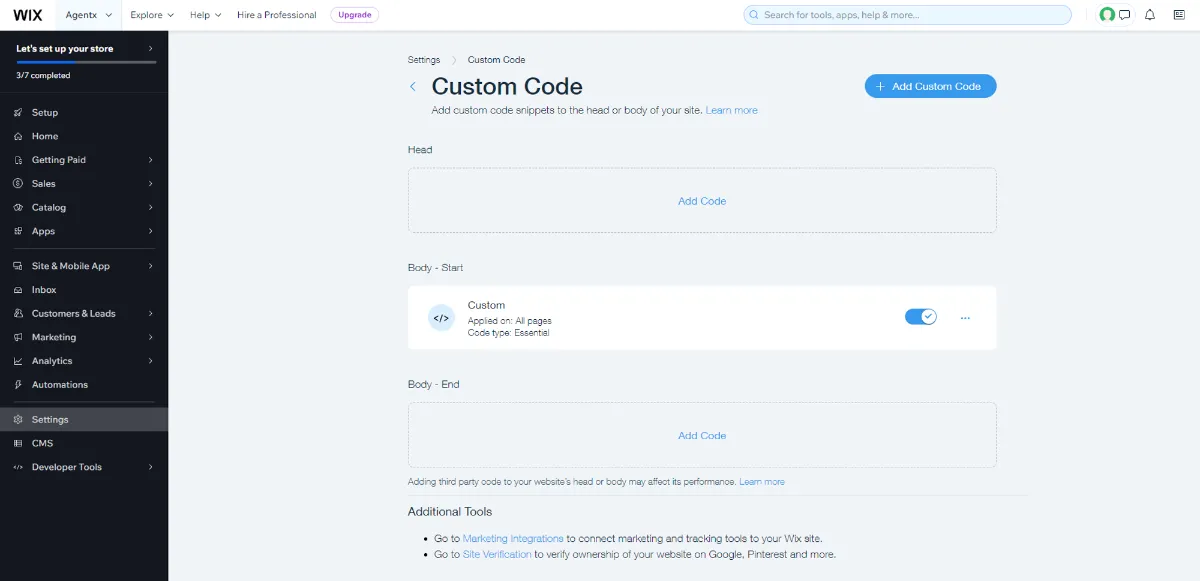
The custom code will show as enabled.
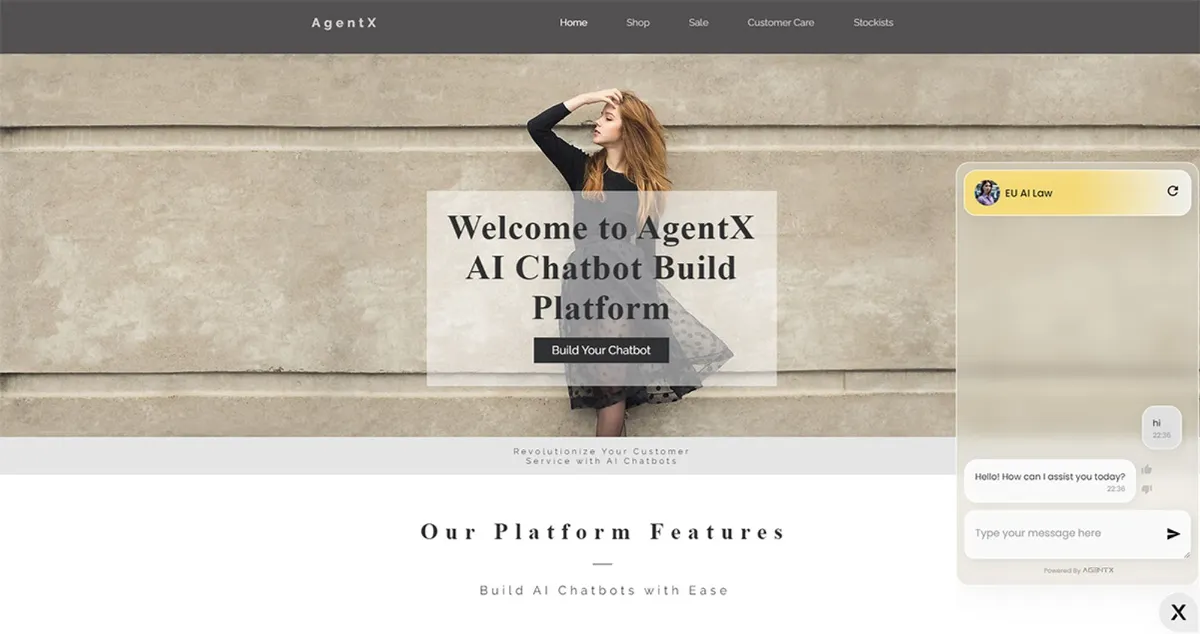
All Done! 😍
Visit your Wix website and see your new AI chatbot in action.
Integrating AgentX with Wix is fast, code-free, and opens up new ways to engage and support your visitors around the clock.
Need help or have questions?
Our support team is here for you - reach out anytime by chat, phone, video, or email.
