

How to deploy an AI Agent to your website
How to deploy your AgentX AI agent as a chatbot widget on your website by embedding a simple JavaScript snippet. After enabling the "Website Embedding" option in the "Deploy" tab, customize the style, add authorized domains for security, and paste the JavaScript code into your site's HTML to make the agent appear on your website.
In this tutorial, you will learn how to deploy your AI agent to any of your websites by copy and paste Javascript snippet. The agent deploy to the website will show up like website chatbot widget.
AI agent website Embedding
AgentX allows creators to deploy AI agent to multiple channels such as websites. If you have not yet create an AI agent on AgentX, check out here - how to create an AI agent.
We constantly update our user interface and add more features to the platform in order to provide the best experience in agent building. You may notice that the user interface differs from what is shown in the video and images here.
Enable Website Embedding
Go to your agent dashboard
Open the Deploy tab
Select Edit to open Website Embedding Settings
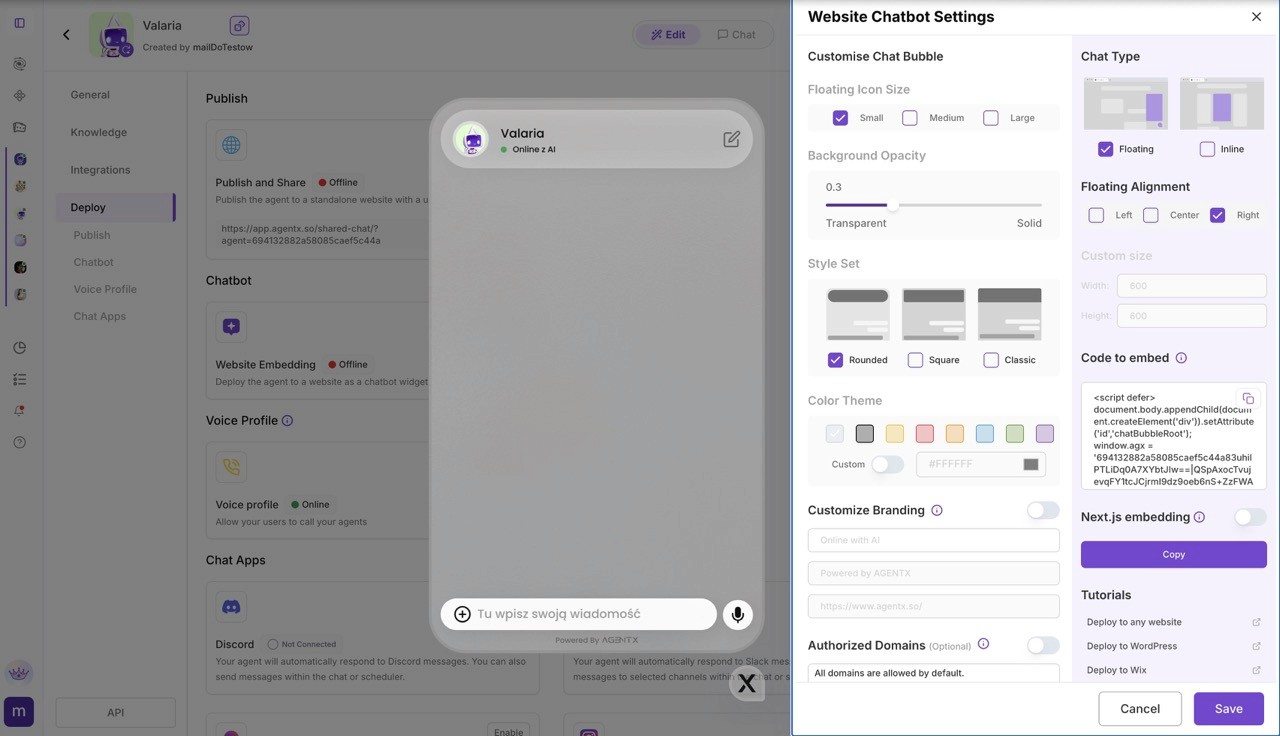
Customize Website Chatbot Appearance
Inside Website Chatbot Settings, you can fully customize the chat widget.
Customize Chat Bubble
Floating Icon Size
Choose between Small, Medium, or Large floating button size.Background Opacity
Control how transparent or solid the chat background appears.Style Set
Choose the overall look of the chat window: rounded, square, classic.
Color Theme
Pick a predefined color or enable Custom to define your own brand color.
Chat Type & Layout
Chat Type
Floating – floating chatbot widget
Floating Alignment (Floating only)
Position the widget on the Left, Center, or Right.
Inline – embedded directly in the page
Custom Size (Inline only)
Enable Custom size and define the chatbot width and height (in pixels).
Customize Branding
If you are on the Pro tier, you can enable Customize Branding to:
Change the status text (e.g. Online with AI)
Replace or remove “Powered by AgentX”
Add your own website or brand link
Authorized Domains (Optional)
You can restrict where your chatbot is allowed to run.
Add one or more domains (e.g.
https://www.nike.com)The agent will only work on the listed domains
Helps protect against unauthorized usage
👉 Always click Save to apply your changes.
Always remember to save changes.
Deploy to your website
When you are ready, it's time to deploy the agent to your website.
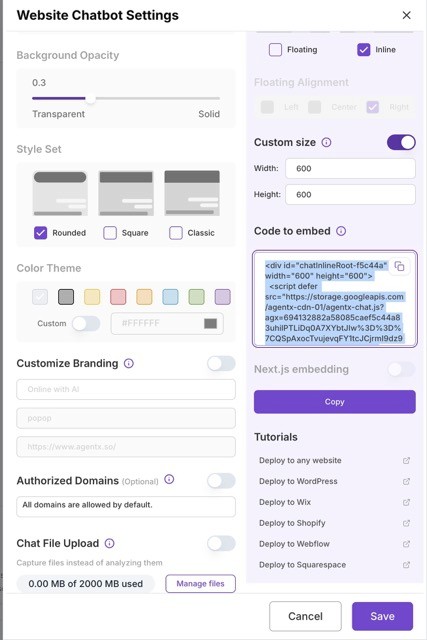
Head back to website embedding setting. In Embed section find the Javascript code snippet. It looks like:
Copy and paste the this Javascript code snippet at the end of your HTML file within the <body> section, and save.
That's it! Check your website, if you see your agent at lower right corner, that means your AI agent is fully deployed to your website.
More
Check out more tutorials to find how to deploy to website builders, such as:
