
How to generate lead and send to Zapier webhook
How to enable lead generation in AgentX and send leads to Zapier via webhook. After building your agent, activate Lead Generation in "INTEGRATIONS." tab In Zapier, create a new workflow with a Webhook trigger and use the "Catch Hook" event. Copy the Zapier webhook URL to the AgentX lead generation settings, and your agent will send collected leads to your Zapier workflow.
This tutorial provides a step-by-step guide on how to enable the lead generation feature and send leads to a Zapier workflow via webhook. This allows you to seamlessly integrate AgentX into your overall workflow.
Sending Leads to Zapier
Once you finished building an agent, (see how to build tutorial). You can turn on Lead Generation feature at INTEGRATIONS -> Lead Generation, and your agent will be able to collect leads from the contacts.
Connect to Zapier via Webhook
Step 1. In Zapier Dashboard, click Create a Zap from scratch (You can also use an existing workflow if you already have one).

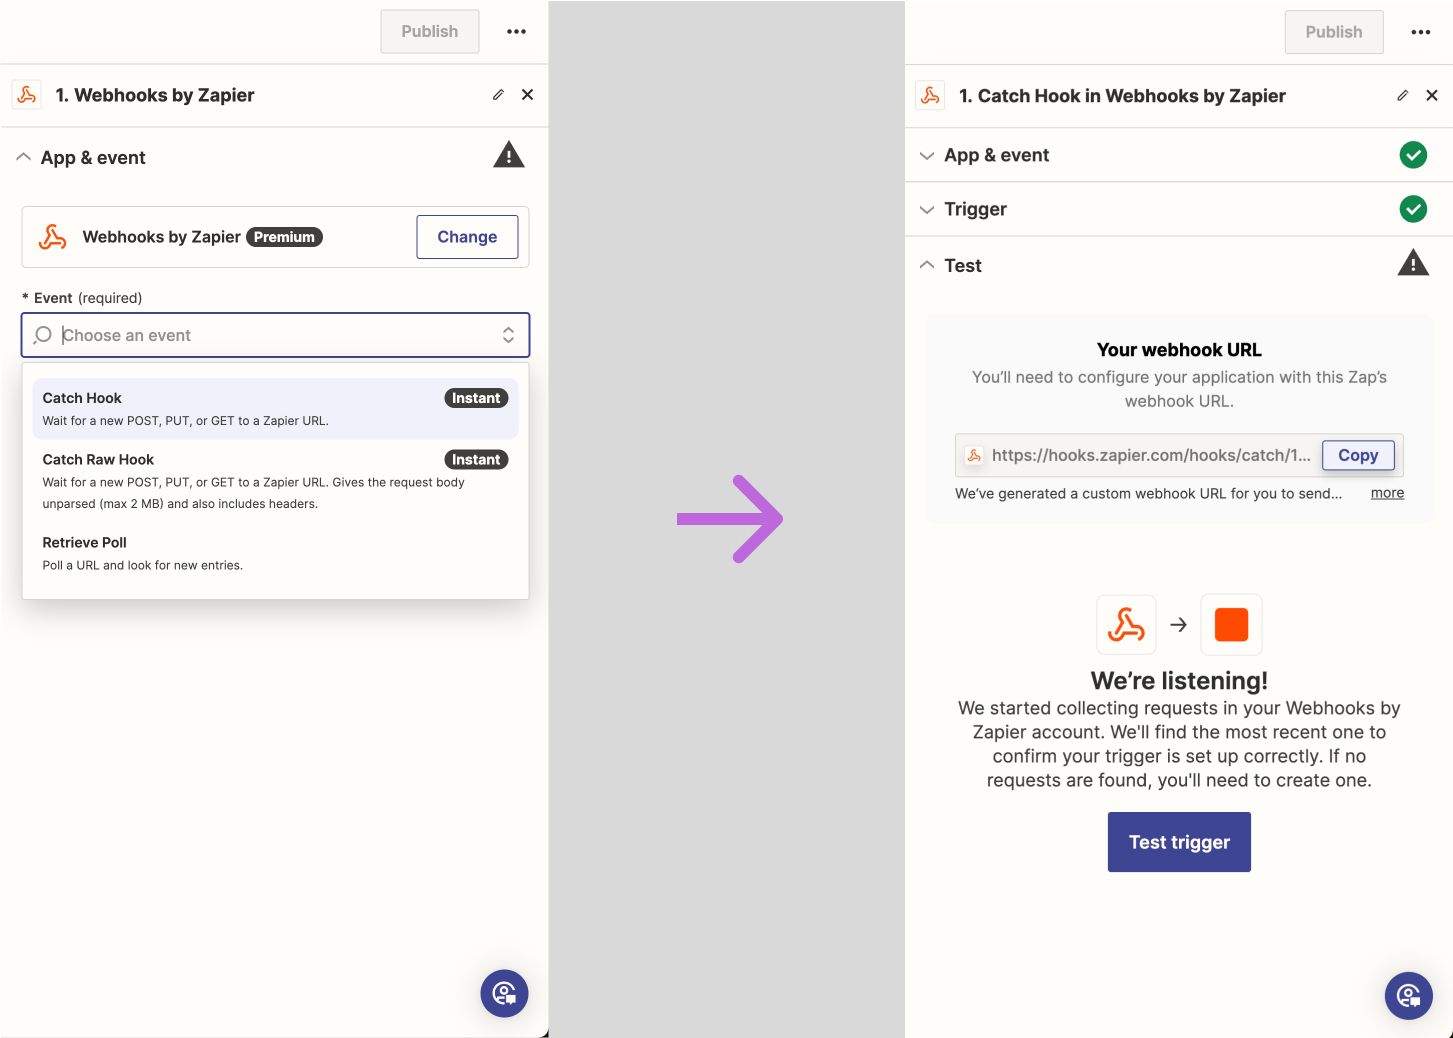
Step 2. Click Trigger to edit trigger event. After that, choose Webhook as your trigger type.
Step 3. You will land to workflow editor page. On the right side of the editor page, choose App & event, and in the Event drop down, choose Catch Hook. After that, you will get Your webhook URL. We will use this URL later.
Step4. Go back to AgentX -> Edit an agent -> Integrations -> Lead Generation -> Add an endpoint (Send lead info to CRM or external API endpoint) -> POST
Copy and paste Zapier webhook url to the field Send data to
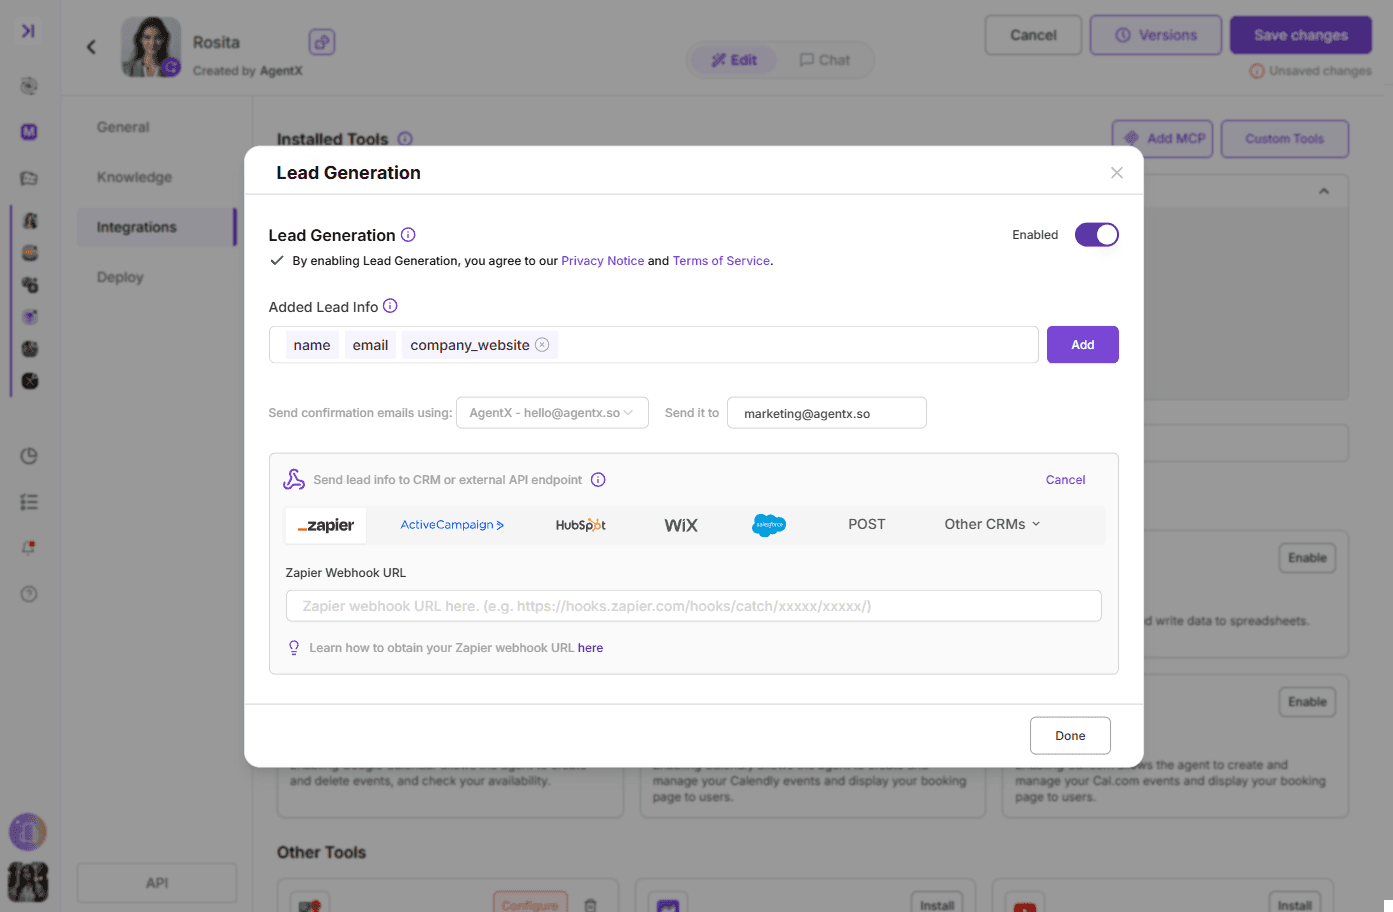
Don't forget to save the changes.
🎉 Congrats, now your agent is able to generate leads and send to your Zapier workflow.
