
How to Set Up Custom Branding for Shared Chats
You can now customize everything in your public share link: image, favicon, title, and description. This gives your agents a clean, professional identity wherever they’re posted. No more generic previews—your brand takes the spotlight.
You can fully personalize how your shared agent link looks when posted on social media, messaging apps, or search previews. Follow these steps to apply your own branding.
Setting up Custom Branding
1. Open Publish & Share
Go to Deploy → Publish, then click Edit in the Publish and Share section.
A side panel will open on the right.
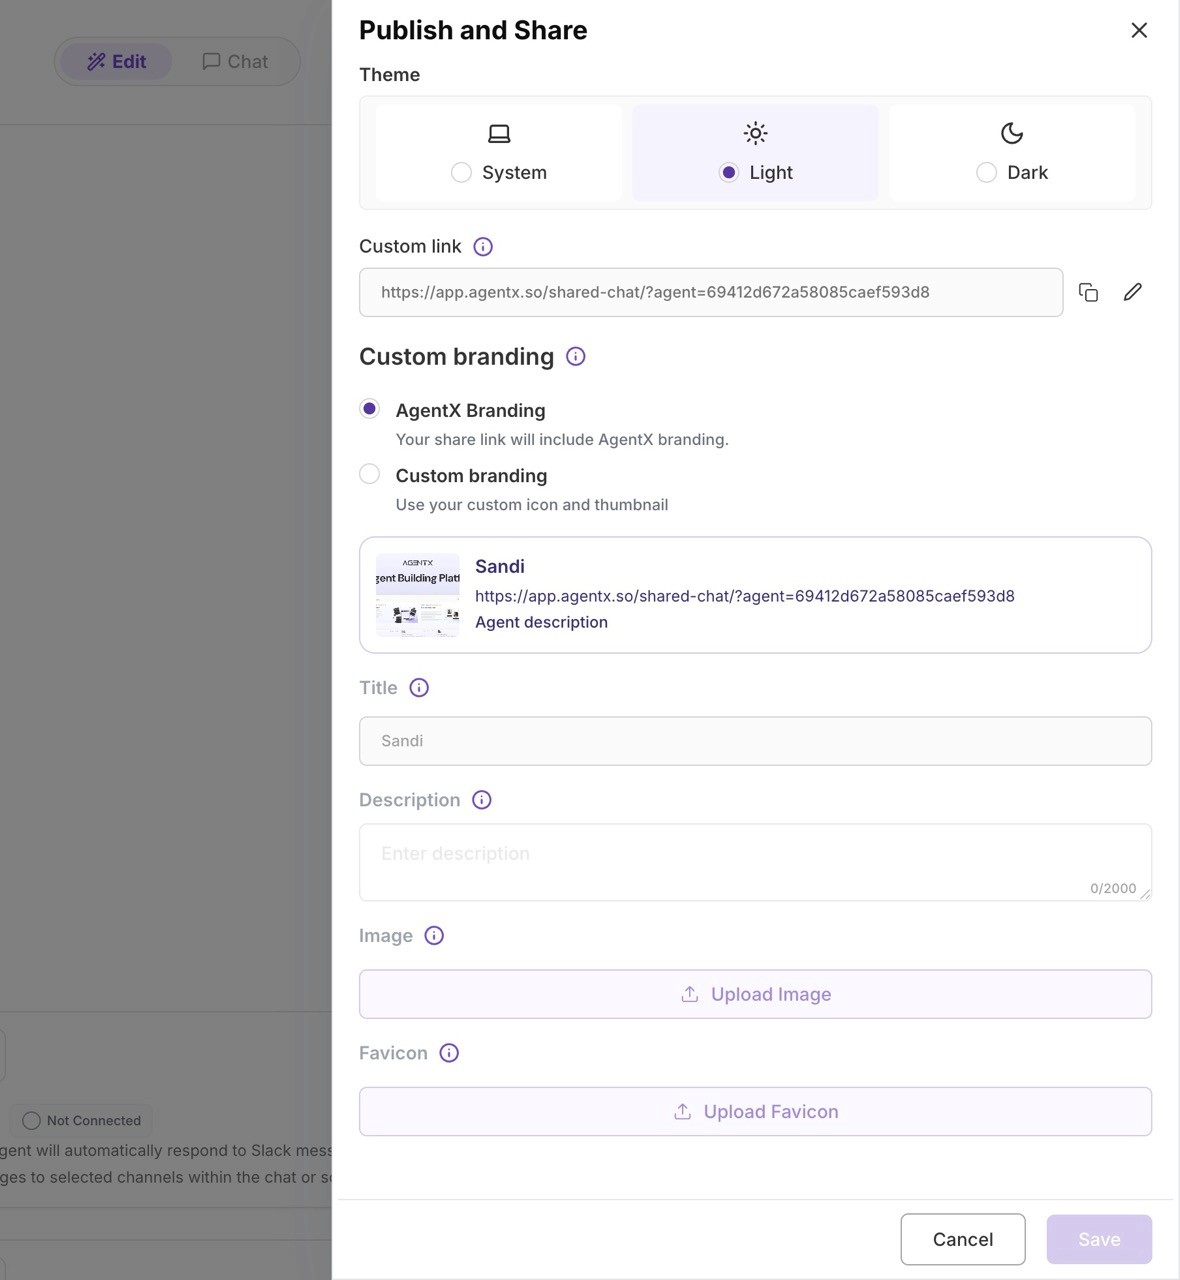
2. Choose Your Theme
At the top of the panel, pick your preferred preview theme:
System
Light
Dark
This affects how your share card is displayed.
3. Set Custom Link (Optional)
Under Custom link, you can edit the share URL to make it cleaner and more personalized.
4. Enable Custom Branding
In the Custom branding section:
Select Custom branding
This unlocks all editable branding fields.You will now see your preview card (thumbnail, title, and link).
5. Edit Title and Description
These appear in link previews on platforms like WhatsApp, Messenger, Slack, and Google:
Title → The main name shown in the share card
Description → A short summary of your agent (up to 2000 characters)
6. Upload Your Custom Image
Under Image, upload the main preview image.
This image is used as your thumbnail / hero image when the link is shared.
Recommended: 2:3 horizontal, high-quality.
7. Upload Your Custom Favicon
Under Favicon, upload a small icon to replace the default AgentX icon.
This appears in browser tabs and rich previews.
8. Click Save
Once everything looks right in the preview, click Save to publish the custom-branded share link.
Your agent is now ready to be shared with your own brand identity.
