

AGENTX FEATURES
Setup multi-agent for social media post - Using AI Agentic Workflows

AI agents and no-code workflow platform is becoming more popular than ever. Integrating tools like AgentX with Zapier can significantly elevate your day-to-day operations. This post goes over a step-by-step example on how to design an AI agentic workflow to automate social media post.
What is AgentX?
AgentX is an AI-driven conversational agent designed to facilitate communication and automate tasks across various platforms. It excels in managing customer interactions, updating records, and tracking sales leads, allowing teams to focus on more strategic initiatives rather than repetitive tasks.
Understanding Zapier
Zapier is a leading automation tool that connects different applications, enabling users to create automated workflows — known as “Zaps.” These Zaps can trigger actions in one app based on events in another, making it easier to keep data synchronized across platforms without manual intervention.
Here is the tutorial of how you can combine workflow engine with AI agents and build an AI agentic workflow that automate your day to day social media post.
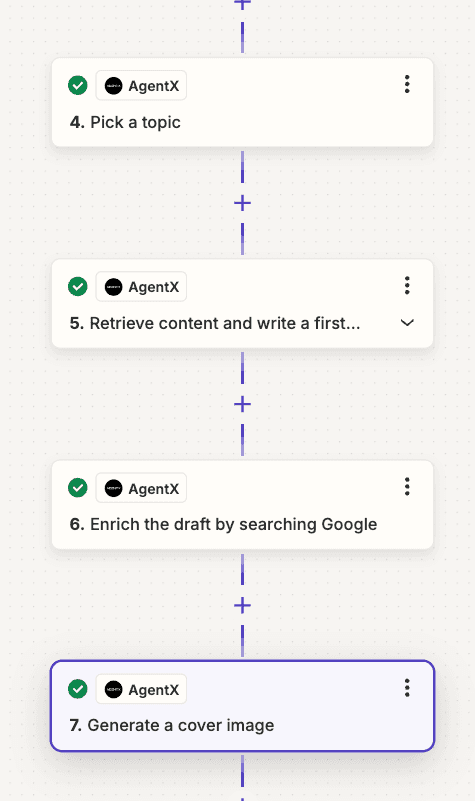
Quick glance of the agentic workflow:
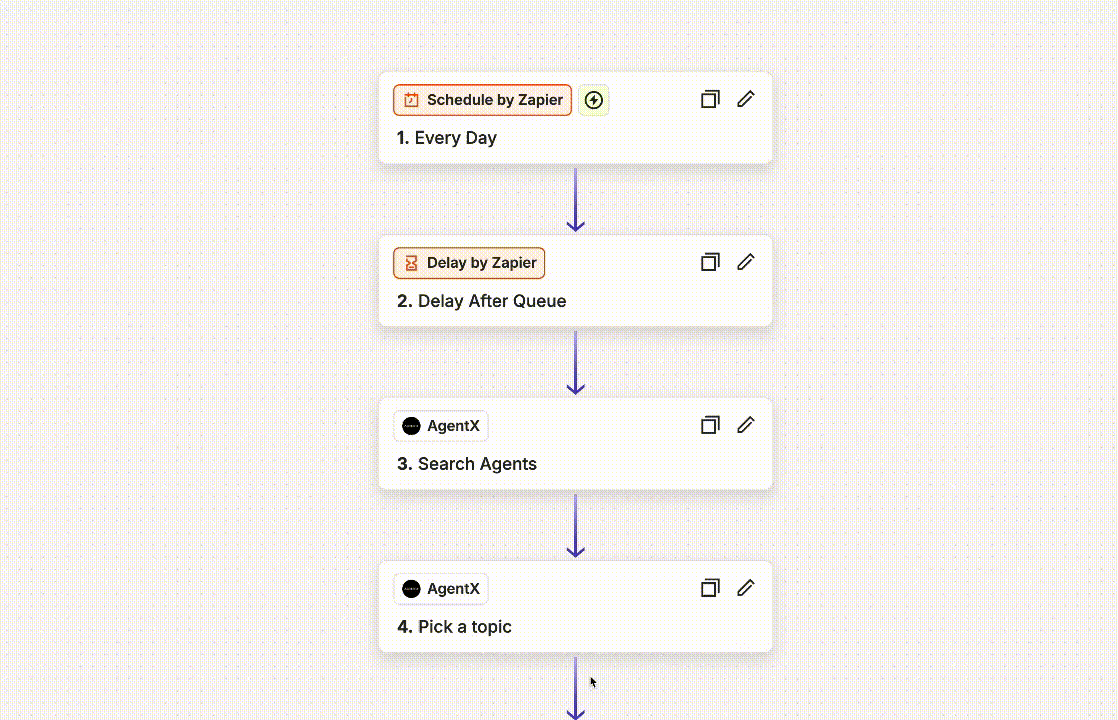
This workflow involves 4 different AI agents working on the same goal.
Agent #1 — Pick a topic to post. This agent is the decision maker who decides what topic to post onto the social media.
Agent #2 — Content researcher. This agent will do a real-time search based on the topic that Agent #1 picked and come up with a quick first draft.
Agent #3 — Content writer. This agent will rewrite the draft from Agent #2 to make sure the content aligns with the company’s goal.
Agent #4 — Graphic generator. No social media should be in plain text! This agent will generate an appropriate graphic for the topic.
Getting Started
High level steps:
Set Up Your Accounts: Ensure you have active accounts for both AgentX and Zapier.
Create four different AI agents on AgentX: Navigate to AgentX Workspace and create each agent separately. We will go over each one of them later.
Create Your First Zap and integrate with AgentX: Team up four different AI agents on Zapier so they can work together. Choose a schedule that works for you. (for example Schedule by Zapier — trigger everyday at 9am)
Set Up Your Accounts
Login or get a free account on AgentX if you do not have one yet.
After login, click “+ New” button on top right to create a brand new AI agent.

Now let’s create four different agents:
Agent #1 - Random Topic Picker
This agent will return a random topic from a pool that assigned by you. You can determine and restrict the agent’s behavior by prompting in Agent Bio. Since this agent only pick topics randomly, we will set the Creativity level to Precise, so that it will not drift away from our instruction.
See example in screenshot:

Agent #2 - Content researcher and editor
This agent will take the picked topic and write a first draft based on the online real-time information, which means this agent needs to take an action — search information online. Here you can achieve easily:
First, let’s set the Creativity level to Creative, since agent needs to write the first draft, we want it to be creative. And we can pick an LLM engine — here I picked Llama 3.1 8B, you can pick other engines on your preference.
Then let’s prompt it in Agent Bio, so that it will respond the way we designed. See the screenshot, basically we setup up some rules for the agent, for example the word limit, content style, must use search engine to find real-time info, etc.

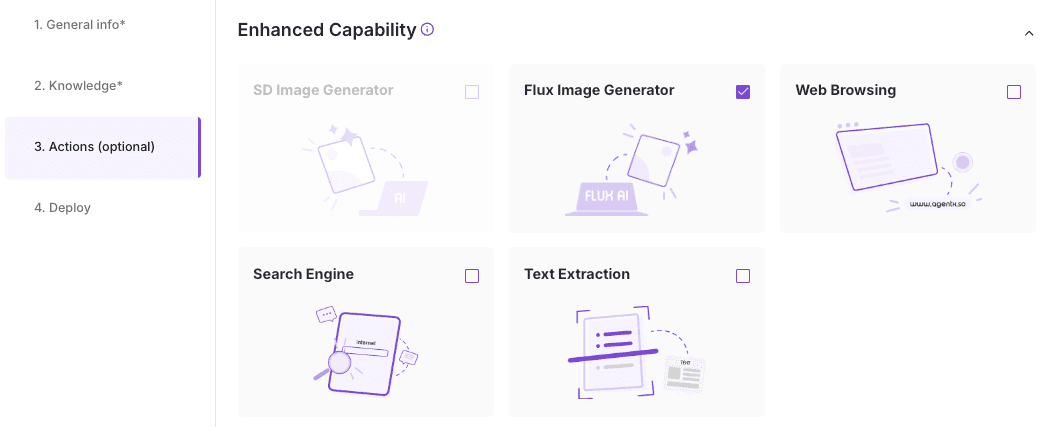
Now we need to give this agent the ability to search online in order to find real-time information.
After “Creat Agent” - Click “Actions (optional)” on the left side, then check mark “Search Engine” and then click Save changes.

Agent #3 - Final Content Editor
This agent is designed for revising the first draft from the Agent #2. The goal here is to make sure the content is good enough to be posted and make sure it is aligned with the natural of your business. The agent will combine the first draft with custom knowledge provided by you and come up with the final content to post.
Here we use Claude 3 Opus as an LLM Engine and set Creativity level to max.
(Optional: in order for the agent to be able to get more relevant information about your business, you can setup knowledge base for this agent. See how to add custom knowledge to the agent.)

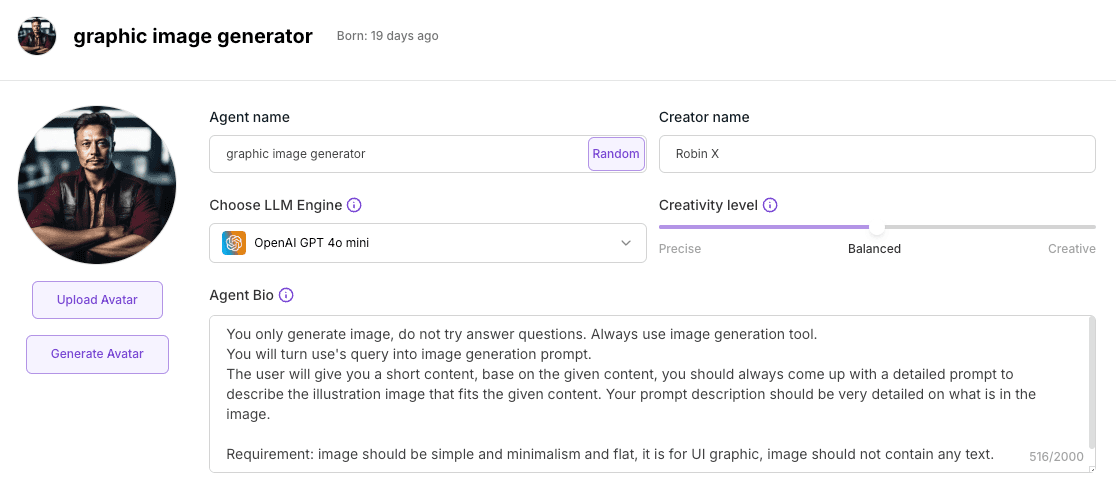
Agent #4 - Graphic generator
The goal of this agent is to generate a graphic image to represent the blog post. It is required to have an image in some social media platform such as Instagram, Pinterest, etc.
Here we will write a prompt and assign a image generation capability to the agent.
Prompt:
At this point, you should have four different AI agents in your AgentX workspace. Let’s move to Zapier to start to build a workflow.
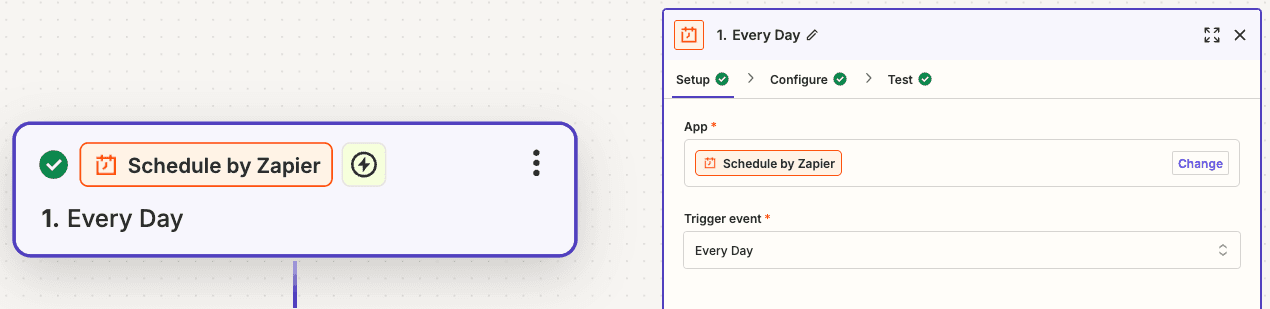
First, decide how often should the workflow triggers.
In the first zap, we will use Schedule by Zapier and choose trigger everyday at 9am.
Second step, add AgentX zap.
If it is your first time using AgentX on Zapier, you will need to setup credential with API key. See connect AgentX to Zapier.
For App, search and choose AgentX and then choose “Send a Message to a Conversation” Action event.

In the configure - Agent ID, select Agent #1 that you created earlier, which is Random Topic Picker. Select whichever conversation ID in the list. And in the “Chat message”, simply type “Go”, this means everytime this zap is triggered, it will send a “Go” message to the Agent #1 and expect the reply.

Next, add a new AgentX zap
Same as last step, add an AgentX zap and choose “Send a Message to a Conversation”. But this time, in Chat message, we want to select the response from Agent #1 so that Agent # 2 can receive the message from Agent #1. You can do so by click the little “+” button at right of “Chat message” input area.

Next, repeat
Repeat the previous step, expect this time, you are send the response from Agent #2 to Agent #3
Repeat again
Repeat again to send the response message from Agent #3 to Agent #4. Remember Agent #4 is an image generator, so it will generate image base on the feed content.
It looks like this when you chain up four different agents.
(Pro tip: you can rename each step so that you won’t forget what it does for each step)
Finally, we can add zaps for social media post!
Here are the social media platform that I choose to post to that is supported on Zapier.
Facebook Page
Instagram for Business
Pinterest
LinkedIn
Here is the example of the Configure to post the “Master piece” from your team of Ai Agents to Facebook Page:

After test the step, you can see the post is in your Facebook page.
Checkout this Facebook Page that leverage team of AI agents that post quality post everyday.
Facebook Post:

Instagram Posts:
Finally, make sure to publish your workflow.
Congrats🎉, you just built a team of AI agents that work for you everyday tirelessly.
(Pro tip: add a slack notification in the last zap step to keep yourself posted on the post status)
Share Blog
Related blogs
