

AGENTX FEATURES
How to Deploy an AI Agent Chatbot in 1 min via Copy and Paste?

Previously, you successfully created your AI Agent on AgentX. Congrats! Deploying your AI Agent can’t be more easier and literally takes copying & pasting and a few clicks. Before everything, make sure that you have acquired authorization to publish your agent on an internet domain.
Step 1: 🔘 Hit the “Publish” Button
Navigate to the upper right corner of your interface and click the “Publish” button (try refreshing the page if not responding). You will then see a pop-up window.

Step 2: 🖋 Add Your Domain Name
Enter your domain name into the text box of the pop-up window and click the “Add” button. Your domain name will then appear under “Authorized Origins.”
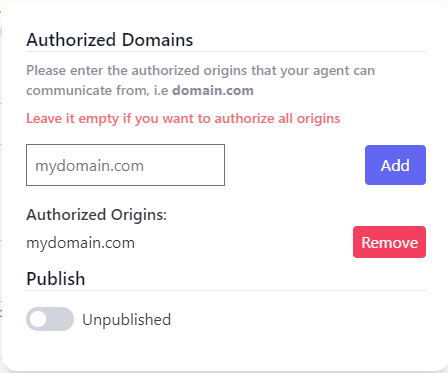
Step 3: 📢 Toggle the “Publish” bar
Toggle the “Publish” bar to “Published” and then you will find a color option for your Agent User Interface and a short JavaScript code. Pick your color and copy the JavaScript code by clicking the “Copy” button. Next, you will embed the copied JavaScript code to your website’s backend to finish the deployment.
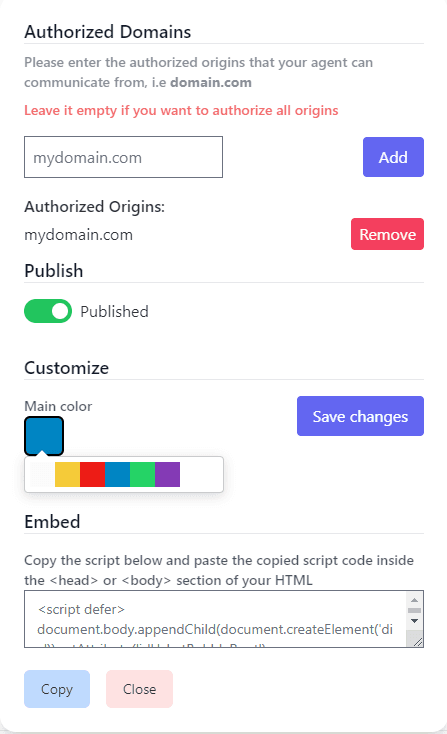
Step 4: 📋 Embed the JavaScript Code
A few examples are provided here to demonstrate where to paste the JavaScript Code, depending on the tool you use for running your website.
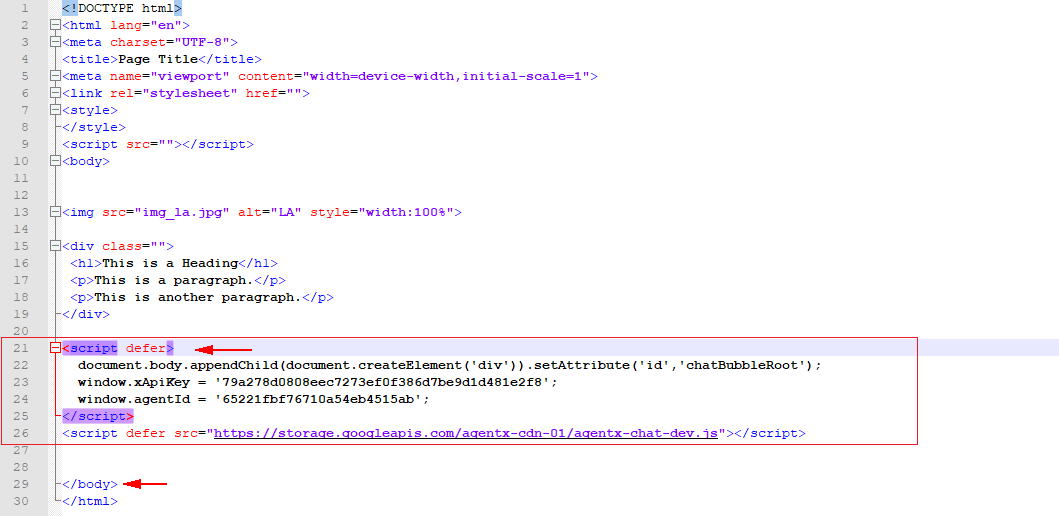
If you use plain HTML
Simply paste the copied JavaScript code inside the <body> section of your HTML - preferably at the very end but before the </body> tag. That’s it!
If you use WordPress
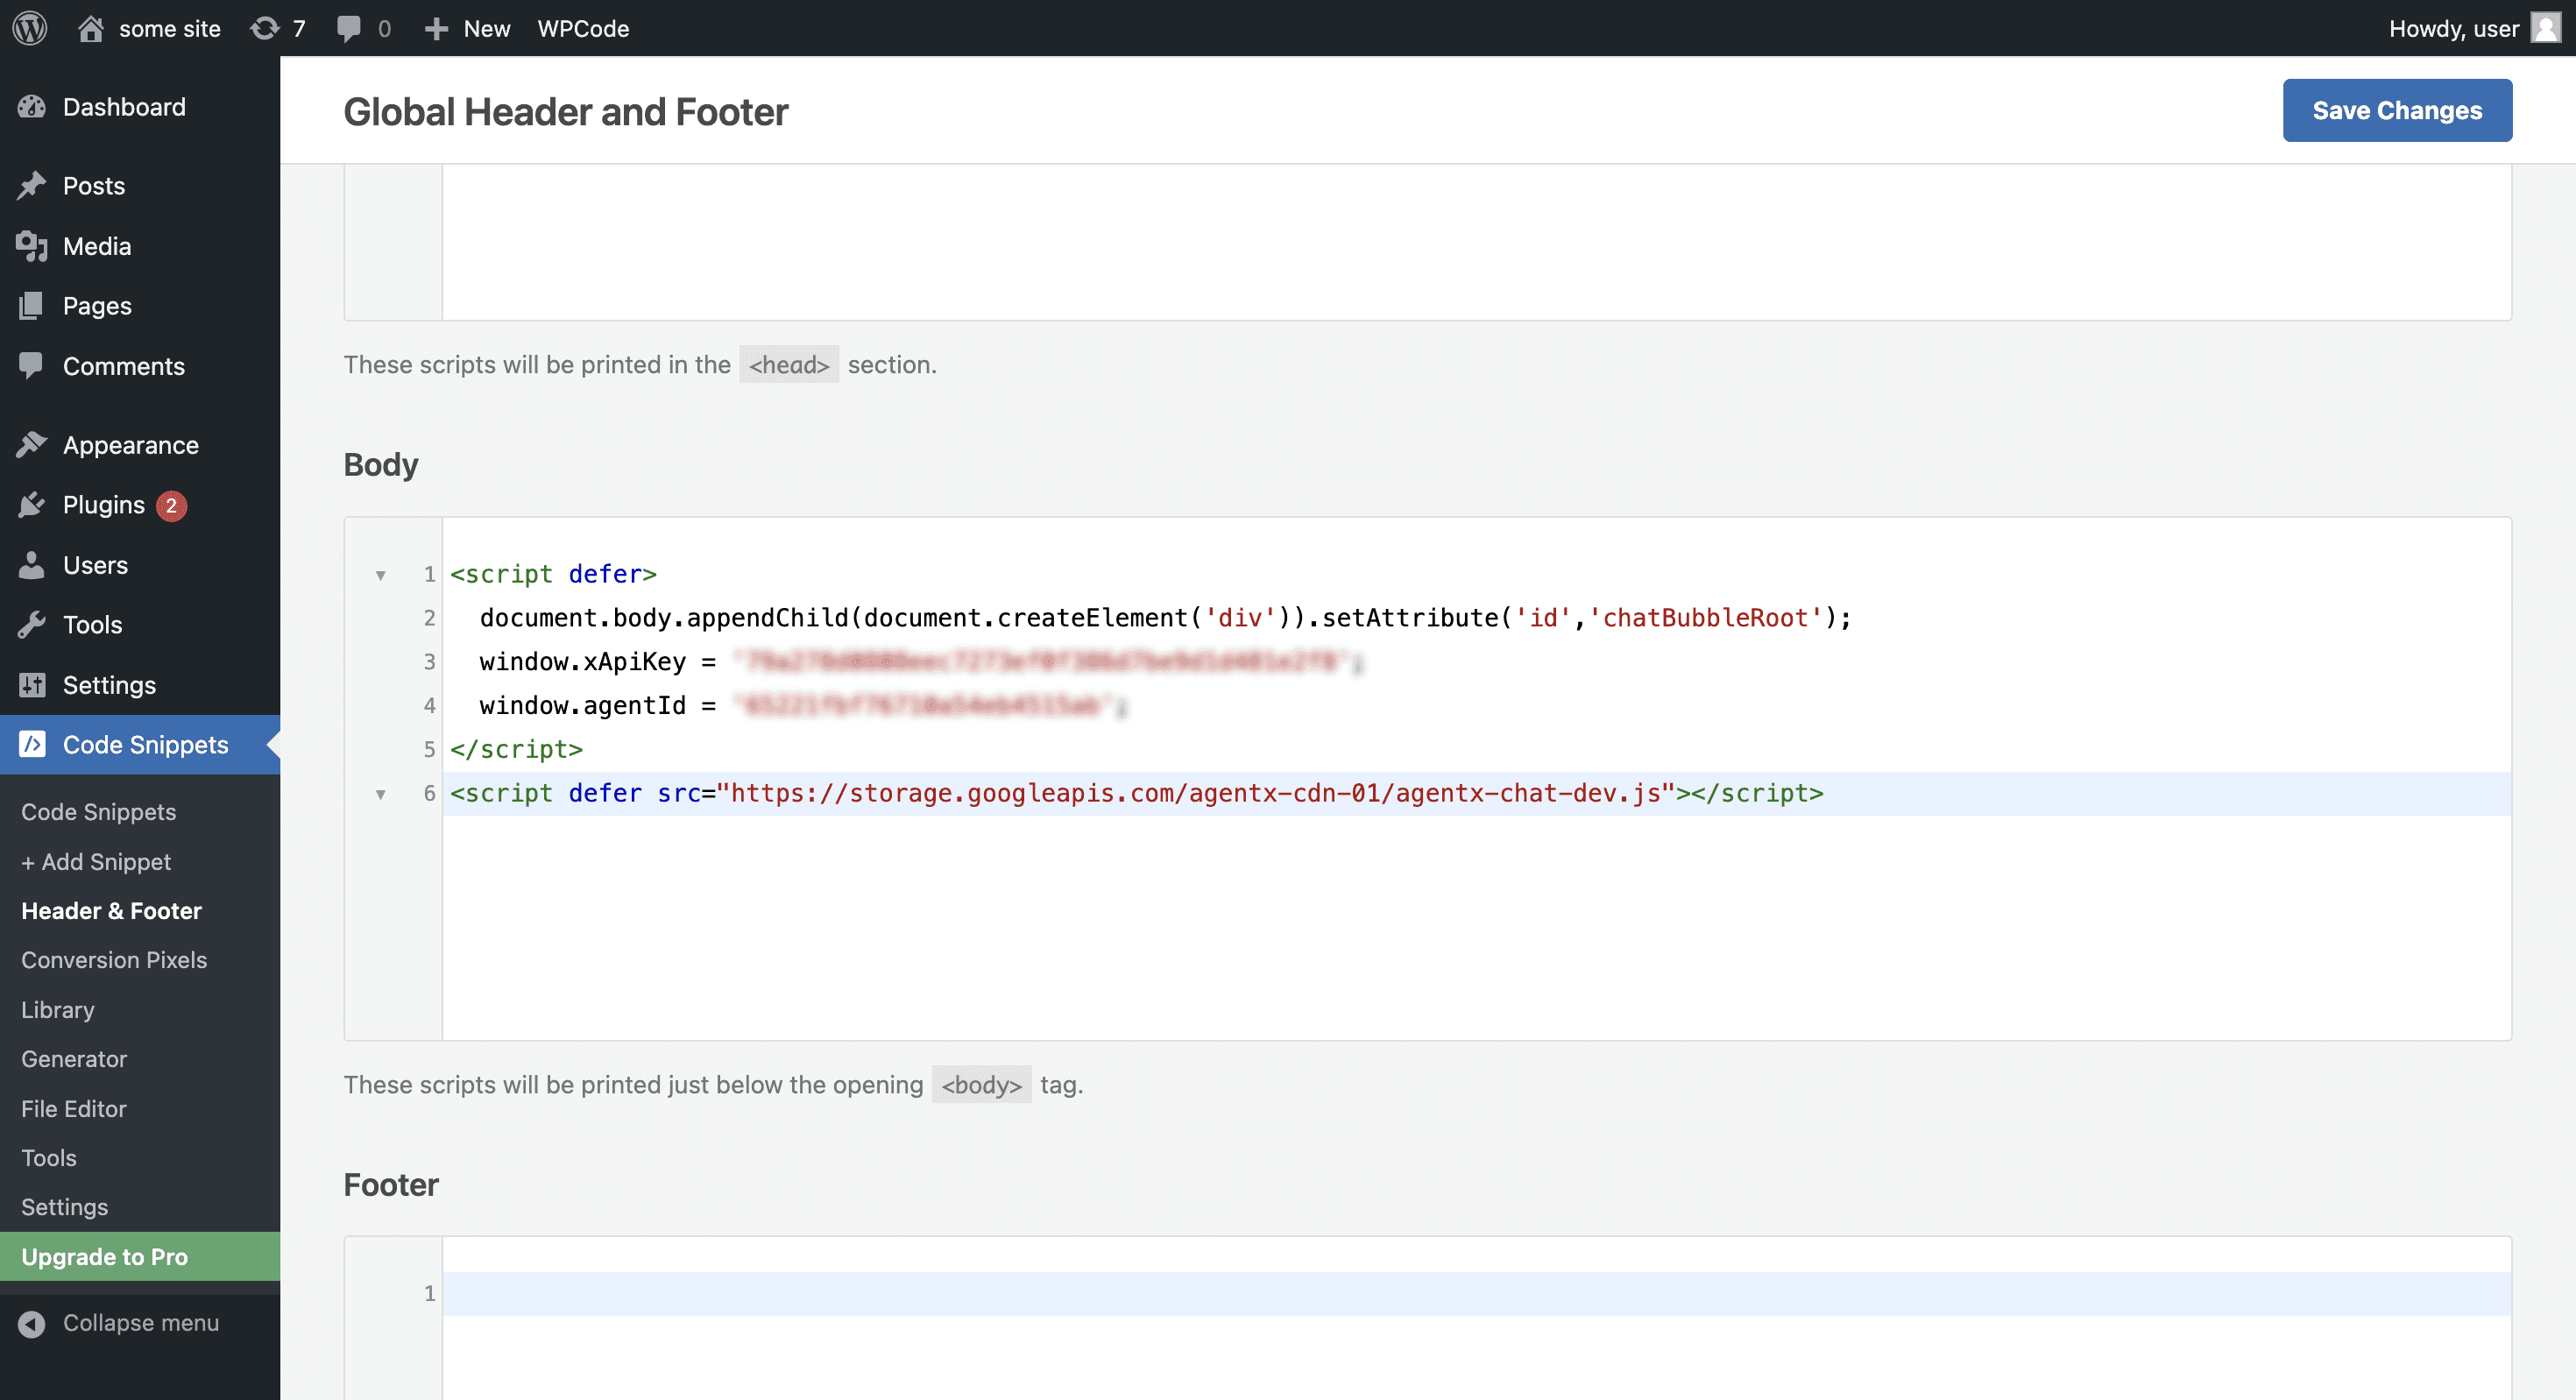
Install any plugin that allows you to inject code Snippets (e.g., WPCode Lite) and paste the JavaScript code to <Body> as shown:
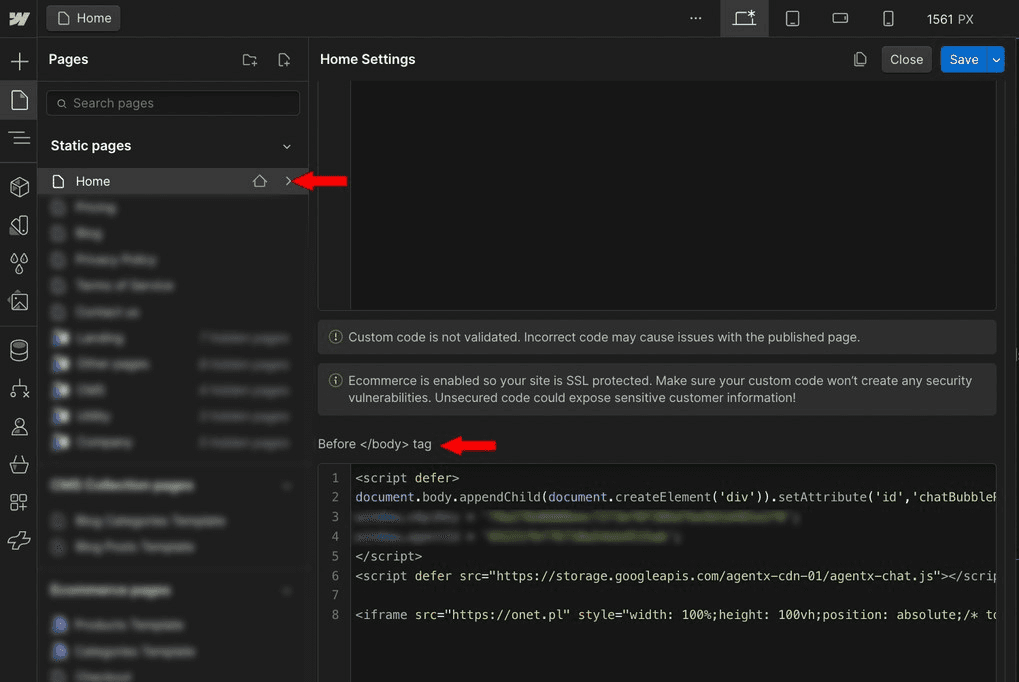
If you use Webflow
Choose a page where you want the Agent to appear, and click page settings ⚙️. And then paste the JavaScript code in the “Before </body> tag” area.
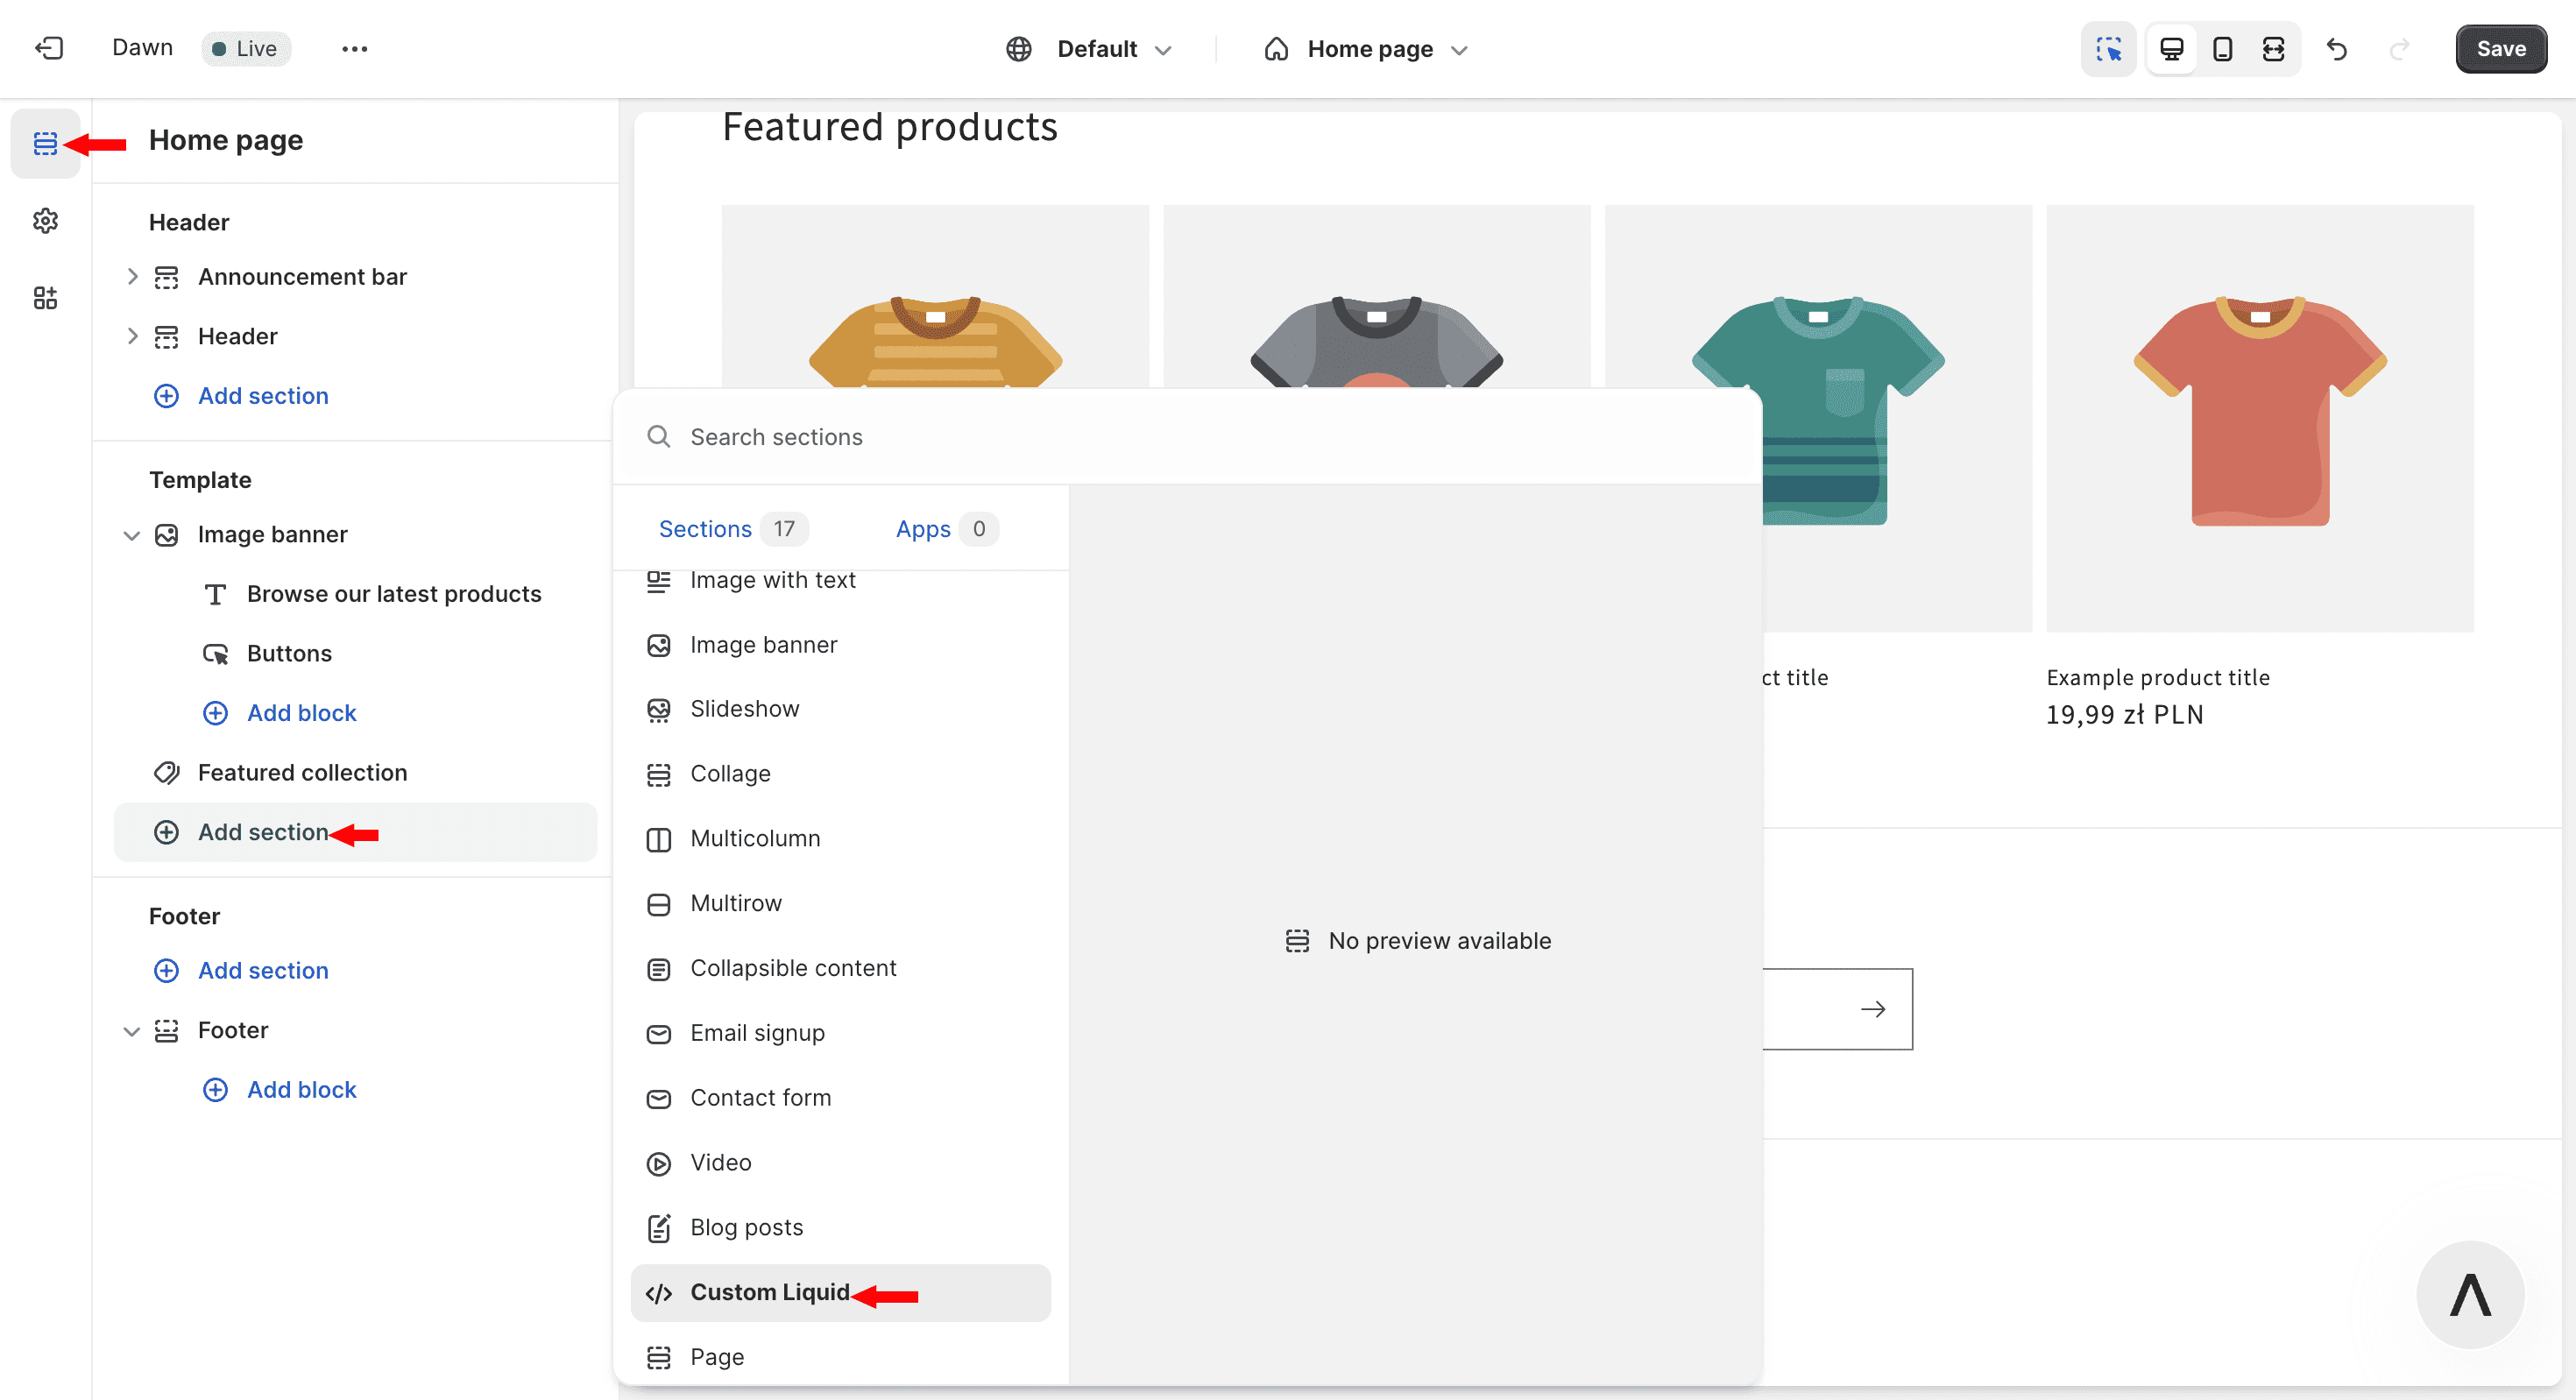
If you use Shopify
Pick a Section menu, and Add section, then choose </> Custom Liquid:
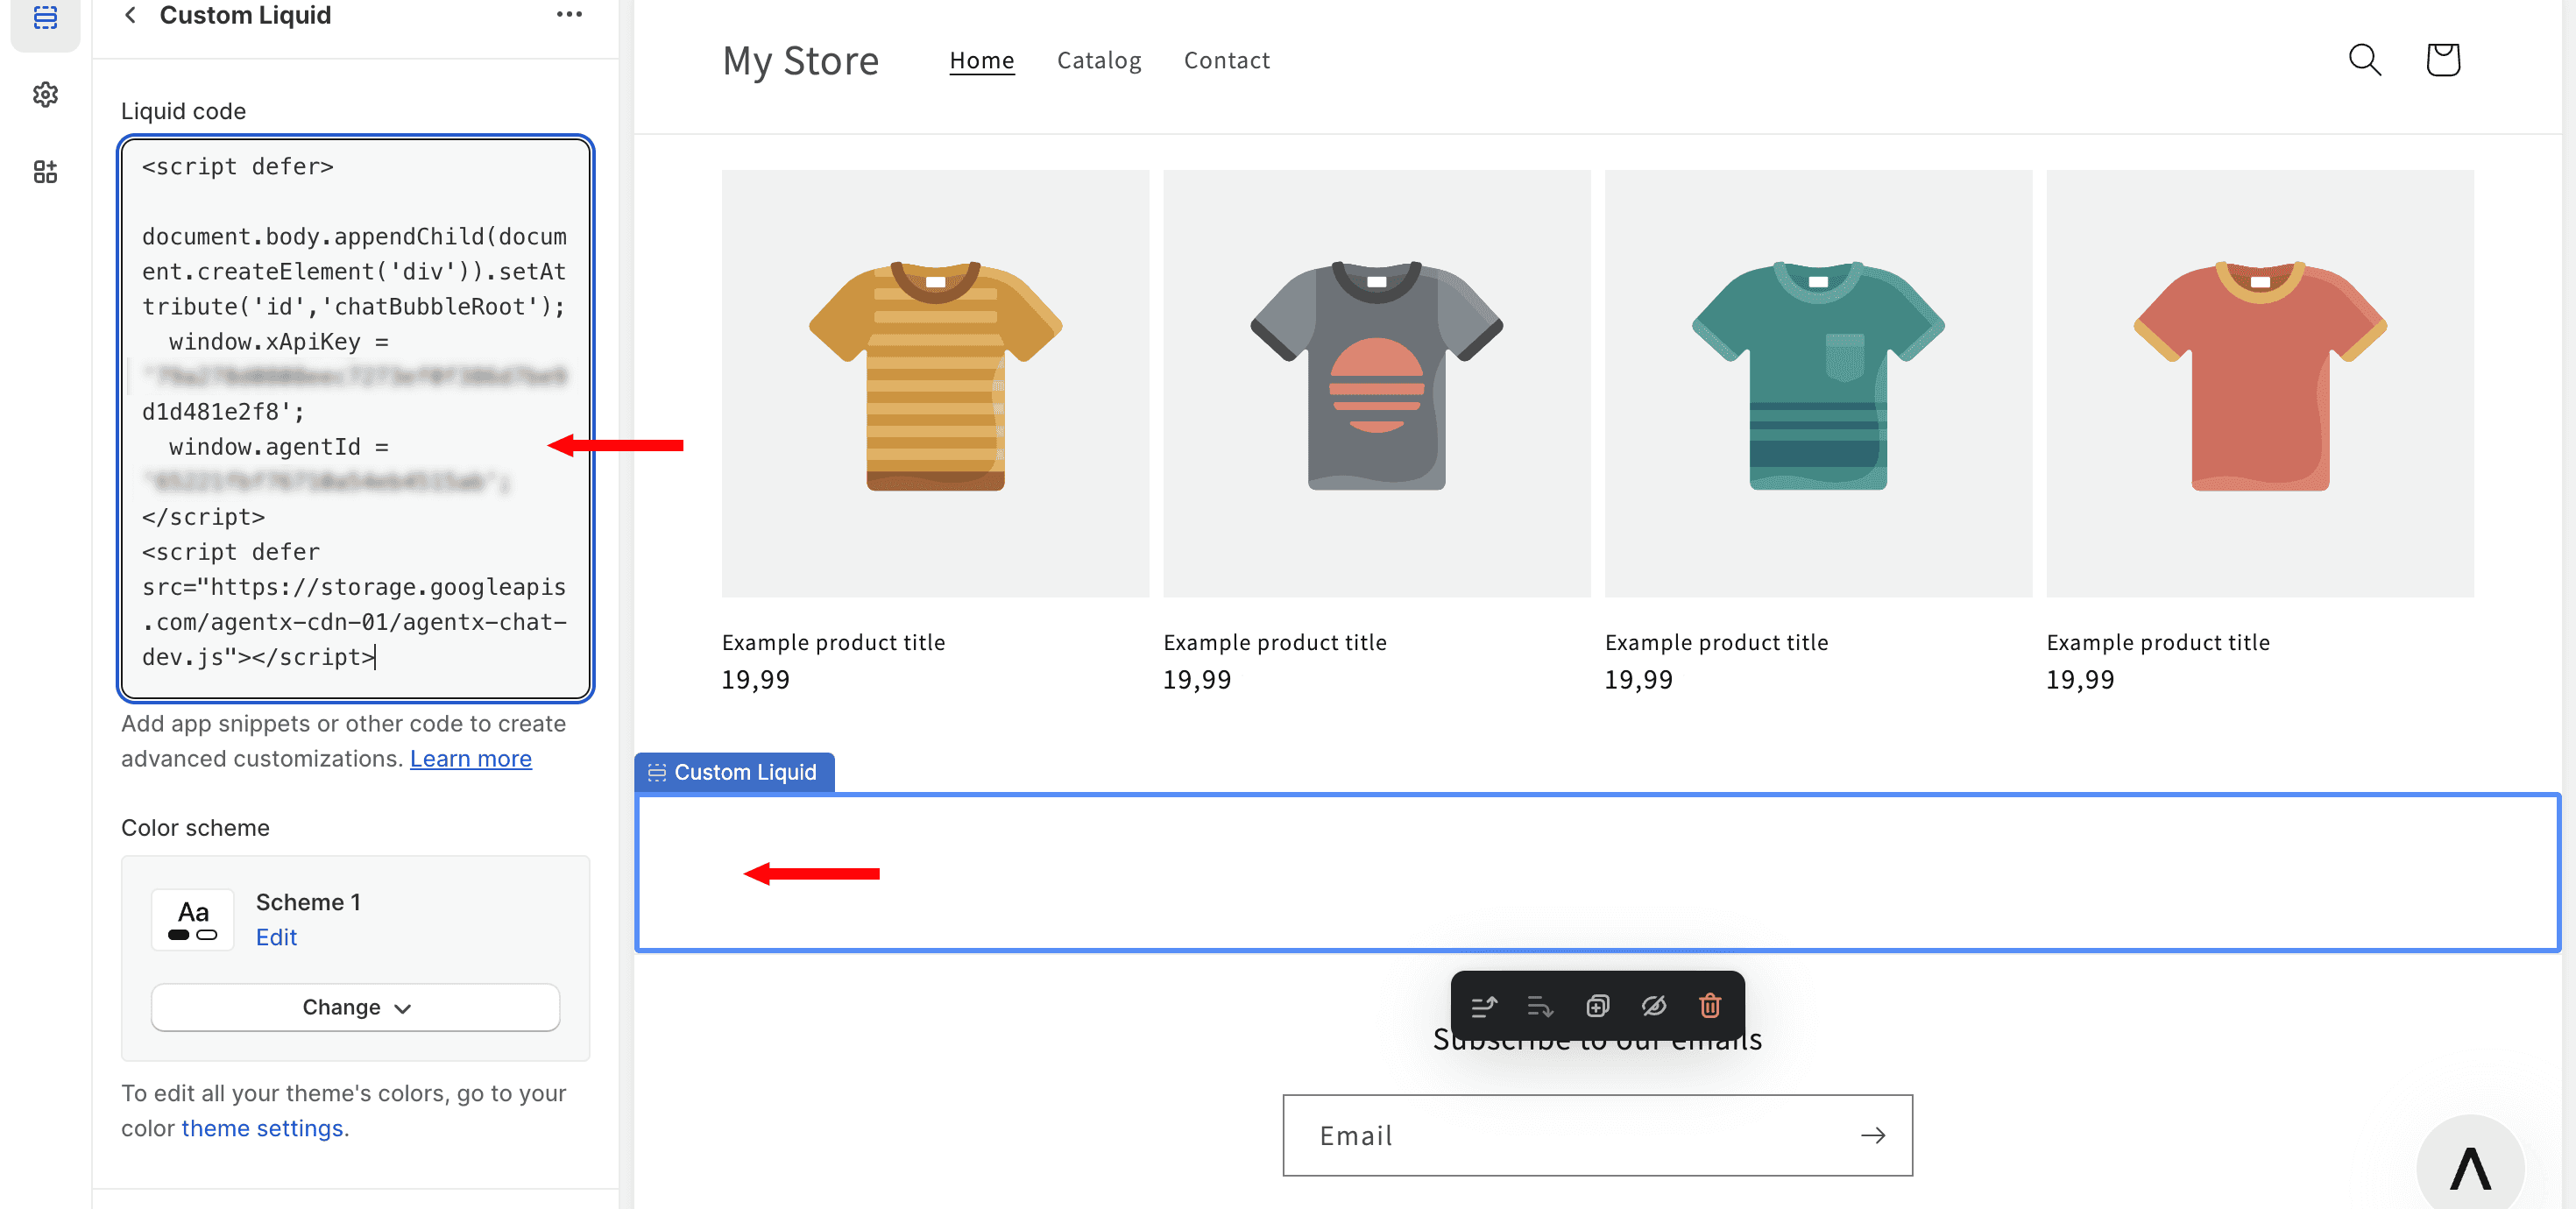
Place the JavaScript code anywhere on your site and provide it as a Liquid code:
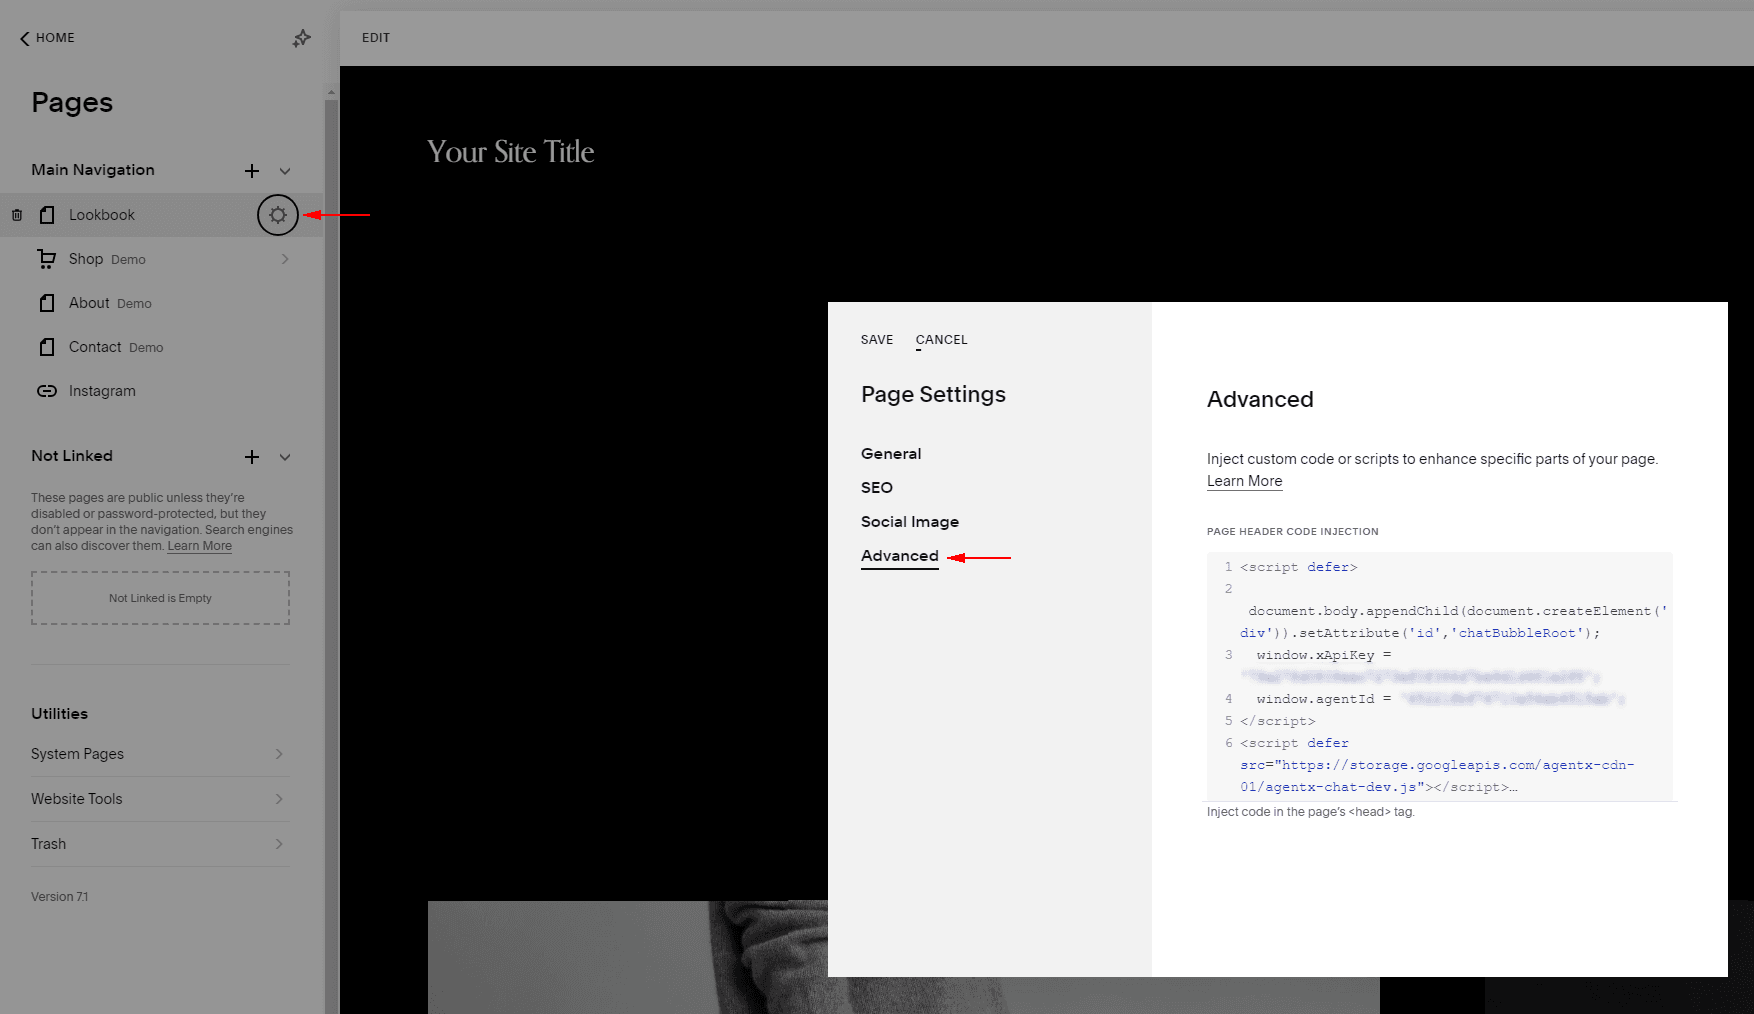
If you use Squarespace
Enter page settings ⚙️, choose “Advanced” and then paste the JavaScript code.
If you use Weebly
Enter page “ Edit” and drop the Individual element “</> Embed code” anywhere on your website. Paste the JavaScript code there.
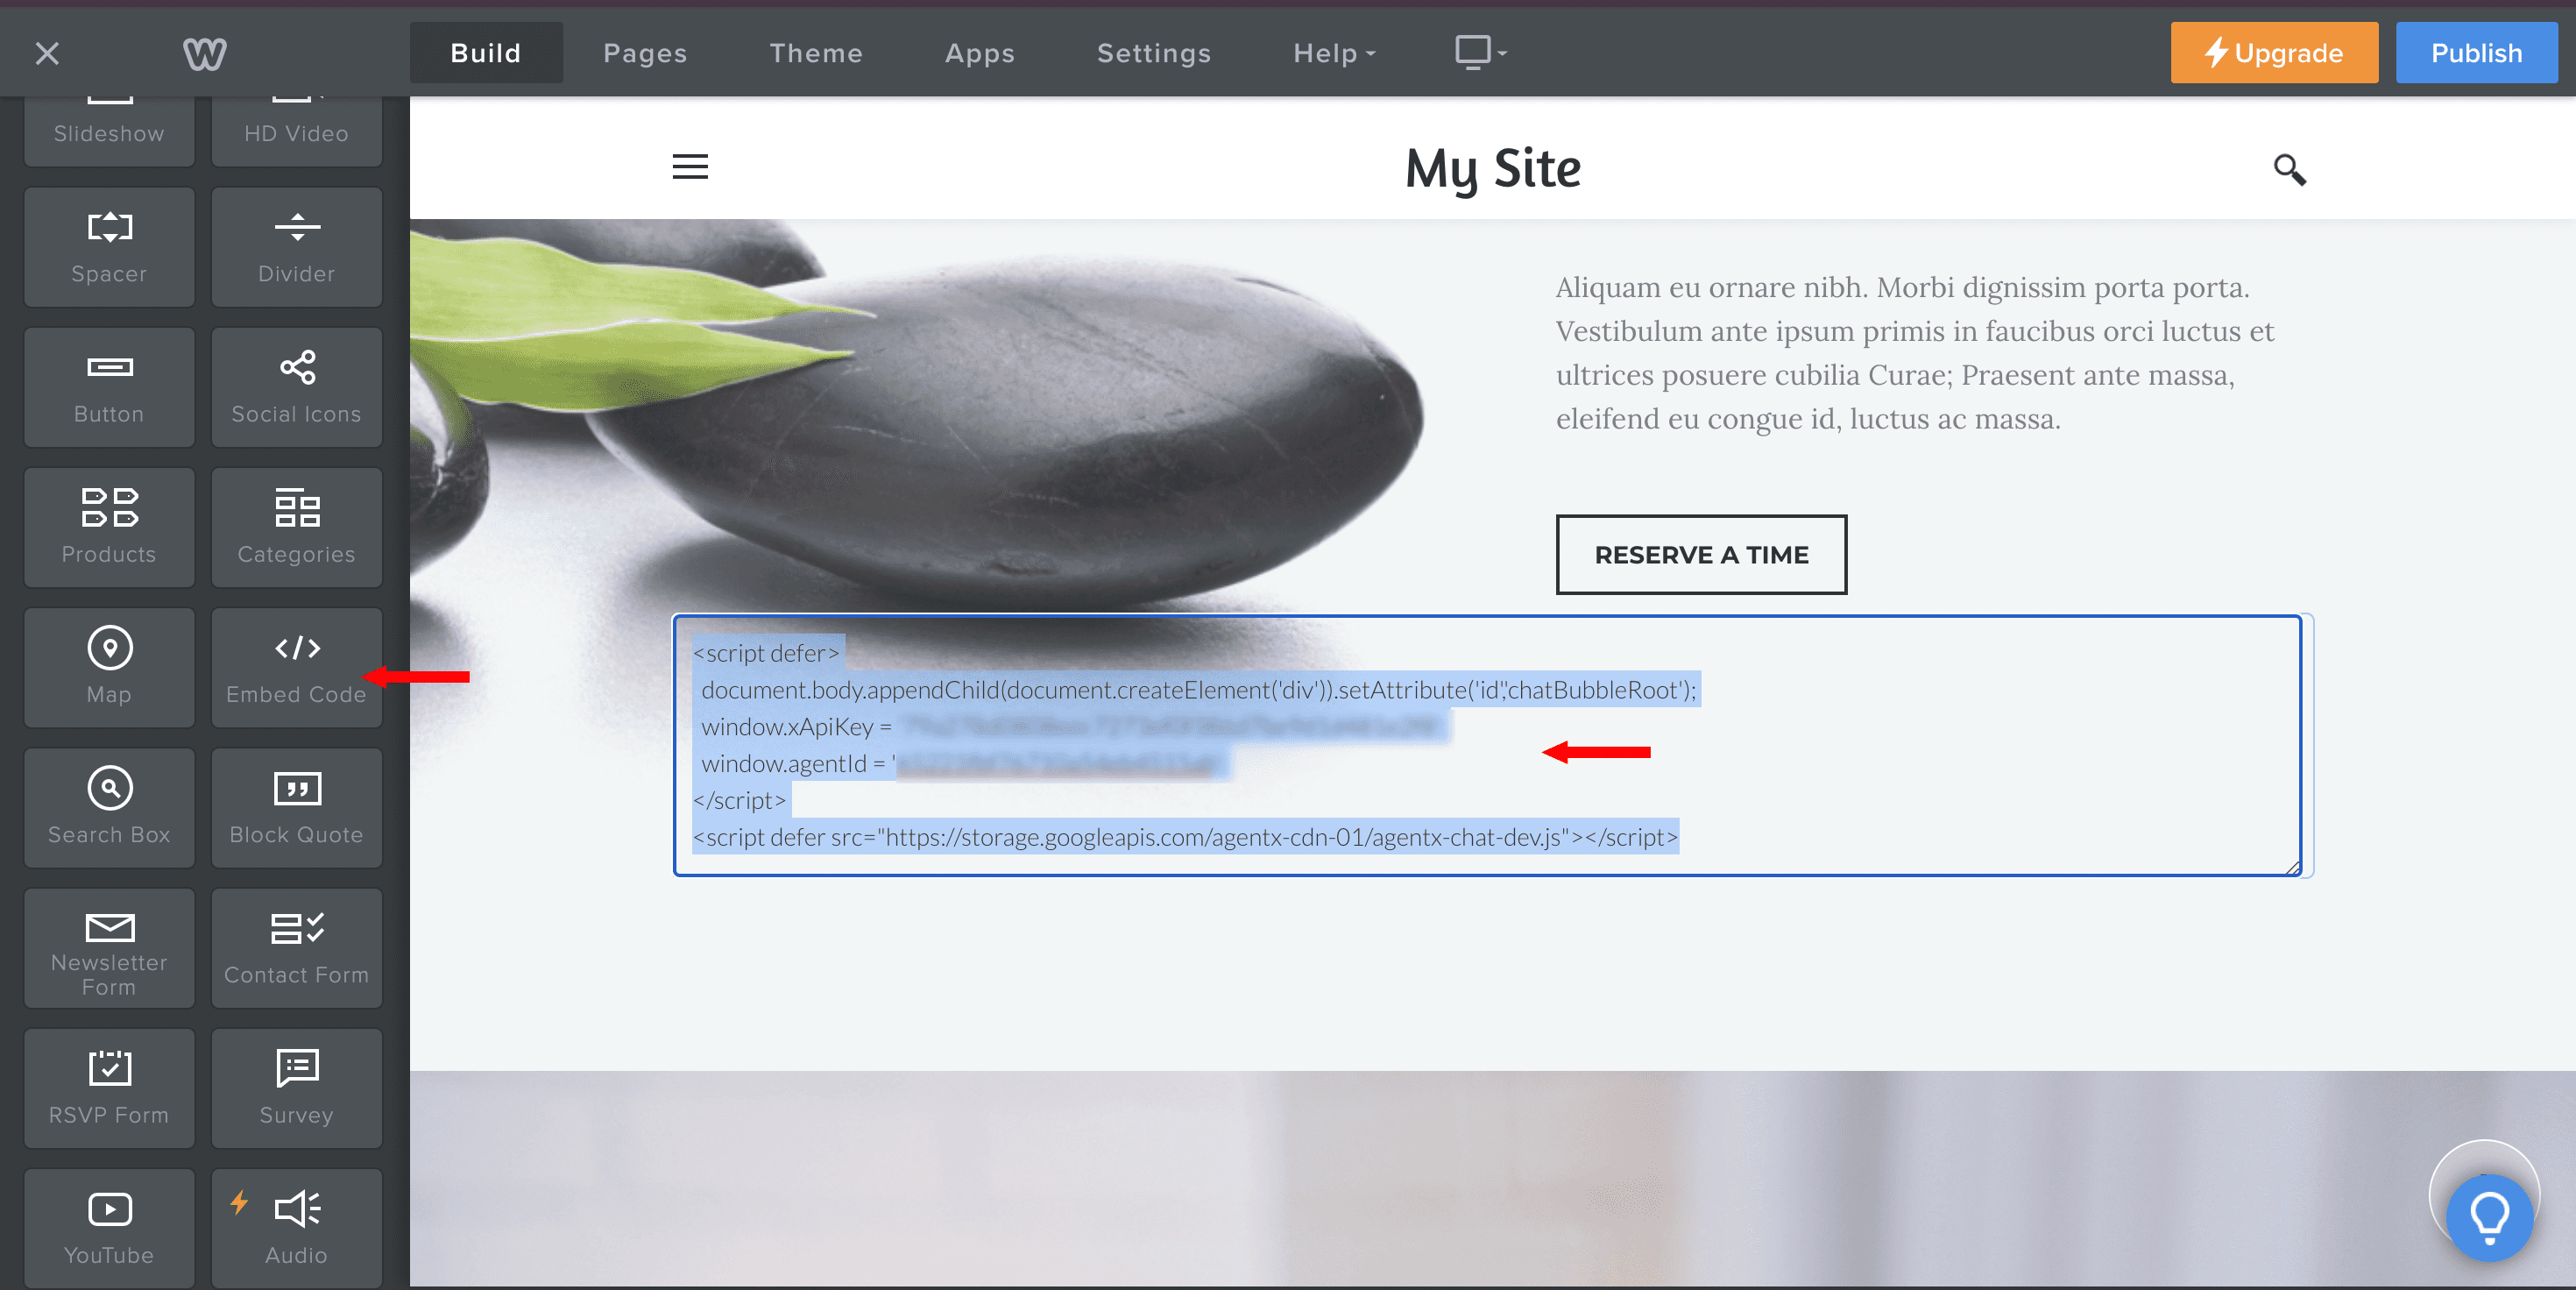
We understand that you may use a different tool for running your website. If you would to see additional examples or need help with deploying your AI Agent, please contact us.
Step 5: 🎊 Chat and share!
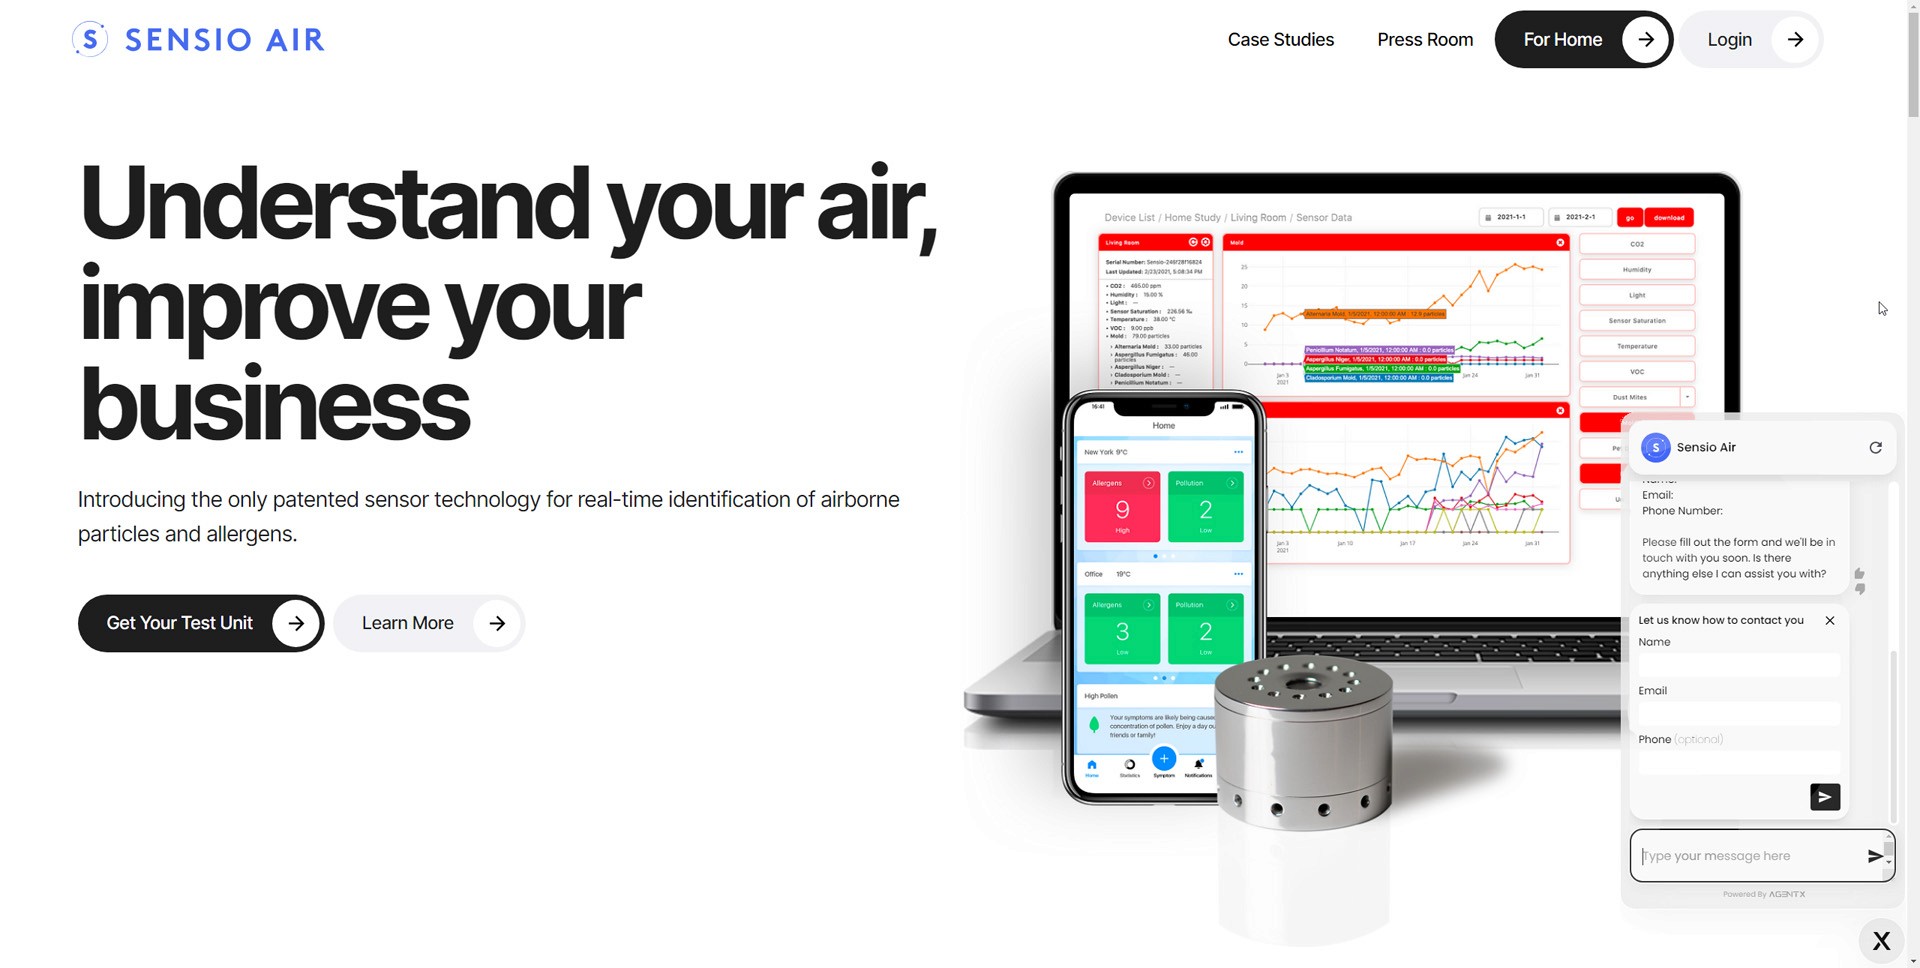
You did it! You just hired a 24/7 multi-lingual AI Agent trained specifically for your business.
Share Blog
Related blogs