

AGENTX NEWS
How to publish an AI chat agent created on AgentX 1.0?

Introduction
Previously, you successfully created your AI Agent on AgentX. Congrats! Deploying your AI Agent can’t be more easier. AgentX offers three modes for publishing your agent: Agent Space, Website, and Chat Apps (coming soon). They are all very easy to do. Let’s go through each of them.
Mode 1: 📢 Publish to Agent Space
Agent Space hosts user-created AI agents just like Youtube hosting user-created videos. This is a community where you can showcase your chat agents, inspire the community, and gain subscribers. Monetization opportunities will also be available. In Agent Space, you may use basic AI models such as ChatGPT 4 and Stable Diffusion for no cost and no hassle. You may also explore other interesting agents and get inspired.
Step 1: 🐳 Under the “Deploy” tab, click “Publish”
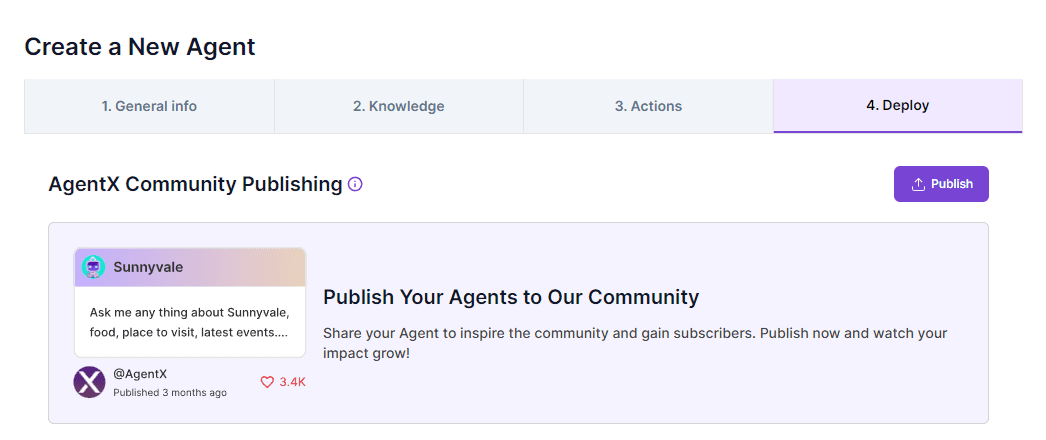
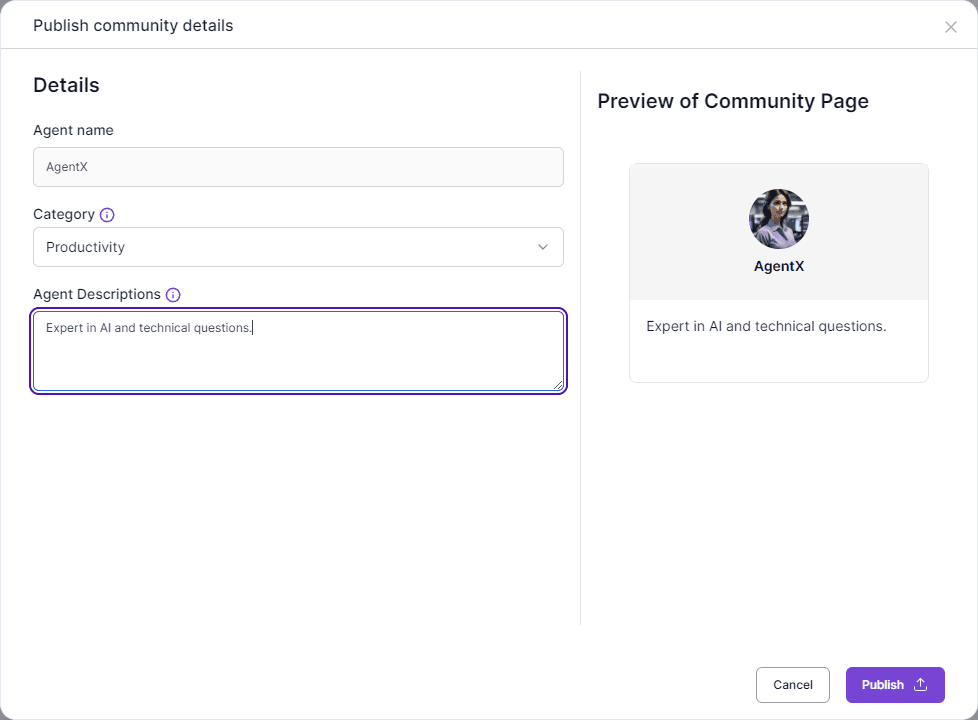
Step 2: 🐳 Fill in some basic info and hit “Publish”
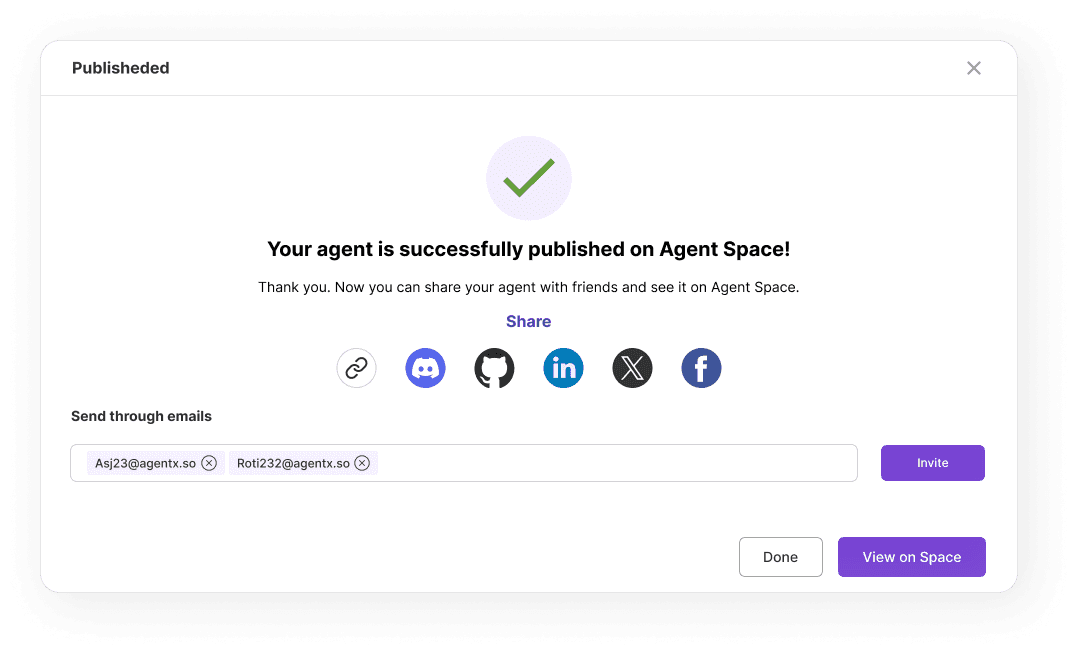
Step 3: 🐳 Share your Agent with friends
You may share via Email, URL link, or social media.
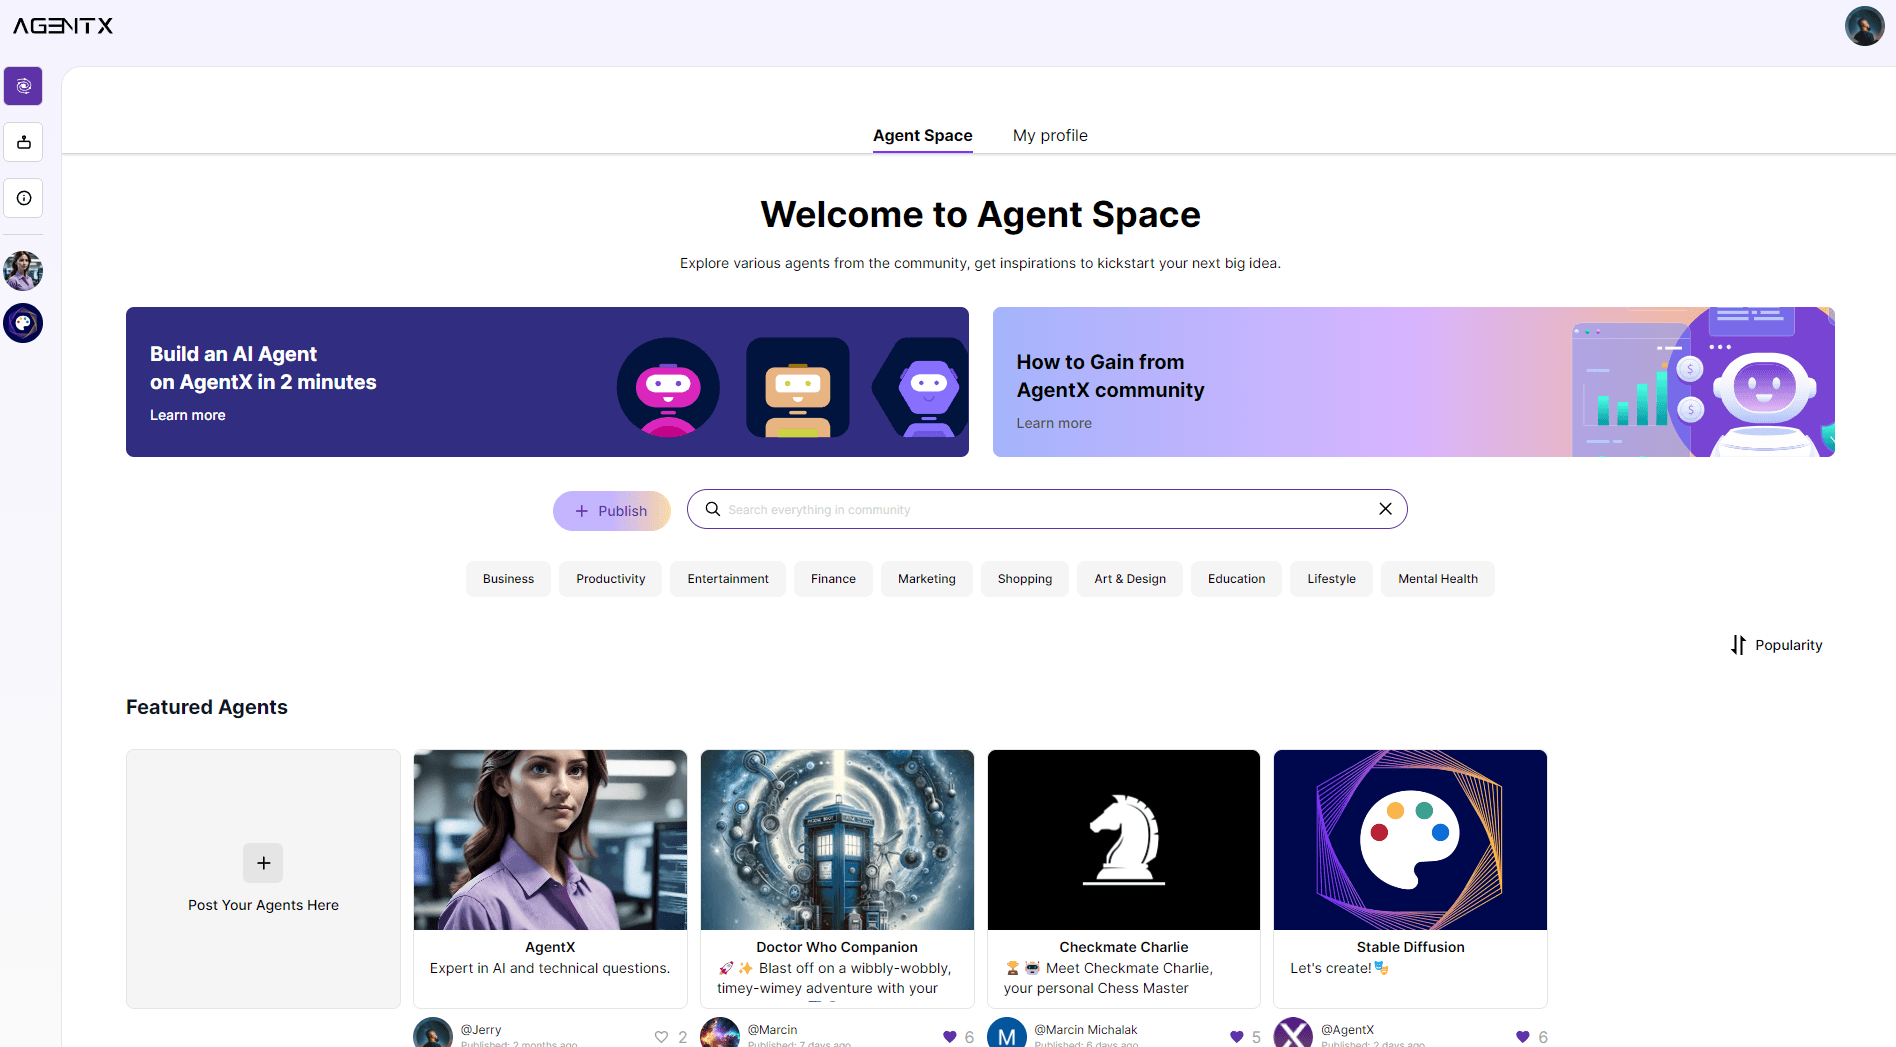
Step 4: 🐳 View your agent from Agent Space😍
Mode 2: 📢 Publish to Website
Step 1: 🦄 Under the “Deploy” tab, toggle “Enabled”
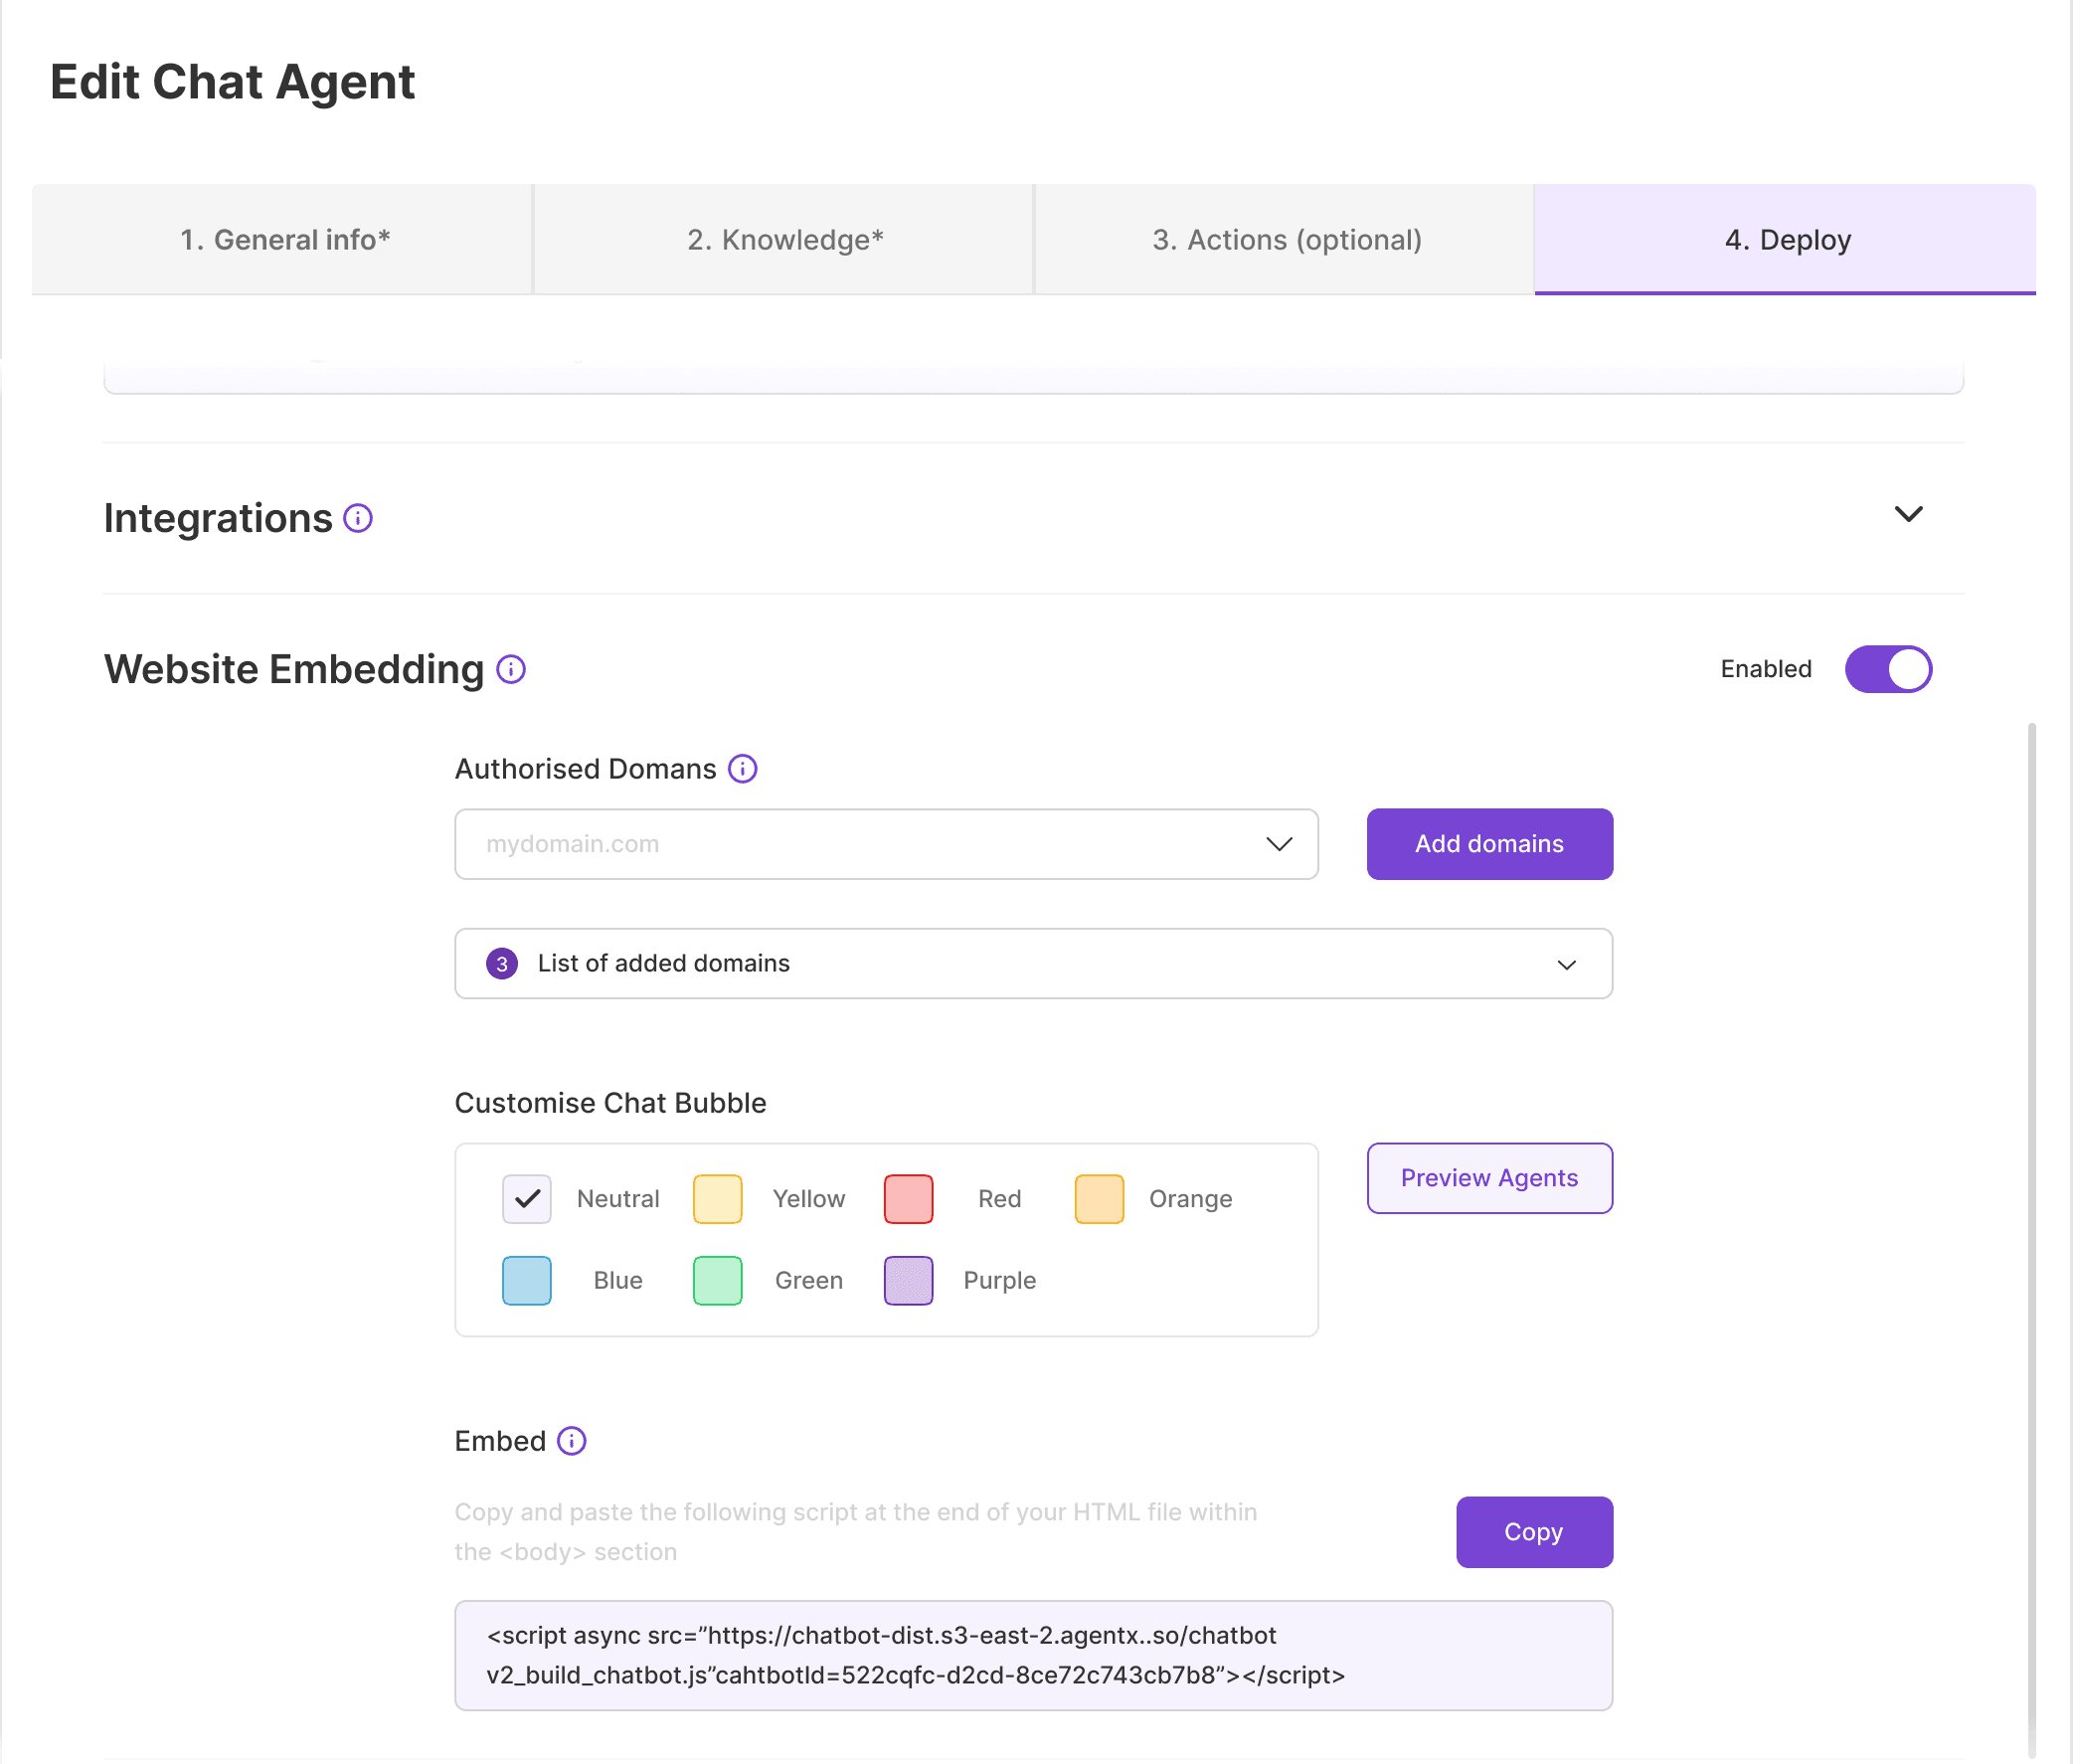
Step 2: 🦄 Add your domain, pick your color
🔸 Make sure that you have authorization to publish your agent to the target internet domain.
🔸 Enter your domain name into the “Authorized Domains” text box and click the “Add domains” button. Once added, the list of domain count will increase.
🔸 Customize your agent with your favorite color.
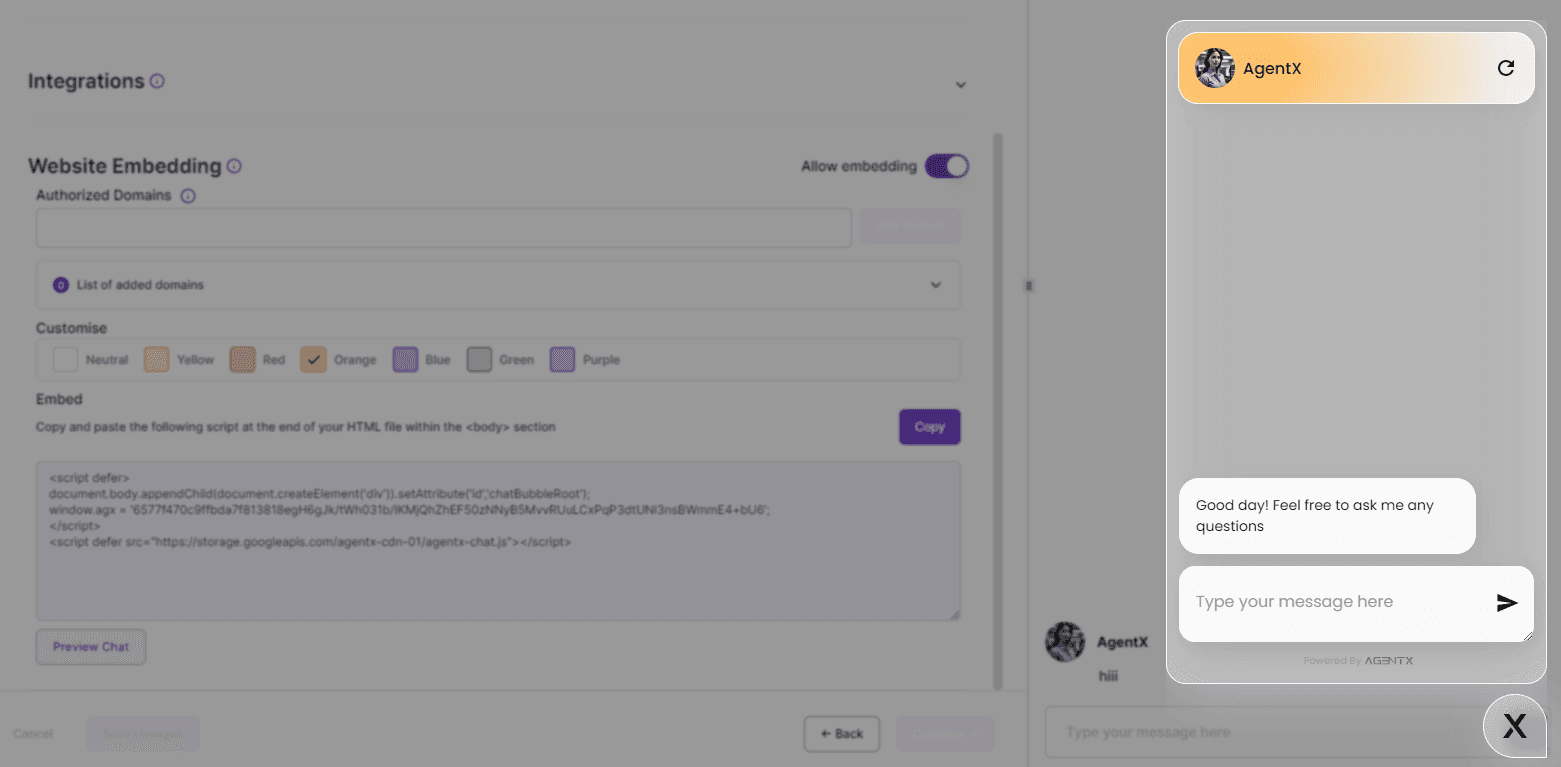
Step 3: 🦄 Preview chat
Click “Preview Agents” to see how it will look like on your website
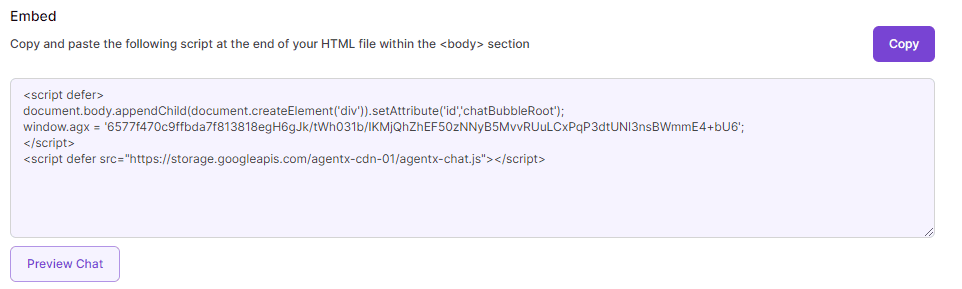
Step 4: 🦄 Copy and Paste JavaScript Code
If you are satisfied with the preview, click “Copy” and then paste the copied JavaScript code to your website’s backend to finish the deployment.
AI Chat Agent Website Deployment Examples
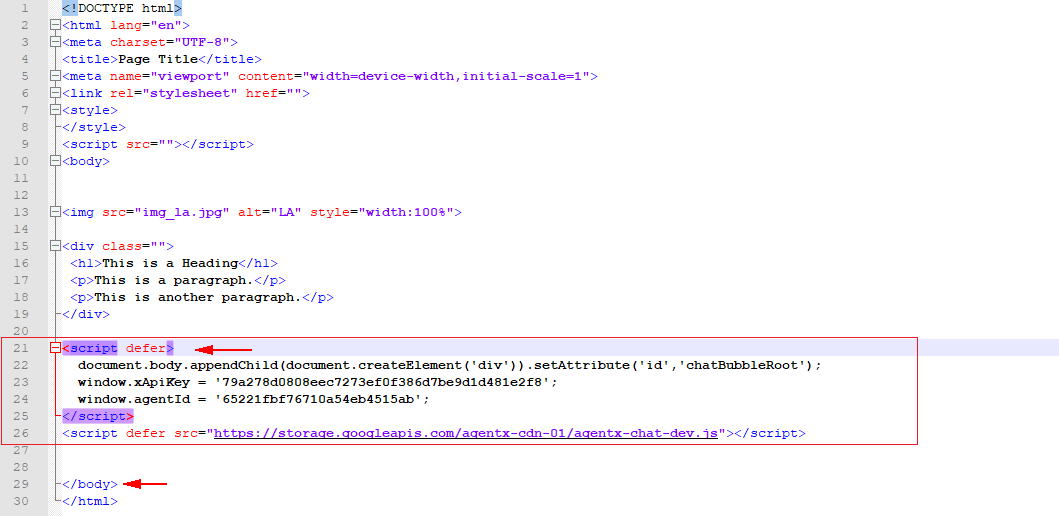
🐻❄️ If you use plain HTML
Simply paste the copied JavaScript code inside the <body> section of your HTML - preferably at the very end but before the </body> tag. That’s it!
🐻❄️ If you use WordPress
Install any plugin that allows you to inject code Snippets (e.g., WPCode Lite) and paste the JavaScript code to <Body> as shown:
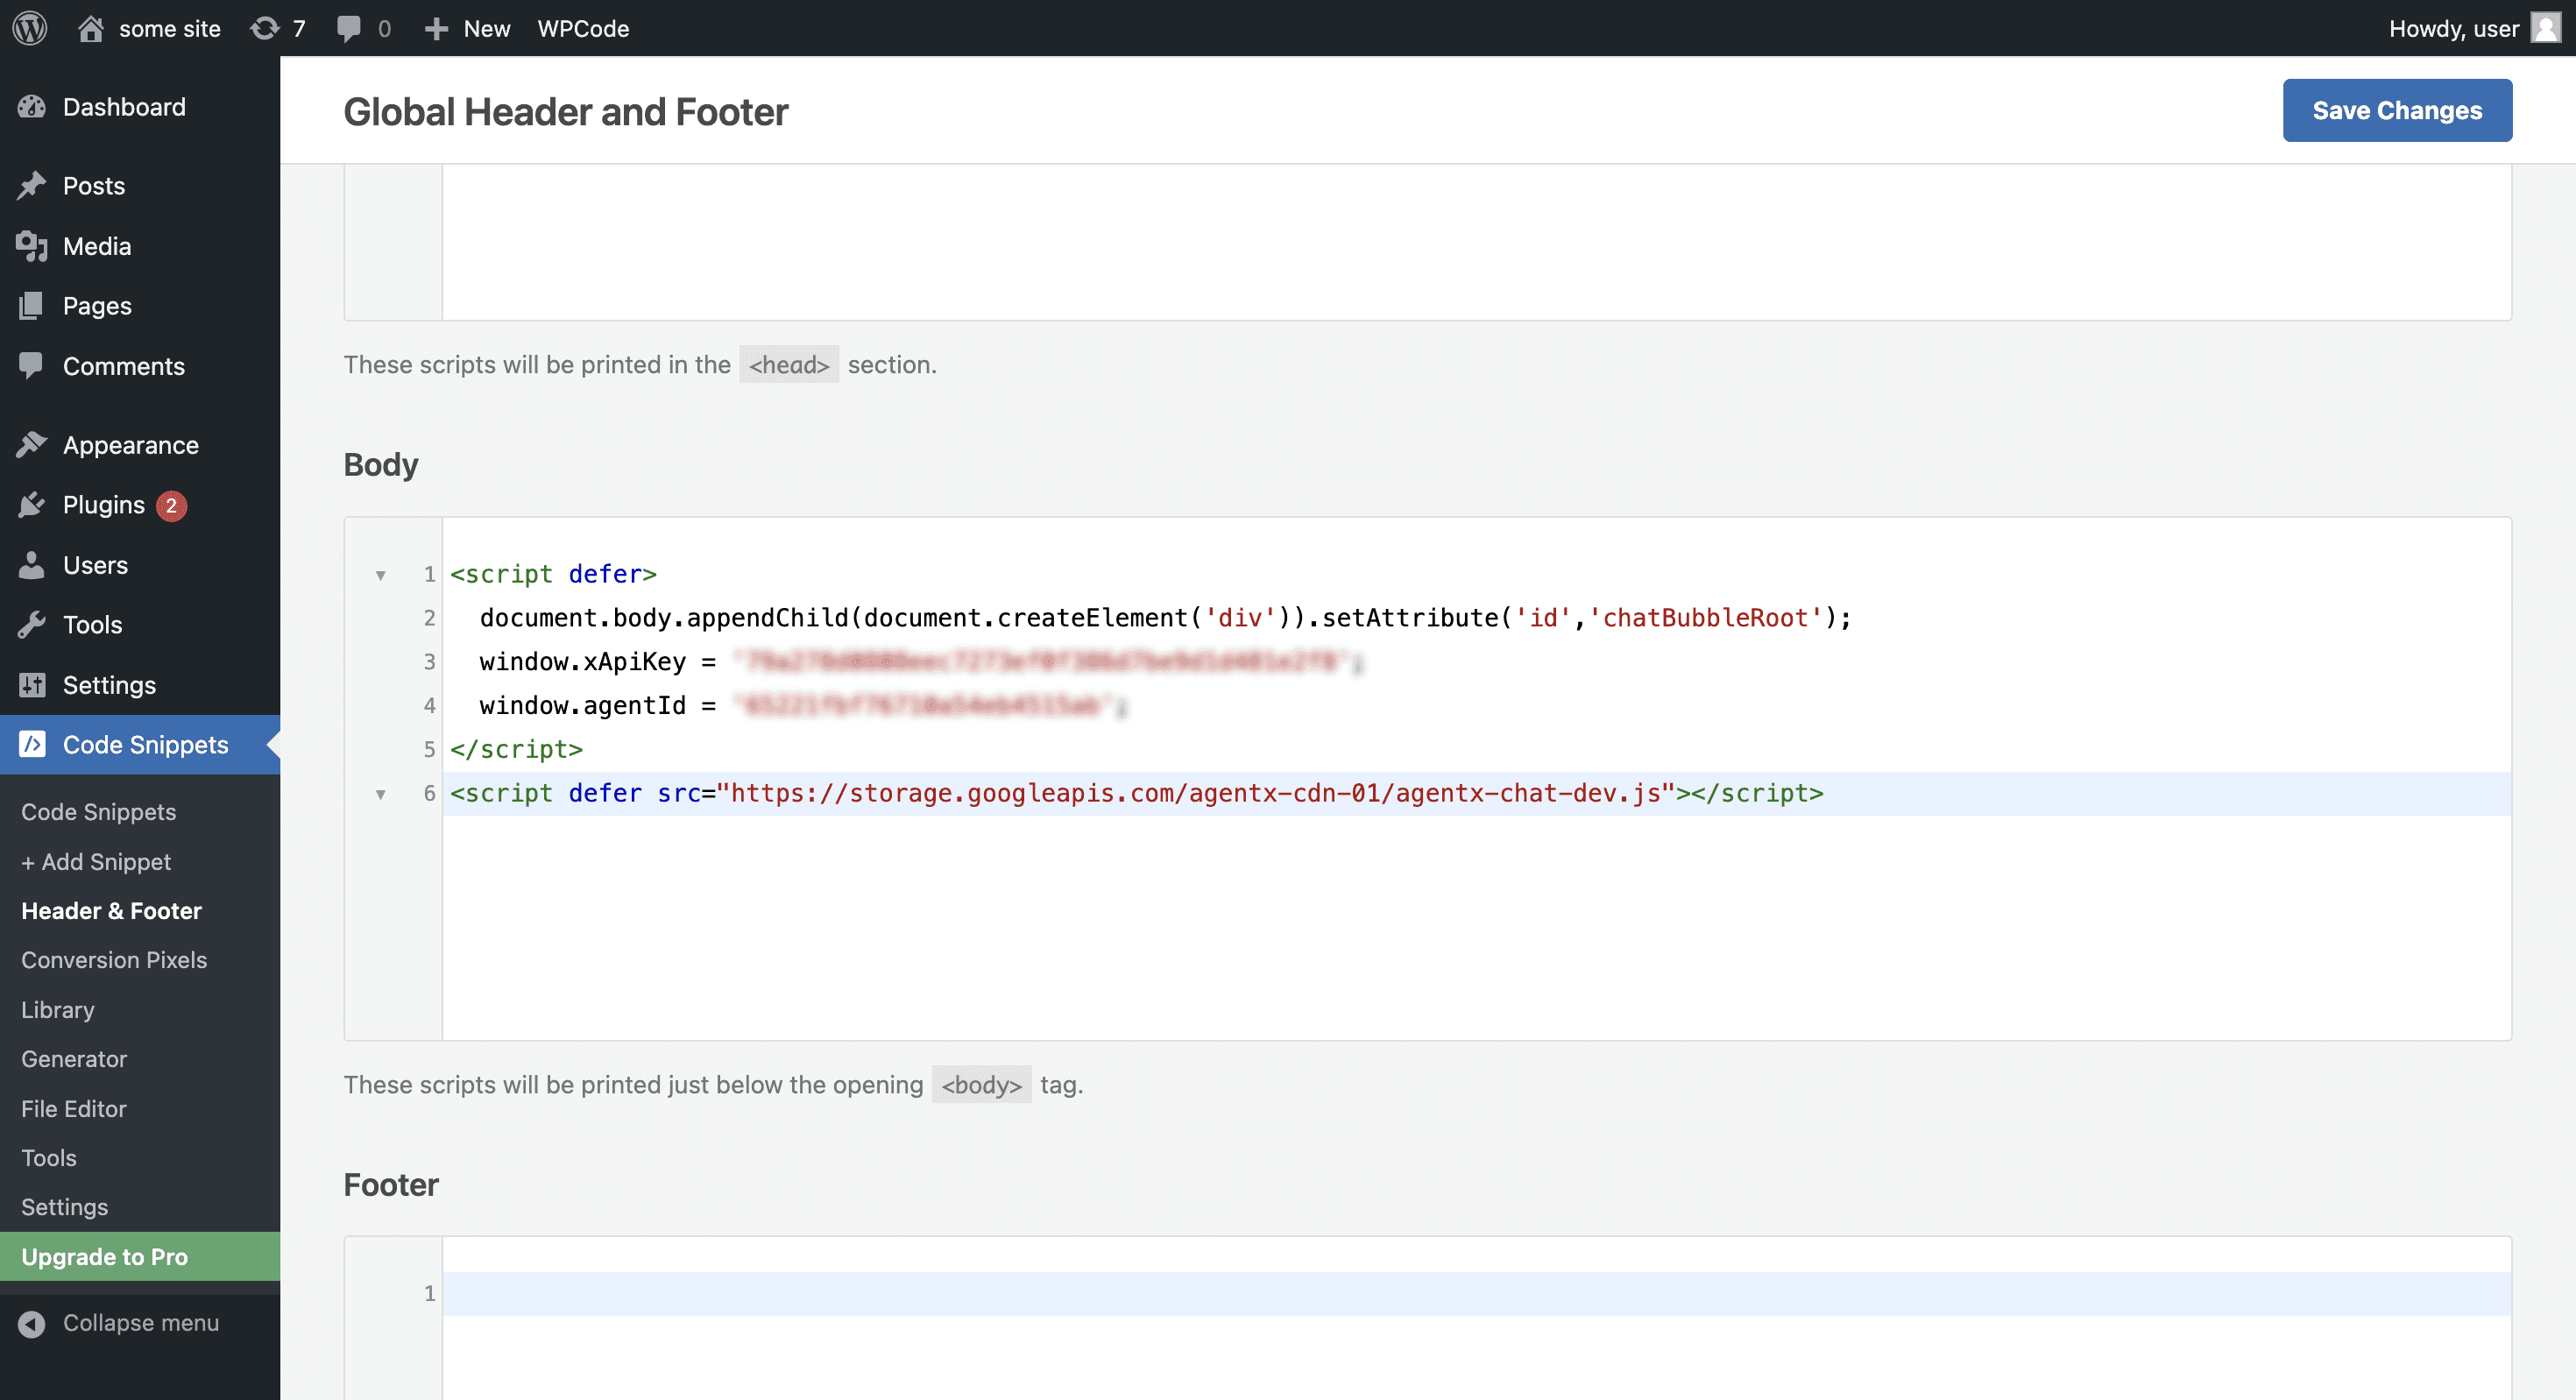
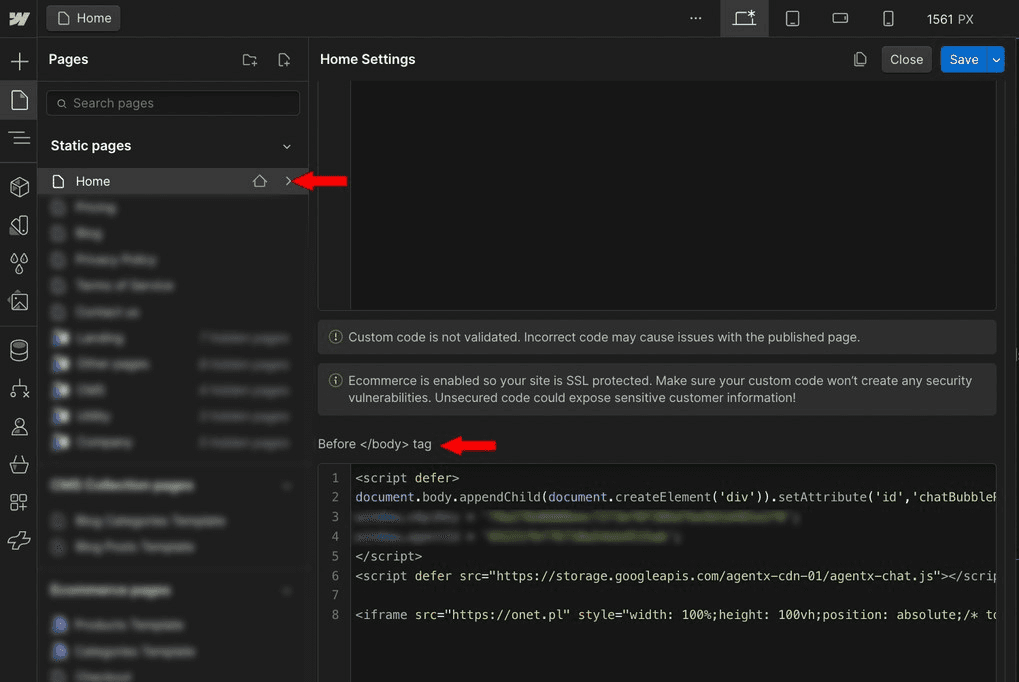
🐻❄️ If you use Webflow
Choose a page where you want the Agent to appear, and click page settings ⚙️. And then paste the JavaScript code in the “Before </body> tag” area.
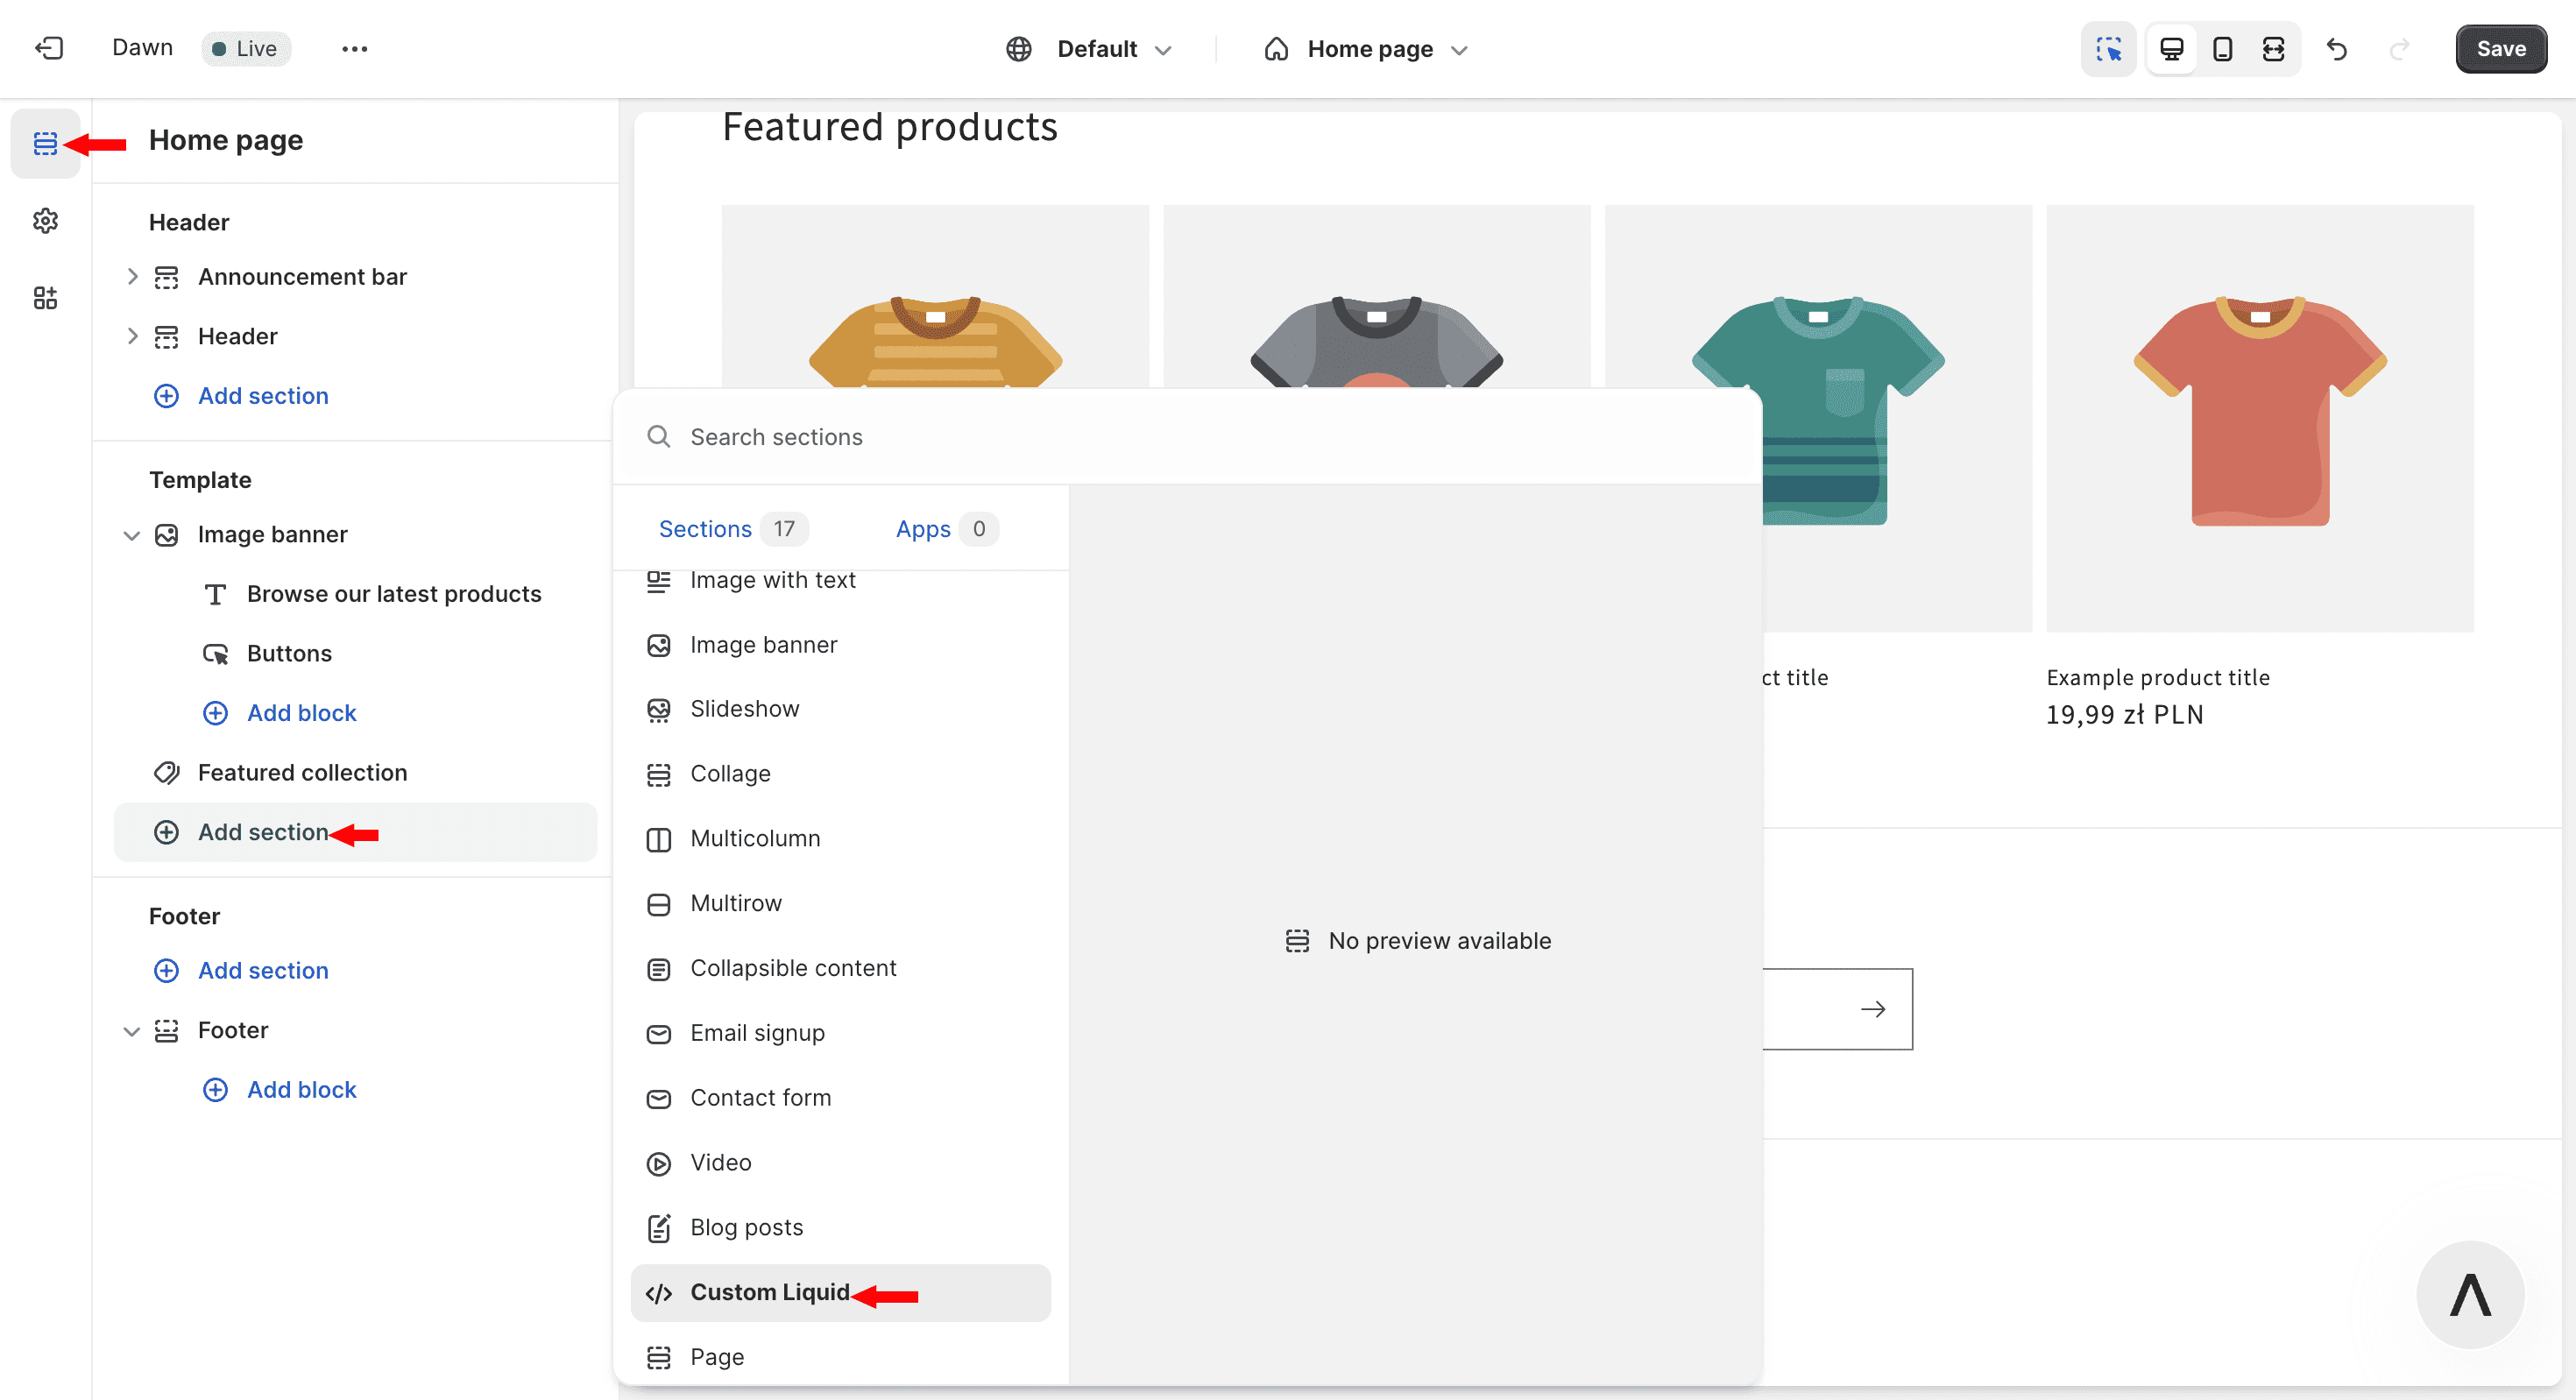
🐻❄️ If you use Shopify
Pick a Section menu, and Add section, then choose </> Custom Liquid:
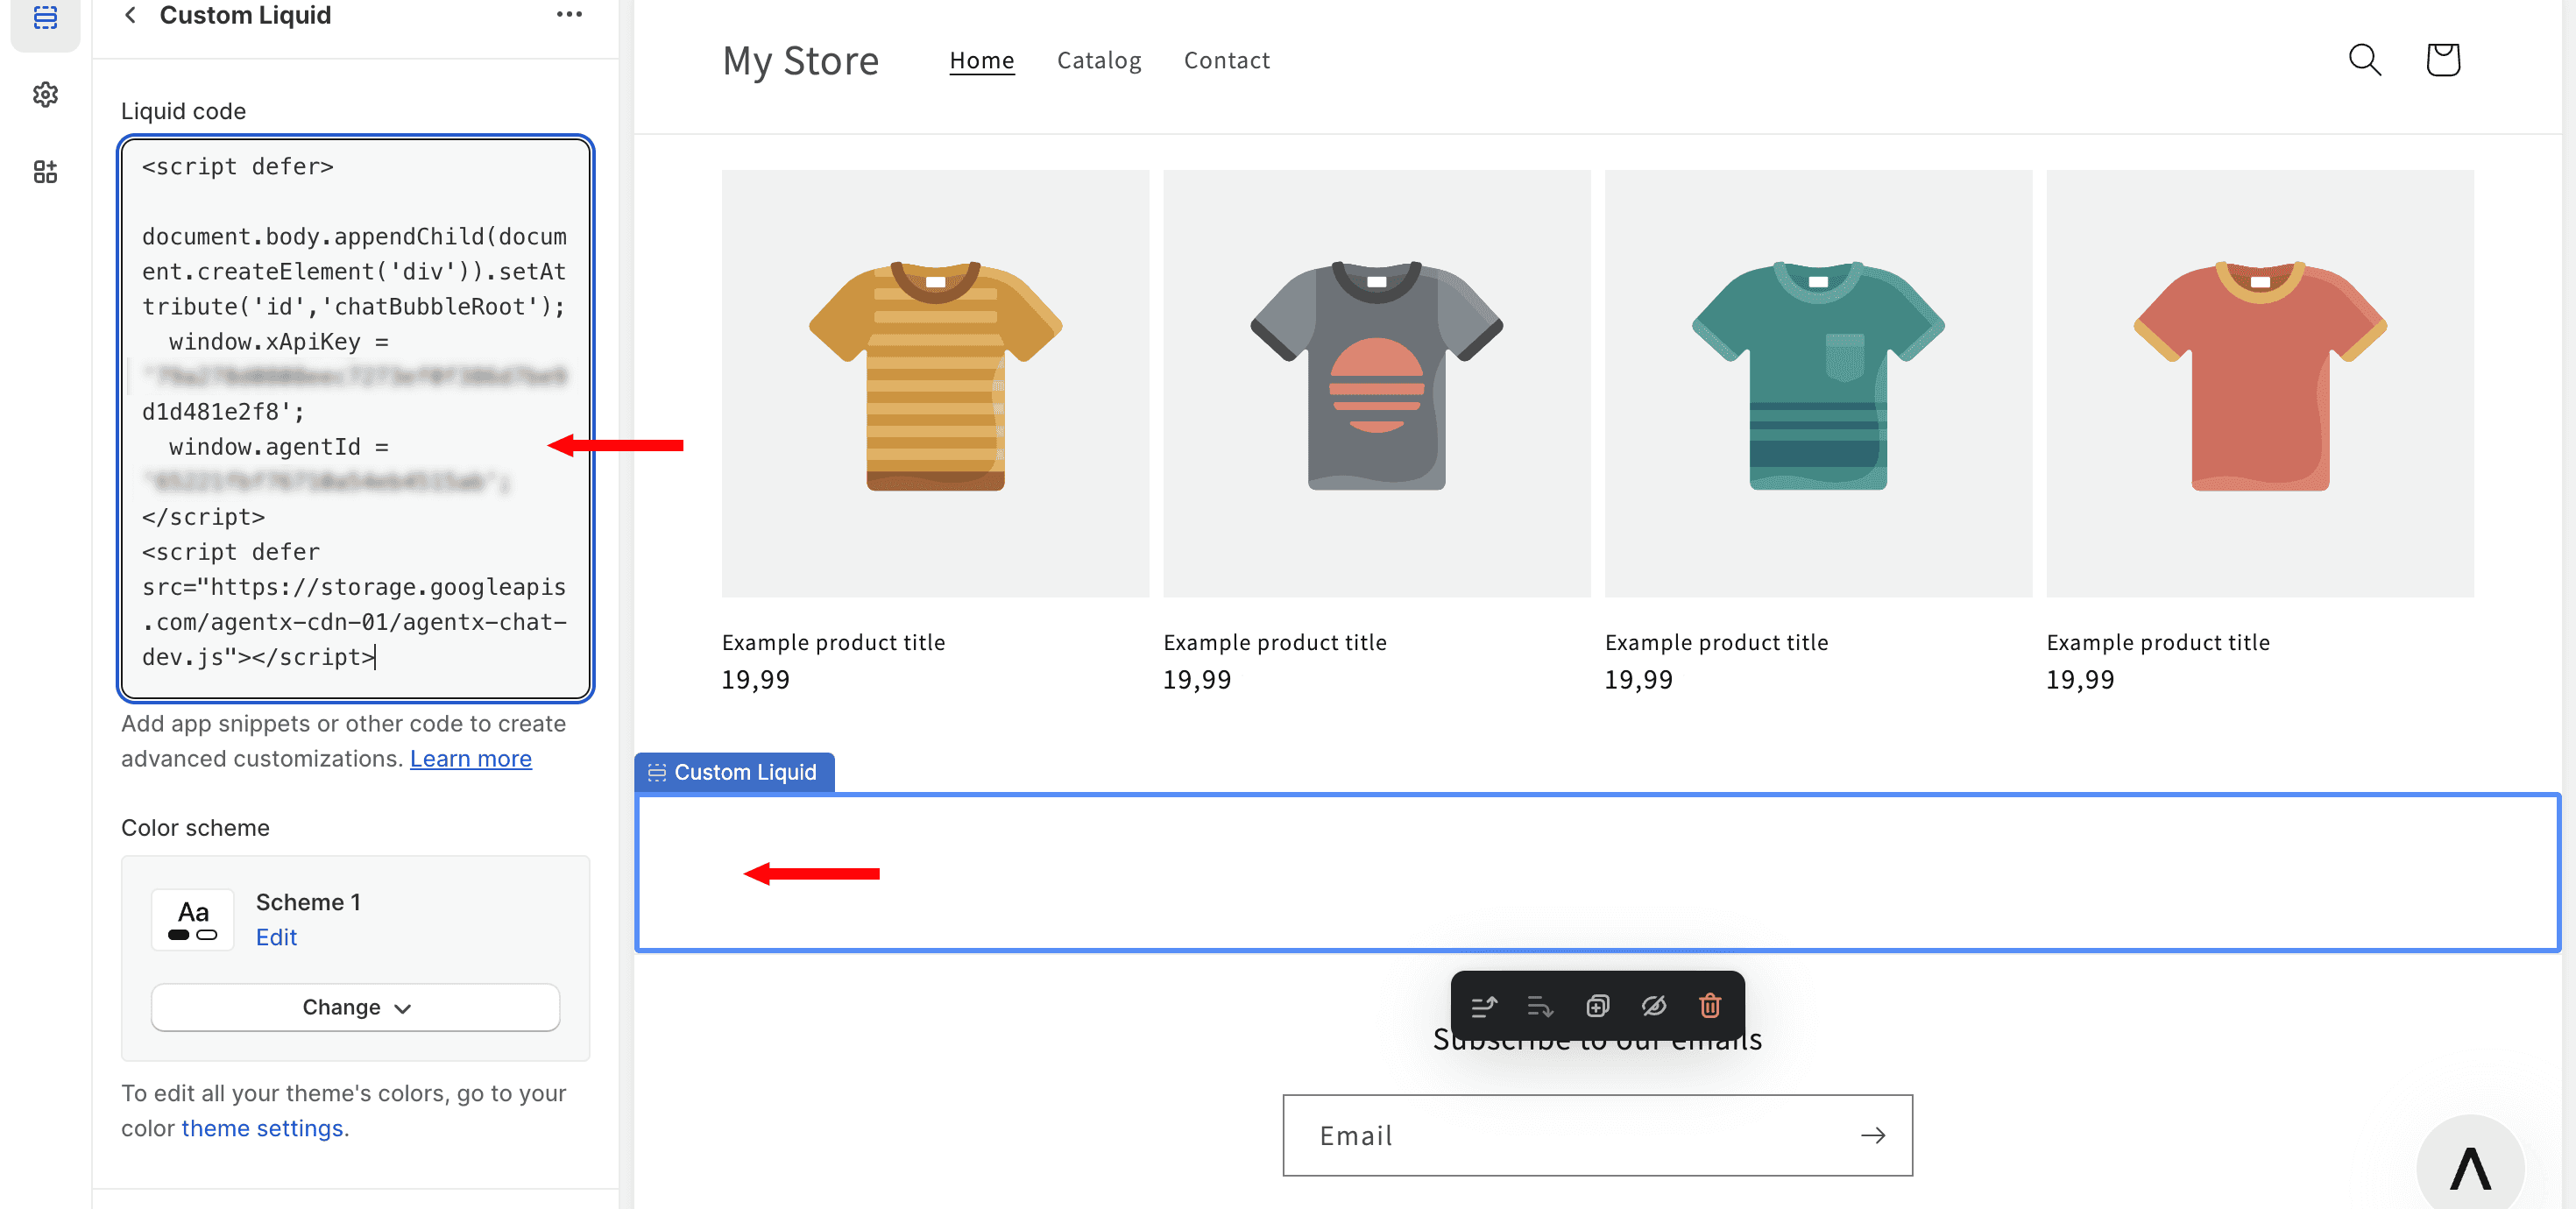
Place the JavaScript code anywhere on your site and provide it as a Liquid code:
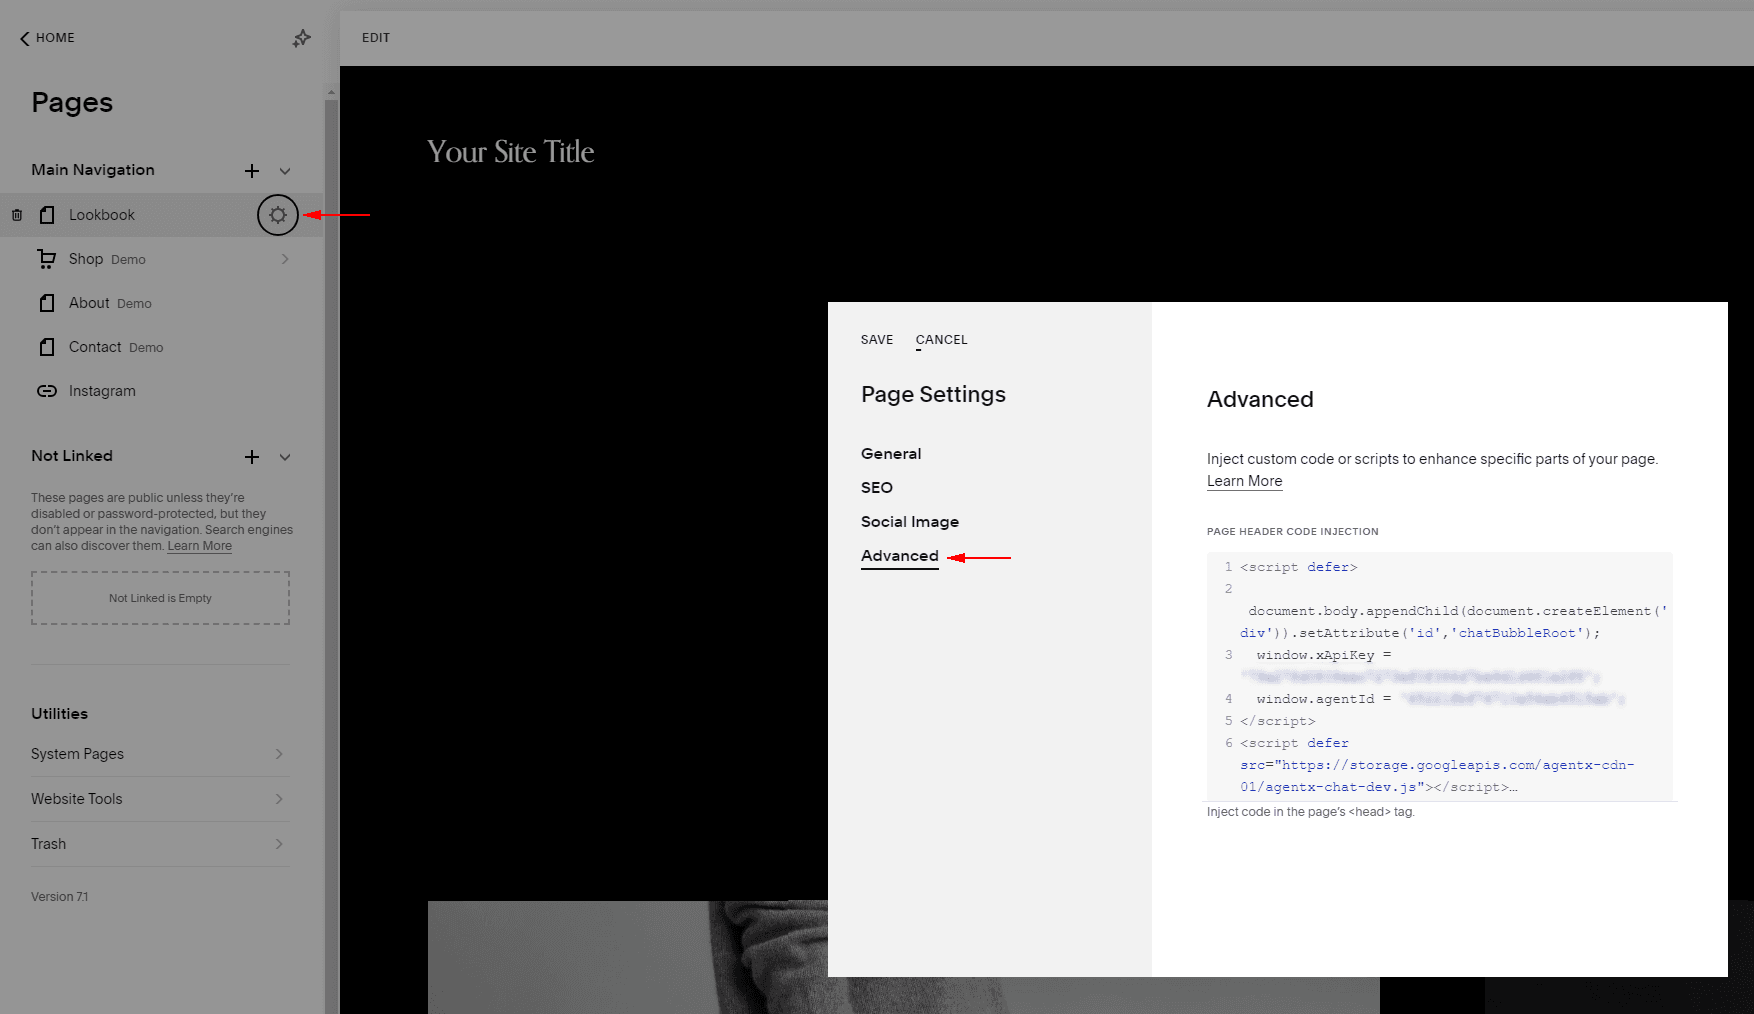
🐻❄️ If you use Squarespace
Enter page settings ⚙️, choose “Advanced” and then paste the JavaScript code.
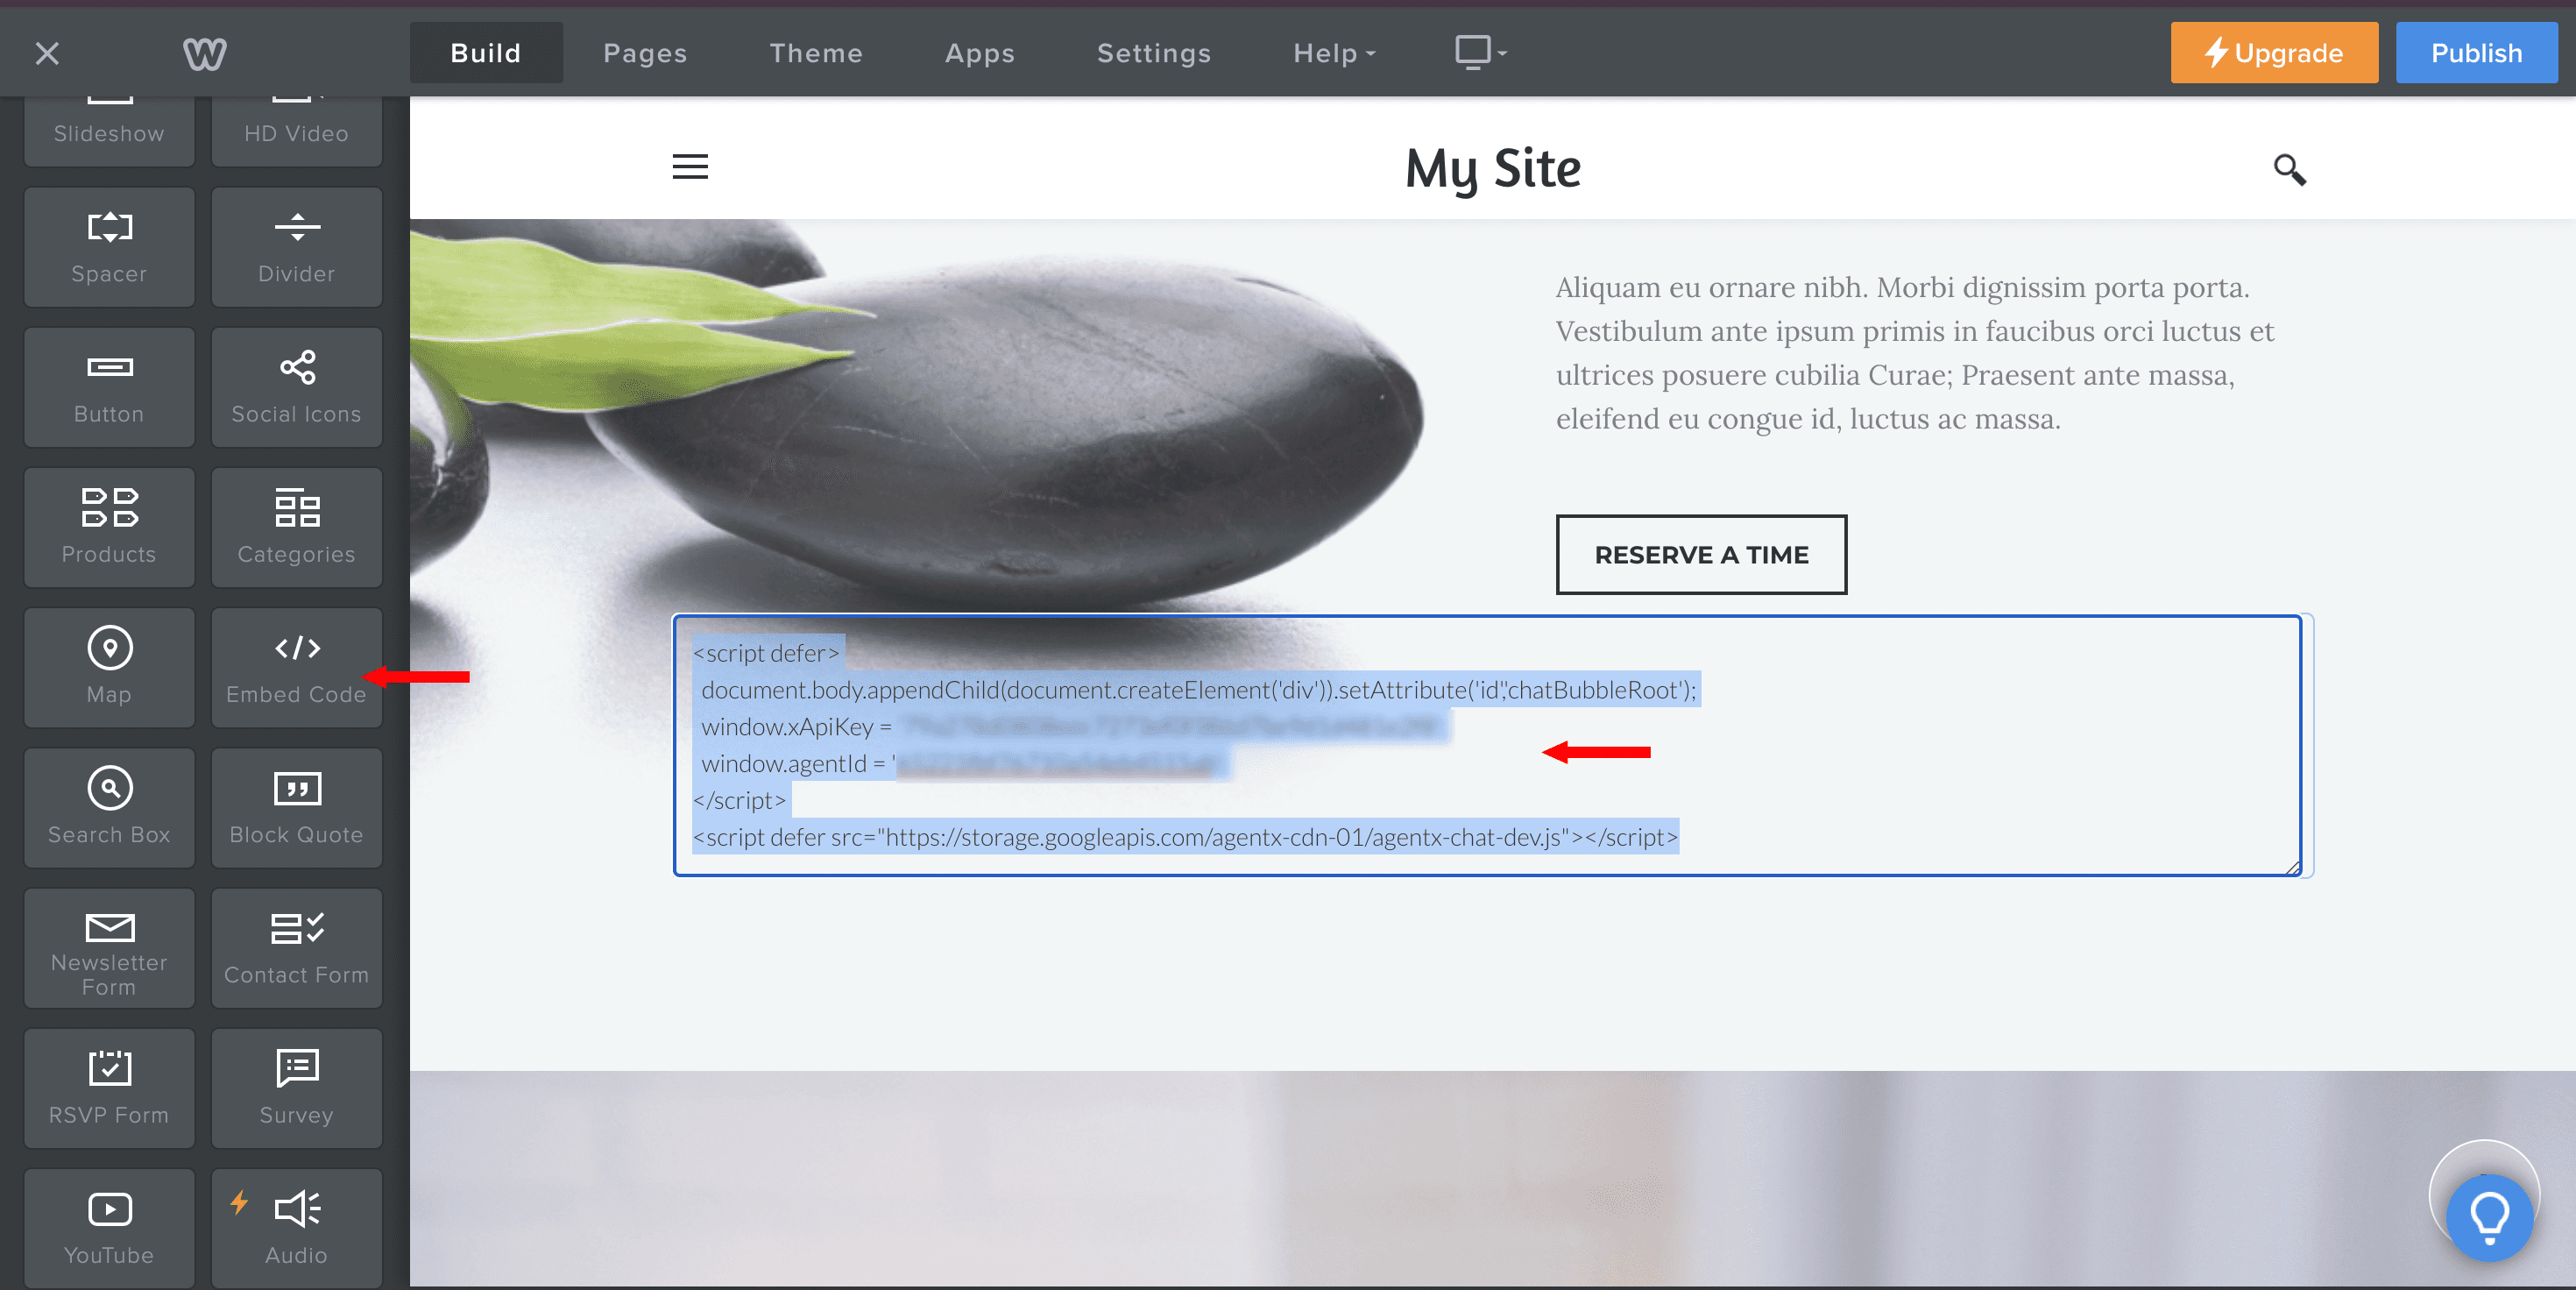
🐻❄️ If you use Weebly
Enter page “ Edit” and drop the Individual element “</> Embed code” anywhere on your website. Paste the JavaScript code there.
We understand that you may use a different tool for running your website. If you would to see additional examples or need help with deploying your AI Agent, please contact us.
Mode 3: 📢 Publish to Chat Apps [Coming soon]
AgentX will integrate with chat apps such as Discord, Instagram, Snapchat, and WhatsApp, allowing you to deploy your AI agent to chat groups. Join our newsletter to stay tuned for any update!
Share Blog
Related blogs